Download
1 / 10
100 likes | 244 Vues
Try to upgrade iPhone to iOS 10 but thus lose some contents? Here's how to restore lost data in 3 ways. Also, remember to make backups before updating.<br>http://www.ifonetips.com/ios/recover-files-after-ios-upgrade.html

E N D
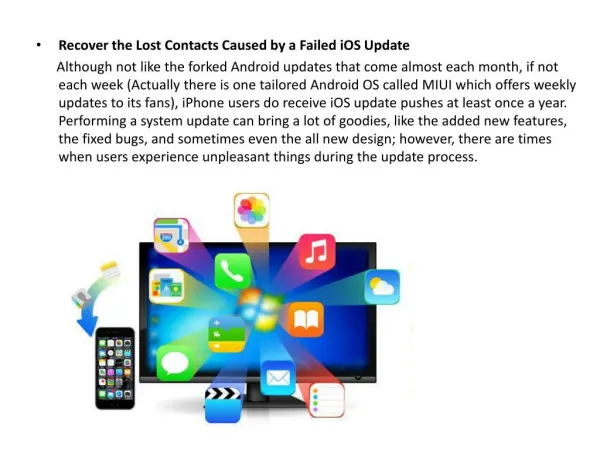
Restore Lost iPhone Files BackAfter iOS 10 Update iOS 10 has recently been available to most iOS users since September 13. Now that there are quite a few new features attracting us to upgrade iPhone/iPad/iPod to iOS 10. Each iteration of iOS is undoubtedly a bomb, and iOS 10 is no exception. Upgrading ensures that you have the latest security features and performance enhancements. I believe that you can't wait to update your device just as I do. For me, I'm personally looking forward to the new features enabling me to wake my iPhone as long as I pick it up. Why do I have to press down the "Home" Key or "Power" Key at first before using my own iPhone? I am feeling that the two button are getting less sensitive. Thanks! Apple's finally aware of this problem! And now, I quite enjoy this new feature after I successfully update my iPhone 6s. However, some may come across something unpleasant. We've recently received an increasing number of reports from our readers saying that they've found some contents missing on their phone after the update. That's frustrating. For the sake of our readers, we immediately provide the feasible solutions as below. CONTENTS Reasons: Why iOS 10 Update Causes Data Loss? Method 1: Restore Lost Data Directly from iOS Device after iOS 10 Update Method 2: Retrieve Contents from iTunes Backup after iOS 10 Update Method 3: Extract Lost Files from iCloud Backup after iOS 10 Update Notes: Backup Before Upgrade (iTunes/iCloud) Reasons: Why iOS 10 Update Causes Data Loss? In fact, this problem occurs every time when a new generation of iOS comes to us. Generally speaking, the upgrading process is safe and lossless, but due to any reason, some users might lose files after the iOS update. Performing an update of mobile operating system needs to get further access to core system in order to install firmware and software as well as fix bugs. Normally, if these three situations happens during upgrading the device, data loss might somehow occur. 1. Being stuck in the process when updating to the latest iOS. (Solution: Use iOS System Recovery to fix iPhone to normal) 2. Though being stuck in the process, the update ceases and the device gets to the www.ifonetips.com
previous condition. 3. The device was stuck in the process for long, but it then works again. Also, it's recommended to use iTunes to update to the iOS 10. Though the OTA way is far easy and fast to perform, using iTunes can be more reliable and trouble-free, which is said to have less cases of data loss. Method 1: Restore Lost Data Directly from iOS Device Actually, there is only one type of data available to directly retrieve from iPhone/iPad/iPod after accidental deletion or loss, say, "Photo". You can always restore deleted photo as long as it's not overdue in "Recently Deleted" album. Those photos being deleted will be temporarily stored in the album named "Recently Deleted" for 30 days. You can go to "Photos" > "Albums" > "Recently Deleted". Then select the lost ones and choose to "Recover". However, if there are other types of data that you lose, stop using your iPhone at first lest the missing data be overwritten by new contents and try iPhone Data Recovery to get them back! Up to 20 types of data are supported, like Contacts, Messages, Notes, Photos, Videos and so on. Step 1. Scan for Lost Files Click on the above button to download and install iPhone Data Recovery for the free trial. Open the software and connect your iPhone to it. The default function is to "Recover from iOS Device". www.ifonetips.com
Now, you need to choose those types of data you want to get them back and hit the "Start Scan" button. If you've chosen quite a few kinds of data, the scanning process may take quite a long time. You can watch TV until it finishes. Step 2. Preview and Recover Files You can check out those data before restoring them. Those missing ones will be marked in red. Better yet, you are allowed to selectively restore files to computer or device. Please choose files and tap on "Restore to device" or "Recover to Computer". Note that there are three types of files currently supported to directly restore back to iOS device, which are Contacts, Messages, and Notes. www.ifonetips.com
Method 2: Retrieve Contents from iTunes Backup If there are iTunes backup available on your computer, that would be great, which is able to save you a lot of trouble. Just connect your device to iTunes, go to "File" > "Devices" > "Restore from backup". One disappointing point is that iTunes cannot restore previous backups and keep existing data at the same time. However, iPhone Data Recovery has no such a drawback. Step 1. Scan iTunes Backup Files Launch iPhone Data Recovery and select "Recover form iTunes Backup File". The program will automatically scan out your previous iTunes backups, which will be listed on the interface. Please choose one to scan. www.ifonetips.com
Step 2. Preview and Restore Contents After done scanning, you can preview files in detail. Users can selectively choose and restore data to computer or device. Then, all the data will be recovered to computer/device intact. www.ifonetips.com
Method 3: Extract Lost Files from iCloud Backup Most users have enabled iCloud automate backup service, so loss data can be easily restored back if you got one. You can restore iCloud backup right on your iPhone. Go to "Settings" > "General" > "Reset" > "Erase All Content and Settings". After the reboot, select "Restore from iCloud Backup". However, this method will result in the loss of existing data. If you'd like to preserve existing contents, you can have a try on iPhone Data Recovery. Step 1. Log in iCloud and Download Backups Open iPhone Data Recovery and choose "Recover from iCloud Backup File" from the left panel. Then, please enter your iCloud account as to get access to iCloud backup files. If there is no iCloud Panel installed on your computer, you need to download it first. Note that our software will not record any personal information. Your privacy is our top priority. Then, you will be asked to select types of data to download, just choose what you want to restore and click on "Next" button. Downloading files from iCloud may take a while according to the size of your files. www.ifonetips.com
Step 2. Recover Data to Device/Computer Now, you can preview those files and select them to export to computer or restore on device. You can right click to choose all the files via "Check All". The process will be done in no time, and your great memories will be safe with you. Then, check them out. Note that Contacts, Messages and Notes are supported to directly restore to iOS device within a click. www.ifonetips.com
Notes: Backup Before Upgrade (iTunes/iCloud) You will never know when you might lose data on your iPhone, so please keep a good habit of backing up your data. Now, let's see how to make a backup for iPhone/iPad/iPod via iTunes and iCloud. Backup Via iTunes Launch iTunes on computer and connect your iPhone via USB cable to computer. Then, click the "Phone" icon. Now, as you can see, please click on "Back Up Now" button, and your device will be automatically backed up. It could take a while, which depends on how much data do you have on your iPhone. Please make sure there is enough storage on Disk: C for backup files. Also, you can also use iTunes to back up data on iCloud. You can highlight "iCloud" under "Automatically Back Up", and then tap "Back Up Now". Note that you can encrypt your iPhone backup or restore backup on this interface as well. www.ifonetips.com
Backup Via iCloud Other than the way using iTunes to do an iCloud backup, you can directly do so just on your iPhone. Please enter a good network in the first place, and then open "Settings" > "iCloud" > Sign in iCloud account (if prompted) > "Backup" > "Back Up Now". It will take some time to finish backing up. Note that if you want to automatically backup your device when the device is unoccupied. You can toggle on the bar above "Back Up Now". www.ifonetips.com
You can also export contents to the specific position on your computer as a backup when restoring them, so you don't have to take so much time every time you restore data from iTunes or iCloud. Better yet, you can preview them and send them via email to friends in a convenient way. Even if you'd like to import files to your iPhone/iPad/iPod, compared with iTunes and iCloud, iPhone Transfer will be a great helper, which will not cause any data loss. By the way, I've heard of quite lots of reports saying that the iOS 10 is not as desirable as it's expected to be. (So far, I have had no such feelings.) However, if you want to downgrade the iOS, it can be done with ease. www.ifonetips.com


![[Solved]Error 14 Occurs After iOS 10 Update](https://cdn4.slideserve.com/7401208/slide1-dt.jpg)