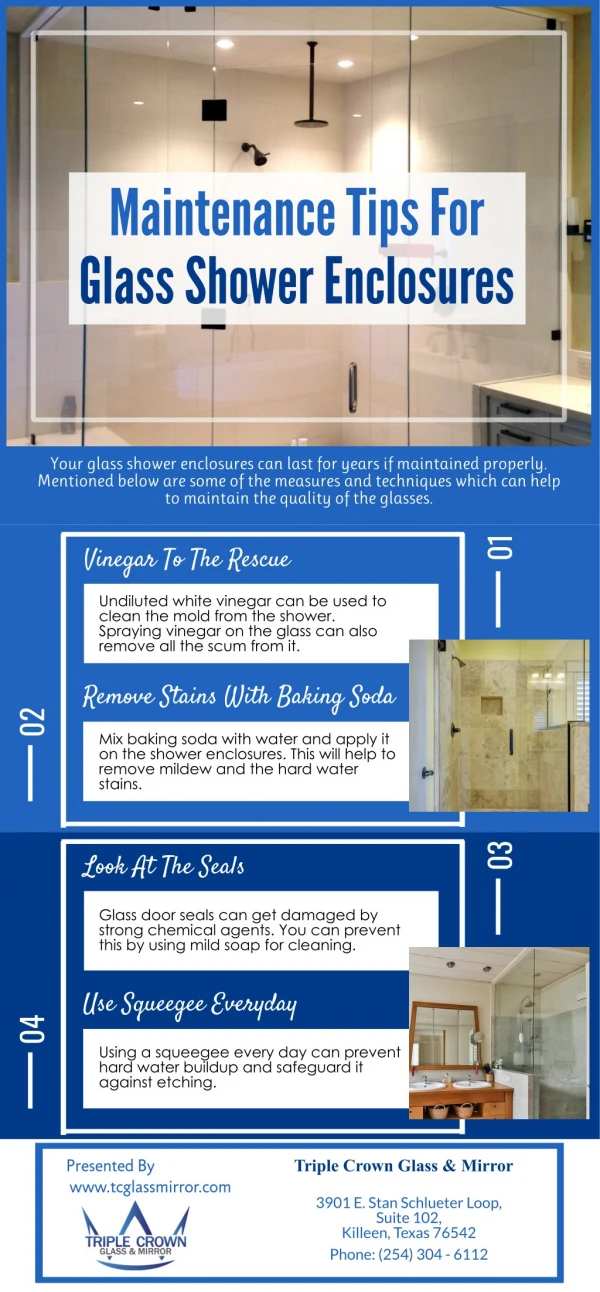
Download
1 / 4
0 likes | 12 Vues
Prevent leaks with the proper installation of shower sealers in Nelson Bay. Expert tips for lasting protection.

E N D
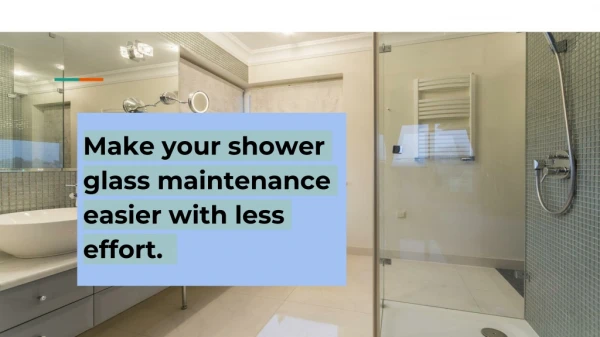
Preventing Shower Leaks: Tips for Proper Leaking Shower Sealer Application in Nelson Bay One of the primary concerns for homeowners is preventing leaks in their showers when it comes to shower maintenance in Nelson Bay. A leaking shower can lead to water damage repair nightmares, costly sealing problems, and potential structural issues. Hence, knowing the best practices for preparing surfaces and applying leaking shower sealers in Nelson Bay is crucial for ensuring watertight seals and avoiding future headaches. This guide covers all the information that you’ll need to prevent a leaking shower, along with vital tips for bathroom waterproofing, and properly applying a leaking shower sealer in Nelson Bay. Best practices for preparing surfaces and applying shower sealers to ensure watertight seals Before applying any sealant, proper surface preparation is key. Begin by thoroughly cleaning the surface to remove any dirt, grime, or old sealant residues. Use a suitable cleaner and ensure the surface is completely dry before proceeding. This step is essential for shower restoration and leakage prevention. While applying the leaking shower sealer, follow the manufacturer's instructions carefully. Use a high-quality sealant that is specifically designed for wet environments like bathrooms. Apply the sealer evenly and generously, ensuring complete coverage over the entire surface.
Pay extra attention to seams, corners, and areas prone to deterioration for comprehensive bathroom waterproofing. Common mistakes to avoid during leaking shower sealer application in Nelson Bay homes One of the most common mistakes during sealer application is inadequate surface preparation. Failing to clean and dry the surface properly can result in poor adhesion and eventual leaks. Another mistake is using an inappropriate sealant for the specific shower surface. Always choose a leaking shower sealer that is compatible with the material to ensure long-lasting protection and proper shower restoration. Improper sealant application techniques, such as applying too little or too much sealer, can also lead to issues and require proper shower maintenance. Follow the manufacturer's guidelines regarding application, thickness, and drying times to achieve optimal results. Rushing through the sealing process or neglecting to allow sufficient curing time can compromise the effectiveness of the sealer. Importance of proper ventilation and drying times for optimal sealer effectiveness Proper ventilation is crucial during bathroom waterproofing and after sealer application. Adequate airflow helps expedite the drying process and ensures the sealer cures properly. Inadequate ventilation can prolong drying times and increase the risk of sealer failure. Allow ample time for the sealer to cure before exposing the shower to water. Rushing to use the shower prematurely can disrupt the curing process and compromise the integrity of the sealant. Follow the recommended drying times provided by the manufacturer to achieve the best results. Don’t be hesitant to do sealer reapplication if the need arises. Tips for troubleshooting and addressing potential issues during the application process Despite taking precautions, issues may still arise during sealer application. If you encounter sealing problems such as bubbles, cracks, or incomplete coverage, address them promptly. Use a tool to smooth out any imperfections and ensure uniform coverage. If leaks occur after sealer application, identify the source of the problem and take corrective action, like sealer reapplication, immediately. This involves reapplying sealer to the affected area or addressing underlying issues with the shower structure. Prompt leakage prevention measures can help mitigate further damage and preserve the integrity of the sealant. Selecting the Right Shower Sealer for Nelson Bay's Unique Climate High levels of humidity and regular rainfall define Nelson Bay's climate. As a result, this requires shower sealers that can withstand moisture and temperature fluctuations. Look for sealants specifically formulated for humid environments to ensure long-lasting protection against water damage.
Consider the material of your shower surface when selecting a bathroom waterproofing sealer. Different materials may require different types of sealants for optimal leakage prevention. Consult with a sealer expert or refer to manufacturer recommendations to determine the most suitable product for your specific sealant application. Surface Preparation Techniques for Long-lasting Sealer Adhesion Proper surface preparation is essential for promoting strong sealer adhesion and preventing leaks. Begin by thoroughly cleaning the surface with a suitable cleaner to remove any dirt, grime, or old sealant residues. Rinse the surface thoroughly and allow it to dry completely before sealing. In addition to cleaning, consider using a primer or bonding agent to enhance sealer adhesion. These products create a stable surface for the sealer to adhere to, ensuring long-lasting protection against water damage. Follow the manufacturer's instructions for proper sealant application and drying times. Application Methods for Even Coverage and Protection While applying shower sealers, strive for even coverage to ensure comprehensive protection against leaks. Use a brush, roller, or applicator tool to spread the sealer evenly over the surface, working in small sections to prevent missed areas. Pay particular attention to seams, corners, and joints where leaks are most likely to occur. Avoid applying too much sealer, as this can lead to drips, runs, and uneven coverage. Instead, apply a thin, even coat and allow it to dry completely before applying additional layers if necessary. Take your time during the sealing process to achieve professional-quality results. Curing and Drying Guidelines for Optimal Sealer Performance After sealer application, allow ample time for curing and drying to ensure optimal performance. Follow the manufacturer's recommendations regarding drying times and curing conditions to achieve the best results. Avoid using the shower until the sealer has fully cured to prevent damage to the sealant. During the curing process, monitor the sealer for any signs of imperfections or deficiencies. Address any issues promptly to prevent leaks and maintain the integrity of the sealant. Once the sealer has fully cured, perform regular sealer inspection and maintenance to prolong its lifespan and effectiveness. Sealer Maintenance Practices to Prolong Lifespan and Effectiveness To prolong the lifespan and effectiveness of your shower sealer, implement regular sealer inspection and maintenance practices. Clean the surface regularly with a mild cleaner to remove soap scum, dirt, and other contaminants that can compromise the sealant. Avoid harsh chemicals or abrasive cleaners that can damage the sealer.
Inspect the sealer periodically for signs of wear, damage, or deterioration. Address any issues promptly to prevent leaks and maintain watertight seals. Depending on the condition of the sealer, you may need to reapply the sealer to ensure continued protection against water damage. Choosing Compatible Materials and Sealants for Different Shower Surfaces While selecting shower sealers for different shower surfaces, consider the compatibility of materials and sealants to ensure optimal performance. Porous materials like grout and natural stone may require specialised sealants to penetrate and provide adequate protection. Consult with a sealer expert or refer to manufacturer recommendations to determine the most suitable sealer for your specific shower surface. Consider factors such as material composition, exposure to moisture, and maintenance requirements when making your selection. Conclusion Proper application of shower sealers is essential for leakage prevention and maintaining the integrity of your shower. By following best practices for surface preparation, sealant application, and maintenance, you can ensure long-lasting protection against water damage and enjoy a leak-free shower experience in your Nelson Bay home. Remember to select high- quality sealants designed for humid environments and compatible with your shower surface for optimal performance.