Download
1 / 9
0 likes | 4 Vues
Mollie Mason shares her favourite immune-boosting recipe, which focuses on the dosage of homemade elderberry syrup. You can make your syrup at home, save money, and have complete control over the ingredients. Mollie also explains how much to take each day, especially during cold and flu season, to support general healthu2014ideal for families, naturalists, and anyone concerned about immune function.

E N D
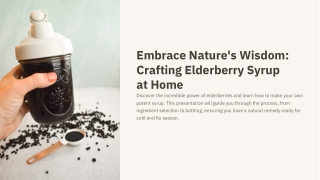
Embrace Nature's Wisdom: Crafting Elderberry Syrup at Home Discover the incredible power of elderberries and learn how to make your own potent syrup. This presentation will guide you through the process, from ingredient selection to bottling, ensuring you have a natural remedy ready for cold and flu season.
Why Choose Homemade Elderberry Syrup? Making your own elderberry syrup offers numerous advantages over store-bought versions. You control the ingredients, avoid unwanted additives, and ensure peak freshness. It9s also a deeply rewarding and cost-effective way to support your well- being. Ingredient Control No Unwanted Additives Cost-Effective Select organic, high-quality berries and sweeteners for a pure product. Save money by preparing larger batches at a fraction of the retail price. Avoid artificial colours, flavours, and preservatives found in commercial syrups.
Essential Ingredients for Your Syrup Gathering the right components is the first step to a perfect elderberry syrup. We'll use dried elderberries, pure water, warming spices, and raw honey for a truly beneficial concoction. Dried Elderberries These are the star, packed with antioxidants. Filtered Water A clean base is crucial for infusion. Warming Spices Cinnamon sticks, ginger, and cloves enhance flavour and benefits. Raw Honey A natural sweetener with soothing properties.
Step-by-Step Brewing Process Follow these simple instructions to create your homemade elderberry syrup. It's an easy process that yields impressive results. Combine Ingredients Add elderberries, water, and spices to a saucepan. Simmer Gently Bring to a boil, then reduce heat and simmer for 45 minutes. Strain & Cool Remove from heat, mash berries, and strain liquid. Let it cool completely. Add Honey & Store Stir in raw honey until dissolved. Pour into sterilised bottles.
Optimal Storage and Shelf Life Proper storage ensures your elderberry syrup remains potent and fresh. Refrigerate it promptly and enjoy its benefits for several weeks. Refrigeration is Key Airtight Containers Always store your finished syrup in the refrigerator to prevent spoilage. Use clean, sterilised glass bottles or jars with tight-fitting lids. Typical Shelf Life Homemade syrup usually lasts 3-4 weeks in the fridge.
Serving Suggestions for All Ages Elderberry syrup is versatile! Enjoy it on its own or get creative with how you incorporate it into your daily routine for a delicious health boost. Straight Up In Hot Tea Over Breakfast In Beverages Take a spoonful daily for general wellness. Stir into warm water or herbal tea for a comforting drink. Drizzle on pancakes, oatmeal, or yoghurt for a sweet treat. Mix into sparkling water or smoothies for a refreshing twist.
Understanding Elderberry Benefits Elderberries are celebrated for their natural immune-supporting properties. They're a fantastic addition to your natural medicine cabinet. Immune Support Rich in antioxidants and vitamins. Antiviral Properties May help combat cold and flu viruses. Anti-inflammatory Reduces inflammation in the body. Respiratory Health Soothes coughs and sore throats.
Embrace Your Home Apothecary Making elderberry syrup is just the beginning of your journey into natural remedies. Empower yourself with simple, effective homemade solutions. Empowerment 1 Take control of your family's health. Knowledge 2 Learn about the power of natural ingredients. Sustainability 3 Reduce waste and rely less on commercial products.
mollie@molliemasonwellness.com United States https://molliemasonwellness.com