Download
1 / 64
850 likes | 3.15k Vues
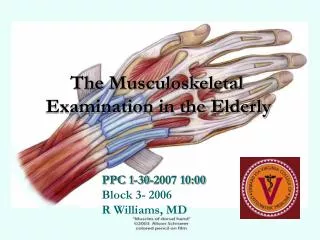
The Musculoskeletal Examination in the Elderly. PPC 1-30-2007 10:00 Block 3- 2006 R Williams, MD. Objectives. Review the adult musculoskeletal examination Classify the common musculoskeletal conditions and risks inherent with aging

E N D
The Musculoskeletal Examination in the Elderly PPC 1-30-2007 10:00 Block 3- 2006 R Williams, MD
Objectives • Review the adult musculoskeletal examination • Classify the common musculoskeletal conditions and risks inherent with aging • Identify methods of examination of frail elderly individuals • Recognize the value as well as the risk of OMM in the elderly population
Physical examination of the knee Exam Overview • A complete knee examination is always done for a knee complaint or complete physical exam. • Inspect your knee visually for redness, swelling, deformity, or skin changes. • Feel your knee (palpation) for warmth or coolness, swelling, tenderness, blood flow, and sensation. • Test your knee's range of motion and listen for sounds.
Physical examination of the knee • Exam your knee ligaments, which stabilize the knee. Tests include: • The Valgus and Varus tests, which check the medial and lateral collateral ligaments. • The posterior drawer test, which checks the posterior cruciate ligament . • The Lachman test, which checks the anterior cruciate ligament (ACL) • A McMurray test may be done if you suspect a problem with the menisci based on your medical history and the above examinations.
General Exam (compare with less affected knee) Observation Ecchymosis Knee Effusion with obscured landmarks Knee Effusion Causes Ballottable Patella Sign Knee Bulge Sign Previous surgical scars Knee resting position Quadriceps muscle atrophy Evaluate Vastus Medialis Obliquus specifically Atrophy often on side of ligamentous injury Tenderness to Palpation Patella Tibial tubercle Patellar tendon Quadriceps tendon Joint line Normal Range of Motion Flexion: 135 degrees Extension: 0 to 10 degrees above horizontal plane Patellofemoral Quadriceps Femoris Muscle Angle (Q Angle) Patella tracking with quadriceps contraction Evaluate for smoothness of motion and crepitation Knee exam
Patellar Apprehension Test Evaluates for Patella Subluxation Anterior Cruciate Ligament (ACL) Stability Tests Lachman Test (most sensitive) Knee Anterior Drawer Test Pivot Shift Test (MacIntosh Test) Posterior Cruciate Ligament (PCL) Tests Knee Posterior Drawer Test PCL Sulcus Test PCL Sag Test Collateral ligament evaluation Knee Valgus Stress Test (Medial collateral ligament) Knee Varus Stress Test (Lateral collateral ligament) Meniscus Evaluation McMurray's Test Apley's Compression Test and Apley's Distraction Test Bounce Test Standing evaluation Balanced weight on each leg Genu Varum or Genu Valgum deformity Gait analysis Patella baja or patella alta deformity Hip, Knee, and ankle alignment Knee exam
Assessment of quadriceps strength. The examiner places his hands over the distal leg and asks the patient to try to straighten out their leg.Assessment of gross quadriceps strength by the physical exam is not as accurate when done by machines. Subtle differences in strength or fatigue may not be accurately determined.
The four major muscles of the rotator cuff • Rotate the humerus and properly orient the humoral head in the glenoid fossa (socket). • The tendons of these four muscles merge, forming a cuff around the glenohumeral joint. • Supraspinatus: abducts the humeral head and acts as a humeral head depressor • Infraspinatus: externally rotates and horizontally extends the humerus • Teres minor: externally rotates and extends the humerus • Subscapularis: internally rotates the humerus
Subscapularis (Internal rotation) • Technique 1: Tennis Forehand • Start with arm at side, elbow flexed 90-100 degrees • Internal rotation against resistance • Tennis Forehand • Technique 2: Apley's Scratch Test Modification • Hand scratching between scapulae • Move hand away from back
Teres Minor and Infraspinatus (External Rotation) • Start with arm at side, elbow flexed 90-100 degrees • External Rotation against resistance (Tennis backhand)
Supraspinatus Test • Hold arms to side as if holding cans bilaterally • Empty Cans test (original test) • Wrists pronated as if emptying cans • Full Cans Test • Wrists supinated as if holding cans upright • May be more specific for Supraspinatus impingement • Hold arm abducted at 50 degrees against resistance • Interpretation • Arm weakness is specific to Supraspinatus impingement
Bicipital Tendon • Technique • Start • Arm forward flexed 50 degrees at shoulder • Hand Supinated (palm up) • Elbow flexed 15 degrees • Maneuver • Forward flex against resistance at forearm • Interpretation • Pain sensitive for bicipital Tendonitis • Suggests SLAP lesion of long head of biceps
FIGURE 1. Anatomy of the shoulder and rotator cuff, showing (left) anterior and (right) posterior view
Ligaments of the Glenohumeral Joint. A joint capsule is a watertight sac that surrounds a joint. In the shoulder, the joint capsule is formed by a group of ligaments that connect the humerus to the glenoid.. These are the glenohumeral ligaments (GHL) Another ligament links the coracoid to the acromion - coracoacromial ligament (CAL). This ligament can thicken and cause Impingement Syndrome Ligaments attach the clavicle to the acromion in the AC joint. Two ligaments connect the clavicle to the scapula by attaching to the coracoid process, a bony ridge on the scapula - coracoclavicular ligaments (CCL) Ligaments of the Shoulder Complex: • CCL - coracoclavicular ligaments • CAL - coracoacromial ligaments • SGHL - Superior GlenoHumeral Ligament • MGHL - Medial GlenoHumeral Ligament • IGHL - Inferior GlenoHumeral Ligament
Normal Rotator Cuff MRI • Notice purely black signal at the tip of the red arrow
Torn Rotator Cuff MRI • Notice white signal within black signal at the tip of the red arrow
Shoulder strength testing Rotator cuff Supraspinatus
Range of Motion External rotation Internal rotation Forward flexion
Sciatic nerve as it passes through the sciatic notch and beneath the piriformis muscle--a site of possible nerve compression
Lateral femoral cutaneous nerve as it passes behind the inguinal ligament--a possible site of nerve compression
FABER Test (Hips/Sacroiliac Joints) • FABER stands for Flexion, ABduction, and External Rotation of the hip. This test is used to distinguish hip or sacroiliac joint pathology from spine problems. • Ask the patient to lie supine on the exam table. • Place the foot of the effected side on the opposite knee (this flexes, abducts, and externally rotates the hip). • Pain in the groin area indicates a problem with the hip and not the spine. • Press down gently but firmly on the flexed knee and the opposite anterior superior iliac crest. • Pain in the sacroiliac area indicates a problem with the sacroiliac joints.
Treatment for hip arthritis • Weight LossProbably one of the most important, yet least commonly performed treatments. The less weight the joint has to carry, the less painful activities will be. • Activity ModificationLimiting certain activities may be necessary, and learning new exercise methods may be helpful. Aquatic exercise is an excellent option for patients who have difficulty exercising. • Walking AidsUse of a cane or a single crutch is the hand opposite the affected hip will help decrease the demand placed on the arthritic joint. • Physical TherapyStrengthening of the muscles around the hip joint may help decrease the burden on the hip. Preventing atrophy of the muscles is an important part of maintaining functional use of the hip.
Treatment for hip arthritis • Anti-Inflammatory Medications Anti-inflammatory pain medications (NSAIDs) are prescription and nonprescription drugs that help treat pain and inflammation. • Joint Supplements (Glucosamine)Glucosamine appears to be safe and might be effective for treatment of osteoarthritis, but research into these supplements has been limited. • Total Hip Replacement SurgeryIn this procedure the cartilage is removed and a metal & plastic implant is placed in the hip.
Tools • Activities of Daily Living • Tinetti Gait and Balance Tool • Get up and go
Activities of Daily Living • Based on 6 criteria • Bathing with sponge, bath, or shower • Dressing • Toilet Use • Transferring (in and out of bed or chair) • Urine and Bowel Continence • Eating • Each criteria is graded on level of dependence • Performs independently • Performs with assistance • Unable to perform
Tinetti Gait and Balance • 16 items, including: • Sitting balance • Attempts to arise • Standing balance • Balance with a nudge • Turning 360 degrees • Initiation of gait • Step length and height • Step symmetry • Step continuity • Walking stance
Get up and go 1. Rise from sitting position 2. Walk 10 feet 3. Turn around 4. Return to chair and sit down Interpretation Patient takes <20 seconds to complete test=Adequate for independent transfers and mobility Patient requires >30 seconds to complete test= Suggests higher dependence and risk of falls
Hand OA • Heberden's nodes • bony enlargements of the distal interphalangeal joints • are the most common form of idiopathic OA. • Bouchard's nodes • proximal interphalangeal joints • Often, these nodes develop gradually, with little or no discomfort. • However, they may present acutely with pain, redness, and swelling, sometimes triggered by minor trauma. • Gelatinous dorsal cysts filled with hyaluronic acid may develop at the insertion of the digital extensor tendon into the base of the distal phalanx.
MCP PIP DIP Note the involvement of the DIP (Distal Interphalangeal) followed by PIP (Proximal Interphalangeal) and relative sparing of the MCP (Metacarpal Phalangeal) joints. Bouchard’s node Heberden’s node