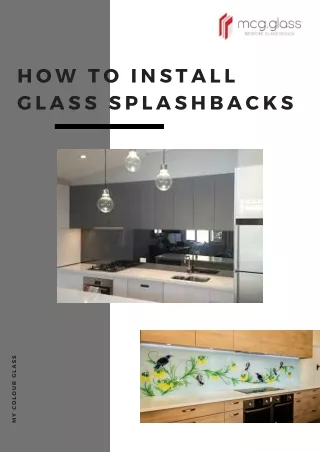
How to Install Acrylic Splashbacks in Your Kitchen Like a Pro
0 likes | 3 Vues
Want to install acrylic splashbacks for kitchens like a pro? This step-by-step guide helps you fit splashback wall panels with ease and precision. Learn how to prep your surface, cut panels to size, and fix them securely for a seamless, stylish finish. Whether you're upgrading your cooking space or adding a modern touch, acrylic splashbacks are a durable, easy-to-clean solution that transforms any kitchen. Follow these tips and achieve a polished, professional looku2014without the need for costly installers!

How to Install Acrylic Splashbacks in Your Kitchen Like a Pro
E N D
Presentation Transcript
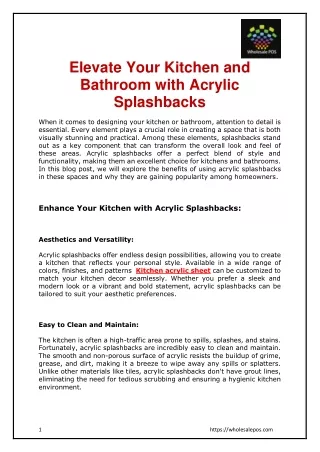
How to Install Acrylic Splashbacks in Your Kitchen Like a Pro Do you want to give your kitchen an elegant, modern update without breaking the bank? Thenacrylic splashbacks are the answer. They are affordable, stylish, easy to clean and available in a wide range of colours to match any interior. If you're planning a DIY project this weekend or want to save on installation costs, this step-by-step guide will help you install acrylic splashbacks for kitchens and bathrooms like a professional. And don't worry, we will keep it simple, practical and stress-free. Why Choose Acrylic Splashbacks? Tiles are classic, but they can be time-consuming, messy and expensive to install. Now we have acrylic splashbacks - a modern option that delivers both function and flair. Here is why acrylic splashbacks for bathrooms and kitchens are taking over in the UK: ★ Easy and easy to handle ★ Cost-effective compared to glass or tiles ★ Available in infinite colours thanks to colored acrylic sheets ★ Hygienic and easy to clean - no sealant means no shape ★ Durable and resistant to moisture and steam You will also find matching styles for different areas of your home, including acrylic splashbacks for bathrooms, so that you can maintain a consistent look.
Tools And Materials You Need Before you begin, gather these tools and materials: 1. Acrylic splashback panels (cut in size) 2. Measuring tape 3. Pencil and spiritual level 4. Fine tooth saw or jigsaw (for trimming if necessary) 5. Double-sided glue band or silicone glue 6. Masking tape 7. Cloth and mild cleaner 8. Sealant (optional, for water-exposed areas) Pro tips: Order coloured acrylic sheets that are pre-shot to size if you want to skip trimming entirely. Many suppliers, such as Perfect Splashbacks, offer custom cutting based on your wall measurements. Step 1: Dimensions And Plan The Layout First thing first - measures your wall area precisely. Decide how much coverage you want. Some homeowners opt for a full wall behind the stove, while others choose a half-height option for a minimalist appearance. Use a spirit level and pencil to mark your reference lines. This will help you keep the splashback level during installation. Do not forget to explain plug contacts or wall barriers - these must be cut around. Step 2: Cut Openings (If Necessary) If yoursplashback wall panels are not advanced, select carefully and cut the necessary shapes (eg electrical outlets or corners) using a puzzle with a fine-tooth blade. To avoid cracking the acrylic, support the panel well on both sides during cutting and proceed slowly. Smooth rough edges using fine sandpaper. Step 3: Prepare The Surface Clean the wall thoroughly with a damp cloth and a mild detergent. Ensure it is free of grease, dust, and flaking. A dry, smooth surface is crucial for strong adhesion. You can apply splashback to: ● Painted plaster walls ● Existing tiles (as long as they are flat) ● Plywood or MDF support boards
Step 4: Use Glue Or Tape There are two standard methods to fix your acrylic splashbacks for kitchens: Adhesive Tape Method ● Apply two-sided foam adhesive tape in vertical strips to the back of the panel. ● Leave the holes in between to allow air to release for a flush. Silicone Glue Method ● Use a notched trowel to spread glue in dots or waves on the back of the panel. ● Avoid edges to reduce the overflow. If you use both methods together, place the tape for instant hold and glue for long-term grip. Step 5: Fit and Press Gently adjust the splashback against the wall using the pencil guidelines as a reference. When you are happy with the position, press the panel firmly against the wall, starting from the centre and working out. Use masking tape temporarily to hold it in place while the glue sets (usually 24 hours). Tip: Don't rush this step - once it's firm, it's hard to adjust! Step 6: Seal Edges (Optional) If your splashback is near a sink, stove, or any other wet area, you can seal the edges with a clear or colour-matched silicone seal. This keeps the moisture out and gives a nice finish. Wipe away excess just before it dries. Bonus Ideas: Match With Bathroom Too! When you have nailed the kitchen installation, why stop there? The same technique works wonders with acrylic splashbacks for bathrooms - especially around pools or as shower wall panels. Because they are water-repellent and grout-free, they offer a hygienic and low-maintenance upgrade ideal for busy British households. Make Your Kitchen Stand Out With a Splash of Style! Updating the kitchen does not have to mean a full renovation. With acrylic splashbacks for kitchens, you can transform the room with colour, shine and personality - all in a single afternoon.
Whether you opt for bold coloured acrylic sheets or keep it subtle with elegant neutrals, this simple DIY upgrade will make the kitchen feel fresh, modern, and easy to maintain. At Perfect Splashbacks, we offer delivery on pre-cut acrylic panels, a variety of colours and expert advice to help you install with confidence. Whether you want your panels to be the perfect size and ready to fit, we have you covered. Contact Us Company Name: Perfect Splashbacks Address:Unit 1, Darby Way, Narborough, Leicester, LE19 2GP Phone(s) : 01455 413 545 Email id: info@perfectsplashbacks.co.uk Website: https://perfectsplashbacks.co.uk/