Download
1 / 3
30 likes | 60 Vues
RFID4U - TagMatiks Asset Tracking Lite | This article explains how to connect the rfid reader through Bluetooth Device settings and to be connected with PC and Applications of Tagmatiks AT Lite

E N D
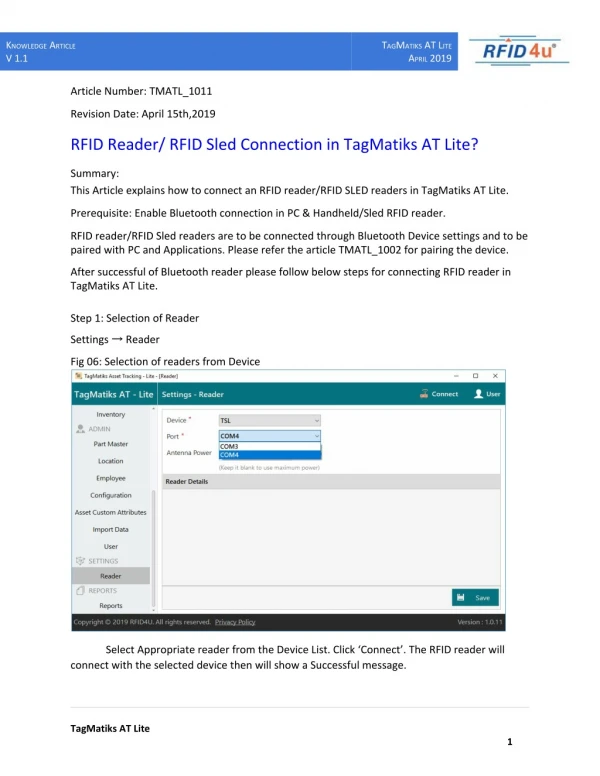
KNOWLEDGE ARTICLE V 1.1 TAGMATIKS AT LITE APRIL 2019 Article Number: TMATL_1011 Revision Date: April 15th,2019 RFID Reader/ RFID Sled Connection in TagMatiks AT Lite? Summary: This Article explains how to connect an RFID reader/RFID SLED readers in TagMatiks AT Lite. Prerequisite: Enable Bluetooth connection in PC & Handheld/Sled RFID reader. RFID reader/RFID Sled readers are to be connected through Bluetooth Device settings and to be paired with PC and Applications. Please refer the article TMATL_1002 for pairing the device. After successful of Bluetooth reader please follow below steps for connecting RFID reader in TagMatiks AT Lite. Step 1: Selection of Reader Settings → Reader Fig 06: Selection of readers from Device Select Appropriate reader from the Device List. Click ‘Connect’. The RFID reader will connect with the selected device then will show a Successful message. TagMatiks AT Lite 1
KNOWLEDGE ARTICLE V 1.1 TAGMATIKS AT LITE APRIL 2019 Fig 02: Reader connection success Check-in, Check Out, Transfer, or Inventory. After Successful of the reader connection. The reader can be used for transactions like TagMatiks AT Lite 2
KNOWLEDGE ARTICLE V 1.1 TAGMATIKS AT LITE APRIL 2019 Step 4: Selection of Antenna Power: Select the Reader from Setting menu, choose Antenna power as per your use case. Please note that this a logarithm scale so every 3 dBm you reduce the power, you’re actually cutting it in half! Fig 02: Antenna Power settings To change the Antenna power, Select Setting from the Top Right corner, Drag the pointer according to change the antenna power and click Apply If Antenna Power left blank, it will take maximum power TagMatiks AT Lite 3