Download
1 / 24
240 likes | 448 Vues
Understanding The 2008 FRC Robot Controller. Chris Gregory FRC1089 – Team Mercury www.mercury1089.com. Agenda. What I will I learn from this workshop? What is the Robot Controller? How do we communicate with it? Robot States (Modes) How does it connect to the rest of your robot?

E N D
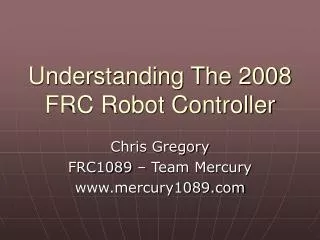
Understanding The 2008 FRC Robot Controller Chris Gregory FRC1089 – Team Mercury www.mercury1089.com
Agenda • What I will I learn from this workshop? • What is the Robot Controller? • How do we communicate with it? • Robot States (Modes) • How does it connect to the rest of your robot? • Tips & Tricks • Additional Resources • Q & A
I. What will I learn? • How the RC interacts with devices in the FRC competition, on and off the field • How to correctly set up your Robot Controller within your robot • The procedure for downloading code to your robot • Tips and Tricks to help you along the way
II. What is the Robot Controller? • “Heart and Brains of Robot” • Contains a PIC processor calculating at 10.0 MIPS, with 128k programmable flash memory • Programmable in C using a C18 Compiler • What you’re here to learn more about
III. How do we communicate with the RC? • RC Interfaces with Operator Interface (OI) via three methods • Radio-Controlled using your radios (practice) • Connected via Tether Cable • Radio-Controlled via the Competition port (At the events)
Connected Via Tether Cable • Robot receives input from OI and controls parts of the robot based on the programmable code • Robot sends data BACK to OI such as battery voltage, which motors are running, etc. • Use the tether to synchronize your OI and RC, as well as to set your team number • Don’t screw the tether in!
Connected Via Tether Cable • Connected this way, the OI does not require a power source, as it is run from the robot’s battery • Not a good way to drive the robot around, as the stock tether is only 6’ long • DON’T SCREW THE TETHER IN!!!!!
Radio-controlled (Practice) • Radios connected to both RC and OI • (Use a tether cable first to synchronize them the first time you use them) • Useful for testing at home, but no radio control allowed in pits at competition. • Operator Interface requires external power (included in KOP) • Screw the radio into the robot, and keep your radio exposed (BUT NOT VULNERABLE)
Radio-Controlled at the Competitions • At the competition, the field controls which status your robot is in through the competition port on the OI • Field Techs will shut your robot down if they deem it unsafe • You don’t use your OI Radio or power source, those are provided through the competition port
IV. Robot States (Modes) • Disabled • How your robot starts and ends in a round • Autonomous • Robot controlled through programming routines. USUALLY at the beginning of a round. • Tele-operated (Practice) • Normal robot state: students control the machine via the OI • Program • How you download code to the robot
IV. Robot States (Modes) • Practice Mode is set by default on power-up if tether cable connected • Disable Mode is on by default on competition field or if no radio/tether connected • Program Mode enabled by pressing Program button on RC for 4 seconds • Disable/Practice/Autonomous mode can be toggled via a MODE SELECTOR SWITCH that you must purchase/create/obtain
V. How does it connect to the rest of your robot? • Main Battery (See Electrical Diagram) • Backup Battery • Status/Team Lights (See Manual) • PWM (Analog) Outputs • Relay (Digital) Outputs • Analog Inputs • Digital I/O
Backup Battery • 7.2V battery pack used to stop RC from resetting if main power is too low • THIS IS REQUIRED FOR USING SERVO MOTORS ON YOUR ROBOT
PWM Outputs • Pulse Width Modulation outputs • Primary used for controlling Victor speed controllers and powering Servo Motors • They are ANALOG outputs, effectively allowing variable speed and, in the case of motors and Victors, multiple directions. • You’ll definitely use these to drive
Relay Outputs • Digital Outputs that have 4 states each (Forward on/off, reverse on/off) • Useful for devices that only are fully on or off (such as the air compressor, a solenoid, or a lower-power motor) • By default, most are controlled by push buttons on your OI joysticks
Analog Inputs • These are typically used to hook up to more advanced sensors, such as a sonic range finder, a potentiometer, or a gyro sensor • Allow for more detailed feedback to the Robot, as opposed to an on-off switch
Digital I/O ports • These ports can be assigned IN CODE as input or output, but by default, they are all set as INPUT. • Typically used for switches on the robot, such as limit switches, the air pressure switch (which shuts off the compressor if you hit the max PSI in your tanks)… • … or autonomous routine switches (if you wanted to have multiple autonomous routines that you could select by flipping a switch on your robot)
Flux Capacitor Just Kidding!
VI. Tips and Tricks(mostly learned from other teams’ mistakes) • Do not drink liquids around your robot controller • Make sure that your robot controller’s ports are easily accessible at all times – you’ll never know when you need to program or tether quickly • The backup battery will need a home – try to create a means to secure it, as the connection is a bit “flaky”
VI. Tips and Tricks(mostly learned from other teams’ mistakes) • Label your PWM cables!!!! You may find that you need to disconnect a cable, and you need to be able to plug them back in the right spot. • Invest in, or create your own autonomous/disable switchbox. This will help with testing, as well as safety • Keep your wiring clean! • Always keep backups of working code!
VI. Tips and Tricks(mostly learned from other teams’ mistakes) • FOR THE LOVE OF GOD, DO NOT SCREW IN YOUR TETHER CABLE! • Treat your robot controller as if it cost you $449.95 plus shipping and handling, because that’s how much it costs to replace it. • Secure your RC in a place that the tether port is easily accessible: You will be required to operate in this mode at the competitions • Invest in extra: Main and Backup Batteries, Tether Cables, Victors and Spikes
VII. Additional Resources • AndyMark – www.andymark.biz • Place to purchase reliable mode selector • IFI Robotics – www.ifirobotics.com • Manufacturer of RC – contains other guides and manuals, as well as links to programming guides and resources • ChiefDelphi – www.chiefdelphi.com • Team 47’s homepage, considered the unofficial FIRST “hub”, contains a lot of useful resources on forums. Don’t forget to use the Search button!
VIII. Q&A WELCOME TO FIRST!!