Download
1 / 9
90 likes | 245 Vues
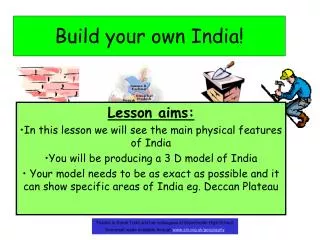
Build your own India!. Lesson aims: In this lesson we will see the main physical features of India You will be producing a 3 D model of India Your model needs to be as exact as possible and it can show specific areas of India eg. Deccan Plateau.

E N D
Build your own India! • Lesson aims: • In this lesson we will see the main physical features of India • You will be producing a 3 D model of India • Your model needs to be as exact as possible and it can show specific areas of India eg. Deccan Plateau Thanks to Sarah Todd and her colleagues at Stanchester High School, Somerset made available through www.sln.org.uk/geography
What 10 keys things did you you find out on your Indian passport? Capital city? Main religions Thanks to Sarah Todd and her colleagues at Stanchester High School, Somerset made available through www.sln.org.uk/geography
Fasten your seat belt – we are now going to take off for India • Please check……. • Your luggage is stored away in the overhead cabin • You have a good window seat to see the layout of the country! Thanks to Sarah Todd and her colleagues at Stanchester High School, Somerset made available through www.sln.org.uk/geography
Follow the route planner on the overhead screen • Our flight will last approximately 9 hours. • You will fly out across Europe and then across the Arabian Sea Thanks to Sarah Todd and her colleagues at Stanchester High School, Somerset made available through www.sln.org.uk/geography
What can you see out of the window…? • The shape and layout of the land…. • The rivers, the mountains, the coastline… • What is your first impression? Thanks to Sarah Todd and her colleagues at Stanchester High School, Somerset made available through www.sln.org.uk/geography
Build your own India • Let’s look closely at the land – where is it highest? Lowest? • Look at our model of the land on ‘make a model of India’ worksheet, shade the different heights using the key • Use the atlas – what are the Northerly, Western and Eastern highlands known as? Then... Thanks to Sarah Todd and her colleagues at Stanchester High School, Somerset made available through www.sln.org.uk/geography
Building India… Remember: Layer 1 = Indian Ocean BLUE Layer 2 = Coastline and main land Orange Layer 3 = 200m Peach Layer 4 = 500m Green Layer 5 = 1000m Yellow Layer 6 = 4000m Red • Use the second worksheet , and the card to start to model India’s land…. • Divide your card into 6 • The blue is the sea (this is the Indian Ocean)… • Now cut out the whole of India on Orange – this is 0-200m • Then cut out 200m and above • Then cut out 500m and above • Then cut out 1000m and above – care there are some small areas here. • Finally cut out 4000m and above. Thanks to Sarah Todd and her colleagues at Stanchester High School, Somerset made available through www.sln.org.uk/geography
Add the detail and finishing touches!! Try and remember these physical features for next lesson – you might be able to guess where most people would like to, or not like to live!! • Now the model has it’s layers add on the key physical features: • River Ganges • Western and Eastern Ghats • Deccan Plateau • Himalayas • Arabian Sea • Indian Ocean Thanks to Sarah Todd and her colleagues at Stanchester High School, Somerset made available through www.sln.org.uk/geography
Thank you for flying Stanchester Airways.. Warning:- All unnamed baggage will be disposed of by airport staff as a security measure (and it will not get marked!!) Before you leave can you please make sure you have securely fastened your model (ie stuck it down onto a sheet of A3 paper). Place your name on it for quick recovery at baggage collection! You must remain seated until the pilot says you can leave the plane... Thanks to Sarah Todd and her colleagues at Stanchester High School, Somerset made available through www.sln.org.uk/geography