Download
1 / 12
120 likes | 234 Vues
Follow step-by-step instructions to ensure correct environment settings for constructing GWIS/ArcHydro databases based on SWFWMD Coordinate System. Check DEM foundation, projections, and settings to ensure accuracy.

E N D
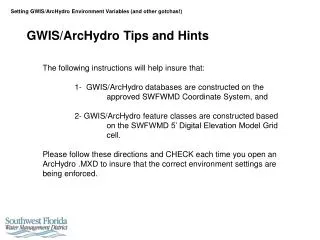
GWIS/ArcHydro Tips and Hints The following instructions will help insure that: 1- GWIS/ArcHydro databases are constructed on the approved SWFWMD Coordinate System, and 2- GWIS/ArcHydro feature classes are constructed based on the SWFWMD 5’ Digital Elevation Model Grid cell. Please follow these directions and CHECK each time you open an ArcHydro .MXD to insure that the correct environment settings are being enforced.
1- Using ArcCatalog, right-click the properties of the original DEM that you are using as your foundation. Its extents should be multiples of five (5) and it should be projected into State Plane Florida West, NAD1983/HARN feet.
If theextents of the foundation DEM are not correct (i.e. not multiples of 5), then… 1- Re-extract the DEM from your ESRI Terrain making sure that the export parameters are set properly, or 2- Use the Spatial Analyst Raster Calculator to multiply your DEM by 1 make certain that the export parameters are set to multiples of 5 (Spatial Analyst > Options > Extent) If theProjectionof the foundation DEM is not correct (i.e. Harn meters), then… 1- Re-extract the DEM from your ESRI Terrain making sure that the export parameters are set properly, or 2- Use the ArcGIS/Spatial Analyst to re-project your DEMto: Florida State Plane West (feet), NAD1983/HARN units (Toolbox > Data Management Tools > Projections and Transformations > Raster > Project Raster) make certain the Environments…General Settings > Extent is set correctly
Helpful Hint: The ESRI default unit for the NADV88 Projection file is METERS; The District specification is US Feet. To change the default: 1- Using Windows Explorer (not ArcGIS), navigate to: C:\Program Files\ArcGIS\Coordinate Systems\Vertical Coordinate Systems\North America 2- Copy the NAVD 1988.prj file to a filename of your choice (ex. NAVD88ft.prj). You may leave this copy in the same folder or place it in your “Favorites” folder. 3- Using any text editor (NotePad, TextPad, ConText, etc.) open the file and scroll over to the end of the file. Change/Edit: UNIT[“Meter”,1.0] to UNIT[“Foot_US”,0.30400609601219] and save the file. 4- Use this new .PRJ file when specifying the Z-Projection for GWIS-related databases. 5- Check to make sure that the file is being read correctly when you create a new feature class or shapefile.
2- When starting a new project, insert the (proper) DEM first. This should set the Data Frame properties to the extent and projection of the foundation DEM, but, check the properties anyway!
3- The Data Frame Properties should be set to the proper Projection and units. If not, re-make the DEM!
4a- Check the Tools > Options > Geoprocessing > Environment Settings
4b – In the “General Settings”, check the “Output Coordinate System (make sure it is as below) and if the “Extent” is set to Default, change it!
Foundation DEM 4c – Using the drop-down, change the “Extent” setting to the foundation DEM (checking that the values are multiples of 5!)
5b – Right-click anywhere in the white-space of the toolbox window and open the “Environments”
5c – Final check on the Output Coordinate System and Extent. Note: We also recommend setting the Scratch Workspace onto an independent disk drive (when possible)