Download
1 / 14
140 likes | 295 Vues
Playground Design A WebQuest for 2nd Grade Designed by Rosanna Sartore rmsartore@usieagles.org. Introduction. Introduction | Task | Process | Evaluation | Conclusion | Standards | Teacher Notes.

E N D
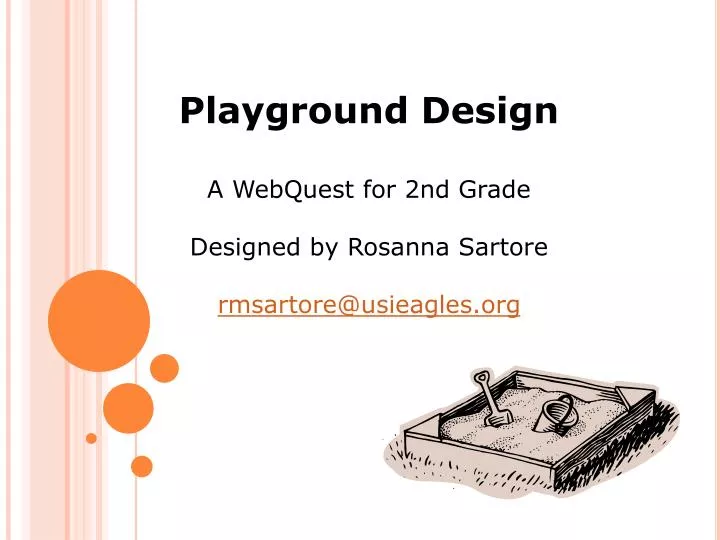
Playground Design A WebQuest for 2nd Grade Designed by Rosanna Sartore rmsartore@usieagles.org
Introduction Introduction | Task | Process | Evaluation | Conclusion | Standards | Teacher Notes Our school has recently designed a new playground and the construction process is underway. I know it has been rough since you cannot play on the playground like usual, but now you get the chance to be a real playground designer. This way, the difficulties of not having a playground for months will all be worth it! If you are ready to get started, click on the task section.
The Task Introduction | Task | Process | Evaluation | Conclusion | Standards | Teacher Notes The new playground designs do not include a sandbox, so you get to work in a group to create a one-of-a-kind sandbox out of different geometric shapes. Our principal is very excited to see what you can come up with as an addition to the playground. The class will be voting on which design they would most like to have. Design can sound scary when you have not done it, but this is a fun activity you get to do with friends. I will still be here to answer your questions every step of the way. If you think you are up to the challenge, click on the process section to get started.
The Process Introduction | Task | Process | Evaluation | Conclusion | Standards | Teacher Notes • Design involves many steps. First, you must actually create the sandbox with the help of your group members. After the design is complete, your group will present your new sandbox to the class, mentioning the shapes used to make it such an awesome and fun playground piece. After all groups present, the class will vote on the one we think will be the most fun to have here at school. So if you are ready to jump into the fun world of design, please ask the teacher who is a member of your group. Then you and your group can get started as soon as possible! • Now that you have a group, you and your group members have a choice to make. Two of you will work together to create the design of the actual sandbox. The other two will work together to find the best accessories that students can use in the new sandbox. Once your duos are chosen, you may begin to design by clicking on the duo you have chosen.
The Process Introduction | Task | Process | Evaluation | Conclusion | Standards | Teacher Notes • Sandbox Design Duo: • First, your duo needs to practice figuring out how different shapes fit together by visiting the following site: Tangram Game • Take notes over the game by printing out this sheet. Turn them into the teacher for a grade. • Next, your duo needs to use the paint program on this computer to create the design for you sandbox. To find this program, go to start, then programs, then accessories, then paint. Notice that there are different art tools on the left of the screen and different colors on the right. Please save your work! • Make sure your sandbox has at least 3 different shapes that fit together. • Make sure your sandbox has a cover to keep the sand from getting wet. • Print out your sandbox design to share with all of your group then click NEXT->
The Process Introduction | Task | Process | Evaluation | Conclusion | Standards | Teacher Notes • Accessories Duo: • First, your duo needs to practice finding shapes in the environment by visiting the following site: Shapes Game • Take notes over using the game by printing out this sheet. Turn them into your teacher for a grade. • Next, your duo needs to use the following site to find your 3 favorite sandbox accessories: Sandbox Accessories • Copy and paste the pictures of these favorites into a word document. Copy by selecting the text, going to edit (top left of the screen), and clicking copy. Paste by putting the cursor over where you want the text to go, going to edit, and clicking paste. • Save and print the document. • Label the different shapes that are part of these accessories on your printout. • Click NEXT-> to finish the process.
The Process Introduction | Task | Process | Evaluation | Conclusion | Standards | Teacher Notes • Now your duos need to meet back into your big group of four. Show each other the work you have done to design this sandbox and what will go inside the sandbox. Together, create a presentation to show the rest of the class, your teachers, and your principal just how amazing your sandbox is. Use the printouts your duos have made to create a poster together. Your teacher will have poster board and other decorating supplies for you to use. • Practice your presentation as a group. Make sure that: • Your poster is utilized and has printouts from both duos. • Every person in the group has a speaking role. • Your presentation tries to convince others to vote on your design. • After all groups have presented to the class, your teacher will conduct a vote to see which sandbox design is the favorite. Don’t forget that the principal will be here for both the presentations and the vote.
Evaluation Introduction | Task | Process | Evaluation | Conclusion | Standards | Teacher Notes • You are almost finished with your design project! Now just click on the links below to ensure that you didn’t forget a step along the way. I want everyone to receive as high of a grade as they possibly can because you all have been working very hard! • Click here to see a checklist for the Sandbox Design Duo • Click here to see a checklist for the Accessories Duo • Click here to see a rubric for you presentation. Remember that I will fill out a rubric and the principal will fill out a rubric and these will both be used to determine your group grade! • Remember that your grade will be based on your Checklist and Presentation, so complete everything and visit the Conclusion Page.
Sandbox Design Duo Checklist Click Hereto Return to the Evaluation Page
Accessories Duo Checklist • Click Hereto Return to the Evaluation Page
Group Presentation Rubric Click Hereto Return to the Evaluation Page
Conclusion Introduction | Task | Process | Evaluation | Conclusion | Standards | Teacher Notes • Great job students! I was very impressed by the way all of you worked together to create great sandboxes. Even though many of you were nervous about presenting your projects to other people for a vote, I was proud of your presentations. • Did you think design was a scary thing? Or was it more fun than you thought it would be? I have heard a few students in class wonder why we had to learn about math and science. Hopefully, now you can see how using math and science in the real world can be fun and exciting. Can you think of other ways that math and science can be used in your life? What about here in our • classroom? Or even at your house?
Standards Introduction | Task | Process | Evaluation | Conclusion | Standards | Teacher Notes Math 2.4.5 Recognize geometric shapes and structures in the environment and specify their locations. 2.6.2 Use tools such as objects or drawings to model problems. Science 2.1.5 Demonstrate the ability to work with a team but still reach and communicate one’s own conclusions about findings. 2.5.4 Begin to recognize and explain that people are more likely to believe ideas if good reasons are given for them. Language Arts 2.7.5 Organize presentations to maintain a clear focus. 2.7.11 Report on a topic with facts and details, drawing from several sources of information.
Teacher Notes Introduction | Task | Process | Evaluation | Conclusion | Standards | Teacher Notes • This webquest was created with an inclusion classroom in mind. This is the reason that the students worked within a duo instead of working separately. It helps students who struggle with reading comprehension or math skills to have a student with different strengths work together. This way, both of the students can both better understand all aspects of the project. If this type of scaffolding and support is not needed in your classroom, this duo work can be written out of your webquest. • Also, if your school is not under construction or building a new playground, the introduction can be rewritten but the basic process can remain the same. Students will still be engaged and excited about the project, especially if a principal or other guest can still be arranged to come in and view the presentations. • I created this webquest dealing with math and science because these are my weakest areas of teaching. This was a way to keep both myself and my students engaged and learning. I believe that my teaching has been strengthened through this assignment, which greatly helped my students. I hope that the same can be said of your classroom, even if the original project was modified to better suit your personal classroom needs. Good luck!