Download

1 / 13
130 likes | 299 Vues
Using the. theme. Drupal Basics Part 4 Insert a file Insert a image Alter an image. Agricultural Communications Services Integrated Media Training Sessions www.ca.uky.edu/agcomm /. Insert a File. How to insert a file (PDF, Word Doc) into a Drupal page.

E N D
Using the • theme Drupal Basics Part 4Insert a file Insert a imageAlter an image Agricultural Communications Services Integrated Media Training Sessions www.ca.uky.edu/agcomm/
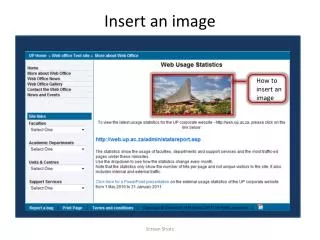
Insert a File How to insert a file (PDF, Word Doc) into a Drupal page. In the “body” area, click the cursor where you want to insert the file . Click on the insert file icon on the toolbar. Click on Upload Insert a File slide 1
Click on “Choose files” and browse for the file. Highlight the file you want to upload, and click open. The file is listed. Click on “Upload to server” You can upload more than one file at a time by clicking on the “add more” link, then the “Upload to server” Insert a File slide 2
The file uploads to the server to the site folder location. Select the box or double click the file to insert in the page. Insert a File slide 3
How to Insert a Image How to insert a image (jpeg, gif, png) into a Drupal page. Click the cursor where you want to insert the file. Click on the insert image icon on the toolbar. This opens the Image Manager Double-click on any of the images already uploaded to the server or Click on “Upload” to find the image you want to add. How to Insert a Image slide 4
If the image is on your computer desktop or on a Flash drive, you will need to browse for it and upload it to the server. Click on “Choose files” and browse for the file. Highlight the file you want to upload, and click open. The file is listed. Click on “Upload to server” How to Insert an Image slide 5
The new image file will appear in the row of images. Double-click on the image to insert into your page. Now you can see the image. Don’t forget to save your edits How to Insert an Image slide 6
To format the image, click on the image so you will see the boxes on the corners. To change the size, add borders, and description to an image, Click on the icon “insert/edit image” • Here’s where you can change the size, • alignment, and space between the image and the text. • Tab Options: General • Describe and title the image. If you don’t add an “Image • Description”, you will get a pop up alert. This is for ADA • Regulations. How to Insert an Image slide 7
Tab Options: Appearance Alignment: Choose how the image will react with the text around it. The graphic next to the dropdown demonstrates the format. Tip: If you want your text to be on the left of the image, choose Left. Dimensions: Constrain proportions and the image will size in correct dimensions How to Insert an Image slide 8
The Appearance Tab Options, continued Vertical/horizonal space: When the text wraps with an image, this adds pixels of white space around the image Border: Adds a thin border around the image Style: This shows you the final formatting of the image. Click on Update How to Insert an Image slide 8
The Advanced Tab Options, continued More options for formatting the image. You can browse to select mouse over, mouse out images. When finished, select “Insert”. The image will reflect your formatted changes. Notice in this example, the text is to the left of the image How to Insert an Image slide 9
SAVE the changes for the page and here’s what the new edits will look like. You may need to go through this process a few times until you can get familiar with it. Once you do, it’s easy. Tip: Drupal uses images and files from it’s own database, so you need to find, place or upload these files before you can use them. Once you upload the files, they are easy to find, all in one place when you browse. How to Insert an Image slide 10
Using the This concludes Drupal Basics Part 4 Thank you for using this training session. Drupal Basics sessions available: • theme Drupal Basics Part 1 An overviewLogin information Edit the homepage Drupal Basics Part 2 Toolbar basics Add a hyperlink Drupal Basics Part 3Create a new pageMain tabs menu Drupal Basics Part 4 Insert a file Insert a imageAlter an image Drupal Basics Part 5Understanding Blocks How to Insert an Image slide 11


![[insert image of vacation spot]](https://cdn2.slideserve.com/4199453/slide1-dt.jpg)