Download
1 / 66
700 likes | 1.05k Vues
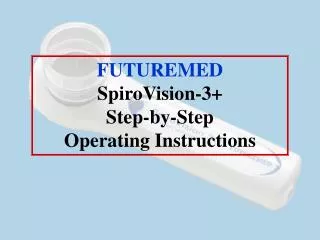
FUTUREMED SpiroVision-3+ Step-by-Step Operating Instructions. This PowerPoint presentation will give you an overview of how SpiroVision-3+ operates. The slide-show will automatically advance every few seconds, so you can just sit back and watch.

E N D
This PowerPoint presentation will give you an overview of how SpiroVision-3+ operates. The slide-show will automatically advance every few seconds, so you can just sit back and watch. If you want to stop the presentation and go back or forward, here are the instructions......
To go back to a slide, press either: Left Arrow ( ) or the Up Arrow ( ) To move ahead, press either: Right Arrow ( ) or Down Arrow ( )
SPIROVISION-3+Spirometer for Windows • Uses Windows95, 98, 2000 or NT • Connects to your computer’s serial or USB port • Performs FVC, SVC, MVV, pre/post test and inhalation challenge
Installation and Set-Up Before using SpiroVision-3+ you will need to: • Set up the turbine flow meter • Connect the instrument to your PC • Install the software
To set up the turbine flow meter Insert the clear turbine all the way in the handset until it sits in the very end
SpiroVision-3+ is driven by the computer’s standard serial port, and is adaptable for USB. . It is powered through the computer’s PS2 port.
To connect SpiroVision-3+ to your computer Plug the cable provided with SpiroVision-3+ into the handset as pictured
If you have a serial port, plug the 9 pin end of the cable into your computer.
If you have a USB port, you will need a USB-serial adapter. Futuremed can recommend or provide you one.
This adapter, provided with your SpiroVision-3+, lets you share your PS-2 port between the spirometer and a keyboard or mouse.
Connect the spirometer to the end marked “M”. Connect the mouse or keyboard to “K”.
Operation of the Software There are 3 steps to obtaining PFT reports: 1) Patient data is entered, 2) The maneuver is performed, and 3) Results are printed
This is SpiroVision-3+’s main screen. It is the starting point for data entry, testing and printing.
Archive Navigator To enter patient data Click on the Archive Navigator button.
The following window, called the Archive Navigator, will open:
Lists all Stored Tests Quickly add Patients Keep Track of Your Patient’s Visits It consists of 3 sections: Tests to Display, where test results are stored. Patient Card, for general patient data. Visit Card, for demographic data for each date.
In the Archive Navigator, click on the “Add a New Patient Card” button.
Each patient is assigned one “patient card”, consisting of permanent data such as name and date of birth. “Patient card” consists of name, ID, date of birth & sex.
You can customize some fields for information specific to your own use Fill in the required blanks (Name, ID, date of birth, ethnicity and sex.). The remaining fields are optional. Click OK to continue
You will also need to enter the patient’s heightand weight. This data can change from one visit to the next and will fill in the Visit Card. If desired, complete remaining blanks (optional). Click on OK when finished.
Predicted spirometry values are calculated based on the patient’s age, sex, race, height and weight.
The “Test” button will light up. Note that the patient’s name is now displayed on the bottom of the screen.
SPIROVISION-3+“Bubbles” Pediatric Incentive NEW • “Bubbles” blows a soap bubble that gets larger as the patient continues to exhale • “Goal bubble” is the Predicted FVC
BUBBLES: • Helps patients perform the FVC maneuver correctly and completely. • Encourages optimal test results. • Is displayed at your discretion.
Children and adults find the SpiroVision-3+ handset easy to hold and handle.
SPIROVISION-3+Colorful Graphs Real time flow/volume & time/volume graphs for best test quality and immediate results
After patient data is entered, the “test” button lights up. Select the desired maneuver.
To begin testing, click on the “start” button. The green “light” indicates that the sensor is on and communicating with the computer.
The patient can start by taking 2-3 normal breaths (tidal volume), or you may proceed directly to the forced expiratory maneuver.
As the patient exhales, you will see the flow/volume and time/volume graphs in real time.
As the patient exhales, you will see the flow/volume and time/volume graphs in real time.
As the patient exhales, you will see the flow/volume and time/volume graphs in real time.
As the patient exhales, you will see the flow/volume and time/volume graphs in real time.
Following the maneuver, the curve and actual values of the test can be compared with the predicteds.
All the tests performed during the session will be listed (from best to worst). Highlight the ones you’d like to study and save in the patient record.
Back in the patient card, the “test to display” box will now show the dates and types of tests stored. These tests were saved Interpretation for this testing session
Highlight the test or tests you’d like to display, then click on OK.
The Flow/Volume and Time/Volume graphs and test data will be displayed on screen
SPIROVISION-3+ • Full page reports can be generated through your Windows printer or fax. • Color printers can be used for colorful graphs and reports. • Reports meet ATS, OSHA, NIOSH, and SSD standards for spirometry.
Click here to “print” … … or here for “Preview” You can print the results immediately or preview the “printout” on screen before printing.
Report headers can be customized with your facility name or other desired information.