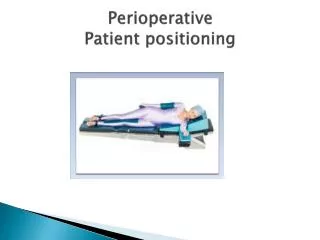
E Scan Patient Positioning
E Scan Patient Positioning. Steven S. Eilenberg, MD Director of MRI North County Radiology. Prepare Your Patients Well. Be a Calming Influence Have Them Arrive in Sweat Suit if Possible. No Metal! If in Street Clothes, is best to get them into Cloth Gown


E Scan Patient Positioning
E N D
Presentation Transcript
E Scan Patient Positioning Steven S. Eilenberg, MD Director of MRI North County Radiology
Prepare Your Patients Well • Be a Calming Influence • Have Them Arrive in Sweat Suit if Possible. No Metal! • If in Street Clothes, is best to get them into Cloth Gown • No Shoes, No Bra (if under-wire) , Excess Metal Off • Comfort First! • Immobilize with Sand Bags and or Rice Bags
Patient Preparation • Explain the Procedure • Tell Them that when the MR is Making Noise, it is Like a Camera with the Shutter Open. Any Movement During that Time Makes All the Images Blurry • Even Tapping the Foot will make the Whole Body Move and Make the Images Blurry
Patient Preparation • Make Sure all Pressure Points are Padded • Make Sure they are Warm Enough • Make Sure there is Adequate Air Flow around Them • Claustrophobic Patients Get Warm and this Makes Things Much Worse for Them • Cough Drops if they are Coughing or Clearing Their Throat
Patient Preparation • CD Music System in the Room • Encourage Patients to Bring their own Music • Consider Putting Fake Bamboo in the Room
Position, Position, Position • Feel for the Bony Landmarks • Pad the Patient. Smallest Coil Possible • Scout Images, Make Sure are Dead On • If Not Reposition • Don’t be Embarrassed to Reposition 10 Times if You Need to. The Only Way to Get Good Images!!!!! • Look for Coil Drop Off • Reposition Coil if Need Be
If You See Motion on the Scan… • Find Out Why Patient Moved • Cold? • Nervous? • Fidgety? • Post Nasal Drip? • Parkinsons Disease? • Precariously in the Coil? • Find a Remedy • Repeat the Scan Sequence and Check it Before You Let the Patient Leave the Scanner
What Does Motion Look Like? • knee motion.jpg No Motion Tech Repeated this One Motion It is a sharper image
Shoulder MRI • Comfort First! • Some External Rotation is good • On the Scout Images, Make Sure the Biciptial Groove is Pointing to the Ceiling • Don’t Simply Rely on Position of the Hand as You Can Move the Hand Independent of the Shoulder • Check the Groove on the Scout Axial. • Reposition if Necessary, Again and Again!
Shoulder MRI • Try and Put the Arm Parallel to the floor. Use Pads • Immobilize the Arm/Forearm with Sandbags • Make Sure Arm is Close to the Body and in Line with the Machine • Do this by Going to the Foot of the Table and Looking Up at the Arm • Recheck the Scout Images. • Watch Those Crosshairs!!! • Spend the Time Up Front Now so You Won’t have to Repeat Scans.
Shoulder MRI • Axials: Cover From Top of Acromion Through Entire Joint • Coronals: Rotate Parallel with the Blade of the Scapula • Sagittals: Rotate Perpendicular to the Coronals.
Setting Up the Sagittal Knee Sequences • Reference off of the Axial Images • Find Medial and Lateral on the Image • More Fat Medial • Find the “Flat Line of the Lateral Femoral Condyle” • Identify the “Anterior Corner of this Line” • Identify the “Posterior Notch, which is just Medial to this Line” (Click to See the Diagram)
Setting Up the Coronal Knee Sequence • Parallel to the Posterior Margin of the Femoral Condyles • Set This Up Off of the Axials • This is NOT Perpendicular to the Sagittal Series • Be Precise!
Where is Isocenter in the Knee? • Middle of the femoral notch • Keep Leg Parallel in the MRI even if patient is angled • Center coil on center of patella • Slight bend in the knee
Why is this a Good Scan? • OK, So the Anatomy is in the Center of the Magnet. That’s Good! • Now, Be Sure that the Coil is in the Center of the Magnet Too! • Center of the Coil is Brighter • Progressively Gets Darker the Farther Away You Get
Why is this a Good Scan? • The Red Cross-Hairs Let You Know where the Center of the Magnet is. It is Always in the Center of the Image Square • This is Where the Best Imaging is Done • Anything Away from this Spot, Image Quality Drops
Why is this a Good Scan? • I See the Distal Quadraceps Tendon • I See Below the Patellar Tendon • Coil and Patient Are well positioned • There is a Slight Bend in the Knee • No Patient Motion!
Positioning the Wrist MRI • Use Scouts to be Sure Cross-Hairs are Perfectly Positioned at Base of Capitate • Immobilize • Use a Marker Where They are Most Symptomatic • Tape Marker on Gently so as NOT to Distort the Anatomy • Use Axials to Set Up your Coronals • Put the Radial and Ulnar Styloids on the Same Plane (This is Very Important!) • Sagittals Perpendicular to the Coronals
Wrist MRI • Make sure arm is in straight and parallel with the MRI • You may have to angle the body to make the arm straight • Wrist should not be deviated radially or ulnarly • Find the radial and ulnar styloids and go parallel to these for the coronals • Go perpendicular to this line for the sagittals
Where is Isocenter in the Wrist? • At the junction of the lunate and the capitate • This is a pretty good coronal • Carpals are Laid Out • Ulnar and Radial Styloid are in the Same Image • This Patient has a Torn Scapho-Lunate Ligament (see how wide the space is?)
Positioning of the Elbow • External Rotation of the Forearm so that You Uncross the Radius and Ulna • Angle the Table and Patient so the Arm is in Line with the MR Table • Find the Distal Humerus on the Axials • Create Perfect Coronals based on the Epicondyles • Create Perfect Sagittals, Perpendicular to the Coronals • Axials Need to Go Just Distal to the Bicipital Tuberosity • Note: This is More Distal Than You Think!
Coronal Elbow MRI • Should see the epicondyles on the same slice • Also note the bicipital tuberosity of the radius. • This is how low you need to go on the Axials! • It is lower than you think!
Elbow MRI • Do the Axial Scouts • Find the Humeral Epicondyles • Go Parallel to these for the Coronals • Go Perpendicular to these for the Sagittals
Sagittal Elbow • This is what it should look like… • By the way, this patient has a torn biceps tendon
Positioning of the Ankle • Mild Plantar Flexion of the Foot • Sandbags, Immobilize, Mark Site of Maximal Tenderness or Mass • Don’t Distort the Anatomy with Marker • Tape on Lightly • Axials are Not Angled • Cover to Below Mid Foot Bony Structures • Find the Square Talar Dome on the Axial Images • Use This to Set Up Sagittals and Coronals • Skin To Skin
Positioning the Ankle • Patient Supine • Mild Plantar Flexion • Immobilize • Comfort • Do Axial Scouts • Find the Talar Dome • This is a Square • Set Coronals and Sagittals off of this
Ankle coverage • This is good positioning • How low to go with the axials? • Don’t Angle the Axials • Need to see heel pad on these sagittals and on the coronals
Ankle MRI- The Coronals • This is what a good coronal looks like • See where the cross hairs go? In the Sinus Tarsi • Can See the Medial and Lateral Malleoli on the same image