Forms
Forms. Making your HTML Page Interactive. Form Tag. First, tell the browser you are creating a Form <form></form> There are other attributes you can add, but we’ll just start with the basics. Your code should look like this:. <html> <head> <title>learning forms</title> </head> <body>

Forms
E N D
Presentation Transcript
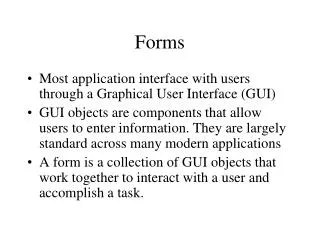
Forms Making your HTML Page Interactive
Form Tag • First, tell the browser you are creating a Form • <form></form> • There are other attributes you can add, but we’ll just start with the basics.
Your code should look like this: <html> <head> <title>learning forms</title> </head> <body> <form> </form> </body> </html>
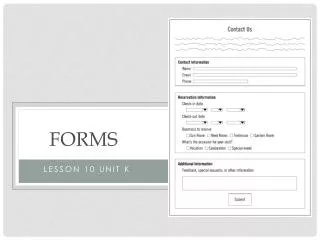
Types of input • You must define what type of input you are requiring your viewer to do • Text • Radio • Check • Simple Drop Down Boxes • Text Area
Syntax • First define the input type • Next name the input • The last step will depend on which type of input you are using • For text, it will be size (how large to make the box to answer) • For radio and checkboxes, it will be value (what value the button has)
Text Input • Text input is used to collect single line of text from the user like name, email address etc. It is the most commonly used input type.A text input item can be defined like this:<INPUT TYPE="TEXT“> TYPE="TEXT" attribute tells the browser that a single line text input box should be created.NAME="FirstName" defines the name of the field. This name will be used at the server side to identify this input item. <input type=“text” name=“First Name”> SIZE="lengthChars“ is the length of the input text box, in number of characters. <input type=“text” name=“First Name” size=“30”>
Let’s put it in a table <table width=“100%”> <tr> <td> <input type=“text” name=“First Name” size=“30”> </td> </tr> What would the next td probably be?
Text Input <form>First name:<input type="text" name="firstname" size=“20”><br />Last name:<input type="text" name="lastname" size=“30”></form> Example 1 Notice that we put what the field should contain before defining the box after it.
Radio Buttons You will use these when you only want your viewer to be able to make one choice. • <INPUT TYPE="RADIO" NAME="name" VALUE="valueOfThisItem"> • Buttons in the same set will have the same name. • For example, if you are asking someone to rate an item as excellent, good, fair, poor, the name of your buttons could be RATE. • Here’s an example: <INPUT TYPE="RADIO" NAME="rating" VALUE="excellent">Excellent !!! <BR>
Radio Buttons • <form><input type="radio" name="sex" value="male"> Male<br ><input type="radio" name="sex" value="female">Female</form> Example 2
Checkboxes • Checkboxes are used when you want the user to select one or more options of a limited number of choices. • For example, if you wanted someone to choose which items they had previously bought from your company. • The name value will be the same for each checkbox: <INPUT TYPE="CHECKBOX" NAME=“product" VALUE="checkboxValue"> Here’s an example: <INPUT TYPE=“checkbox" NAME=“product" VALUE=“MP3">MP3 player
Checkboxes <form>I have a bike:<input type="checkbox" name="vehicle" value="Bike">Bike<br>I have a car:<input type="checkbox" name="vehicle" value="Car">Car <br>I have an airplane:<input type="checkbox" name="vehicle" value="Airplane">Airplane<br> </form> Example 3
Syntax for Drop Downs • A little different than the other inputs. • You use select and option value.
Drop Downs • A drop down is a selectable list. • This time, you don’t have to use the <input form> tag. • Just use <select name=“category”>. • Then define each choice in the drop down use the <option value=“_____”>NAME </option> for each choice in the drop down • Finally, use the ending tag </select>.
Simple Drop Down Boxes <form> <select name="cars"> <option value="volvo">Volvo</option> <option value="saab">Saab</option> <option value="fiat">Fiat</option> <option value="audi">Audi</option> </select> </form> Example 4
Syntax for Textarea • Different still than the other input groups. • Textarea as a paired code is all you need. • <textarea></textarea> • You only define values or name it if you want to.
Text Area • A user can write text in the text-area. In a text-area you can write an unlimited number of characters on multiple lines. <textarea rows=“10” cols=“30”> </textarea> This would give you 10 rows with about 30 characters each for a viewer to write comments.
Text area • 10 rows and 30 columns
Text Areas <form> <textarea rows=“10” cols=“30”> </textarea> </form> Example 5
Adding a Submit Button sent to email <form method="post" action="mailto:youremail@email.com"> <br><input type="submit" value="Send"> </form>
Adding a submit button • <form method="get" action="http://address you want to link to"><input type="submit" value="click here"></form> • This is what it would look like: • Add color to your button: • <FORM METHOD="get" ACTION="http://www.lissaexplains.com"> <INPUT TITLE="submit" TYPE="submit" STYLE="background:#00ff00" VALUE="Click Here"></FORM>