Download
1 / 47
470 likes | 507 Vues
Activity management calendar solution for Microsoft dynamics crm helps you to manage activities like tasks, appointments & phone calls and view the calendar in multiple view formats. To Know More About Plugin : https://www.appjetty.com/dynamicscrm-all-in-one-calendar.htm

E N D
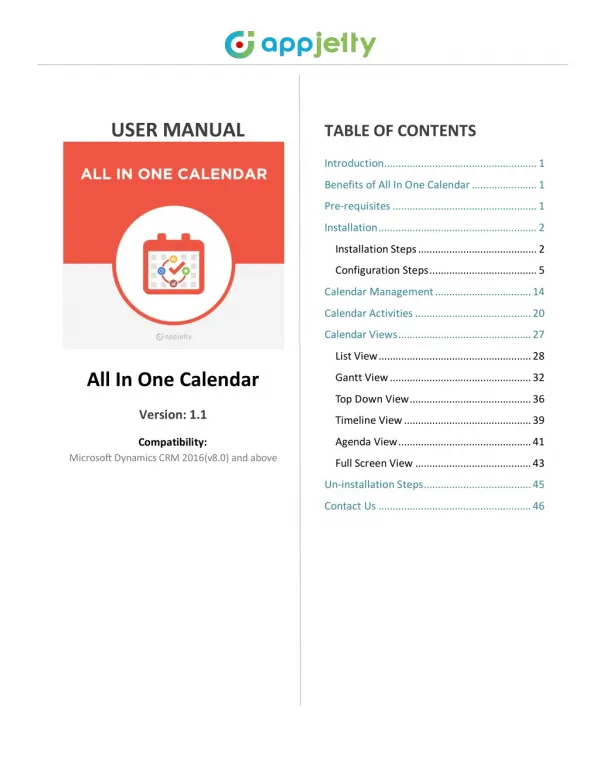
USER MANUAL TABLE OF CONTENTS Introduction...................................................... 1 Benefits of All In One Calendar ....................... 1 Pre-requisites ................................................... 1 Installation ........................................................ 2 Installation Steps .......................................... 2 Configuration Steps ...................................... 5 Calendar Management .................................. 14 Calendar Activities ......................................... 20 Calendar Views ............................................... 27 List View ...................................................... 28 All In One Calendar Gantt View .................................................. 32 Top Down View........................................... 36 Version: 1.1 Timeline View ............................................. 39 Agenda View ............................................... 41 Compatibility: Microsoft Dynamics CRM 2016(v8.0) and above Full Screen View ......................................... 43 Un-installation Steps...................................... 45 Contact Us ...................................................... 46
USER MANUAL – All In One Calendar Introduction All In One Calendar from AppJetty is a calendar solution for Dynamics CRM. This plugin helps you to manage your activities like Tasks, Appointments, Phone Calls, Letters, Fax and Emails. It also lets you create and manage your own desired With this plugin you can also view the Activities along with their attachments in the calendar through multiple views like List View, Gantt View, Timeline View, Top Down View, and Agenda View along with Day, Day Span, Month and Week View. You can also receive a reminder notification for the activities before the configured number of minutes by the admin. Admin User can also customize the look of the activities and can view the calendars of other team members as well. You can also share and display activities in other user’s calendars. activities through Custom Activities. Benefits of All In One Calendar User can manage multiple activities like Tasks, Appointments, Phone Calls, Letters, Fax and Emails. User can create all the activities (Including Custom Activities)in Calendar User can manage attachments for Emails, Appointments and Custom Activities User can receive reminder for the activity through a notification User can share appointments and Custom Activities User can see activities in different views like List view, Gantt view, Timeline view, Top down view, Agenda view along with its details from the tooltip attributes configured User can also view the calendar in Day, Week, Month and Day Span View. Admin user can easily customize the look of all the activities Pre-requisites Following point must be followed before starting the Plugin installation: You should be logged into Dynamics CRM Online. www.appjetty.com 1
USER MANUAL – All In One Calendar Installation Installation Steps To install the “All In One Calendar” plugin the following steps are to be followed On purchasing the plugin, AllinOneCalendar_1_0_0_0_target_CRM_8.0_managed (ZIP file) you will get a zip file named AllinOneCalendar_1_0_0_0_target_CRM_8.0_managed Login into your CRM Account and click on Settings -> Solutions Click on ‘Import’ to upload and install the Solution. Click on ‘Browse’ button and choose the Package Zip File for Inventory Manager from the Import Solution Window. www.appjetty.com 2
USER MANUAL – All In One Calendar Click on Next for further processing. www.appjetty.com 3
USER MANUAL – All In One Calendar Check the box to enable any SDK message processing steps included in the solution and click on ‘Import’ button to Import the Solution. Click on ‘Close’ button after successful completion message is displayed. Once you import the solution, it will be displayed in the solutions grid view. www.appjetty.com 4
USER MANUAL – All In One Calendar Configuration Steps Double click on ‘All In One Calendar’ solution to configure the plugin with your license key. This will open up a new window. Click on ‘Configuration’ from the options provided on the left side. You can request for a trail key, for a one month free trial or directly purchase the license. To get a one month free trial license key fill out the details and click on ‘REQUEST TRIAL KEY’ button. www.appjetty.com 5
USER MANUAL – All In One Calendar You will receive a mail with the Trial Key on the provided email address. Enter the License key received on email and click on ‘Submit’ button. www.appjetty.com 6
USER MANUAL – All In One Calendar Once your trial period expires, a message will be displayed that “Your plugin is expired”. To renew your license, click on ‘Renew’ andyou will be redirected to our website. Purchase the plugin with the same domain details and then click on ‘UPGRADE’ button. You can directly purchase the license for paid version also. Click on the purchase license link and purchase the paid version. www.appjetty.com 7
USER MANUAL – All In One Calendar After submitting the valid license key you will be navigated to the ‘Settings’ Tab. You can manage Default Configuration Settings from here: Views Activities Notifications Upcoming Events www.appjetty.com 8
USER MANUAL – All In One Calendar You can also manage the Default Configuration Settings directly from the All In One Calendar by clicking on the ‘Configuration’ icon. Note: Only the Super Admin User can configure the Default Configuration Settings www.appjetty.com 9
USER MANUAL – All In One Calendar Views: To configure the default view of the calendar navigate to the ‘Views’ section. It will include following dropdown menus: Time Scale View: You can set the default Time Scale View of the calendar from the following: Day Week Month Calendar View: You can set any of the Default Calendar View of the calendar from the following: List View Gantt View Top Down View Timeline View Agenda View www.appjetty.com 10
USER MANUAL – All In One Calendar Number of Days: Select the number of days in which you would like to view the calendar from the Day Span View. Activities: To configure the Activities of the calendar navigate to the ‘Activities’ section. It will include tabs for Task, Fax, Phone Call, Email, Letter, Appointment activity and each of the activity tab will contain following fields: Activity: You can check the checkbox besides the activity name to display the particular activity in the calendar by default. Default Color: You can select the default color for the activity to be displayed in the calendar. Overwrite Priority Color: You can also set the color for the activity as per the priority of the activity. There will be mainly High, Medium and Low priority for the activity also the color set as per the priority will overwrite the default color of the activity. Tooltip Attribute: You can select the tooltip attributes to be included in activity details by checking the checkbox besides the attributes. Following Attributes can be viewed: Subject: It will display the subject of the activity Activity Type: It will display the type of the activity Start Date: It will display the Start Date of the activity End Date: It will display the End Date of the activity Resource: It will display the resource name Priority: It will display the priority of the activity Duration: It will display the total duration of the activity www.appjetty.com 11
USER MANUAL – All In One Calendar Description: It will display the description of the activity Status: It will display the status of the activity Notifications: To manage the notification reminder of the activities navigate to the ‘Notifications’ section. It will include following fields: Notifications: To enable the notification reminder of the activity click ‘On’ button. By clicking on the ‘On’ button the ‘Minutes’ field will be enabled. To disable the notification reminder of the activity click ‘Off’ button. By clicking on the ‘Off’ button the ‘Minutes’ field will be disabled. www.appjetty.com 12
USER MANUAL – All In One Calendar Minutes: You can set the number of minutes before which you want the notification reminder of the activity from this field. Upcoming Events: You can set the default view of the ‘Upcoming Events’ from this section. It will contain following fields: Duration: You can select the any of the default view for ‘Upcoming Events’ from the Day, Week or Month. Save: Click on ‘Save’ button to save all the configurations settings for All In One Calendar. www.appjetty.com 13
USER MANUAL – All In One Calendar Calendar Management To start with All In One calendar go to Sales -> Dashboards. Click on ‘All In One Calendar’ button from the Dashboard to navigate to All In One Calendar. www.appjetty.com 14
USER MANUAL – All In One Calendar By clicking on ‘All In One Calendar’ you will be presented with the All In One Calendar. All the activities will be displayed in the calendar as per the default configuration made in the backend. Activity Details: To view the Activity Details mouse hover on the particular activity and the enabled tooltip for the activities will be displayed. www.appjetty.com 15
USER MANUAL – All In One Calendar To manage the activities which are to be displayed in the calendar navigate to ‘Activities’ section on the right hand side of the calendar. Thereafter check the checkbox besides the particular activity to display the particular activity in the calendar. To manage the Custom Activities which are to be displayed in the calendar navigate to ‘Custom Activities’ section on the right hand side of the calendar. Thereafter check the checkbox besides the particular activity to display the activity in the calendar. www.appjetty.com 16
USER MANUAL – All In One Calendar Now to view the activities as per the priorities navigate to ‘Overwrite Priority Color’ section and check the checkbox besides the priority. This would overwrite the actual color of the activity and display the activity in the color as per the priority of the activity. www.appjetty.com 17
USER MANUAL – All In One Calendar To enable / disable weekends in the calendar navigate to the ‘Weekends’ section. To enable weekends select ‘On’ button. To disable weekends select ‘Off’ button. To view a list of upcoming events navigate to‘Upcoming Events’ section, from here you can select the type of view and view the upcoming events as per the Day, Week or Month format. www.appjetty.com 18
USER MANUAL – All In One Calendar Resources: To view the calendar of the other users or resources navigate to ‘Resources’ section on the right hand side of the calendar and select the resources from ‘Resources’ dropdown list. Note: Only the Super Admin user can view the calendar along with the activities of all the users or resources. Other users can view the calendar of only their team or an individual depending on their respective role. Refresh: To refetch all the events or activities from the CRM click on the ‘Refresh’ icon on the right hand side of the calendar. www.appjetty.com 19
USER MANUAL – All In One Calendar Calendar Activities Create a Custom Activity: To create a custom activity navigate to Default Configurations by clicking on ‘Configurations’ button. Click on ‘Custom Activity’ tab under ‘Activities’ section. Now click on “+” icon to create a custom activity. Thereafter following fields will appear under Custom Activity tab: Type Name: Enter the name of the Custom Activity. Active: Check the Checkbox to display the activity in the calendar by default. Default Color: Select the default color for the activity to be displayed in the calendar. Overwrite Priority Color: You can set the color for the activity as per the priority of the activity. There will be High, Medium and Low priority for the activity also the color set as per the priority will overwrite the default color of the activity. Tooltip Attribute: You can select the tooltip attributes to be included in activity details by checking the checkbox besides the attributes. Save: Click on ‘Save’ button to save the activity. Cancel: Click on ‘Cancel’ button to cancel the activity. Delete: Click on ‘Delete’ button to delete the activity. Note:‘Delete’ button will appear once the Custom Activity is created by clicking on ‘Save’ button. www.appjetty.com 20
USER MANUAL – All In One Calendar www.appjetty.com 21
USER MANUAL – All In One Calendar Create an Activity: To create activities click on the calendar, a confirmation dialogue box will pop up on your screen. Thereafter click on ‘OK’ button. By clicking on the ‘OK’ button ‘Create Activity’ popup will appear on your screen. It will contain following fields: Activity: Select the type of activity you want to create. Note: The type of custom activity created from the backend will be displayed in the dropdown list. The attributes for creating an activity will be displayed as per the type of activity selected. Subject: Enter the subject of the activity. Start Time: Set the Start Date and Time of the activity. End Time: Set the End Date and Time of the activity. www.appjetty.com 22
USER MANUAL – All In One Calendar Priority: Set the priority of the activity. Description: Enter the description of the activity. Lastly click on the ‘OK’ button to create the Activity. By clicking on the ‘OK’ button a confirmation pop up will appear on your screen. To proceed further click on ‘OK’ button. Now you can view the added activity in your calendar. www.appjetty.com 23
USER MANUAL – All In One Calendar www.appjetty.com 24
USER MANUAL – All In One Calendar Attachment for Activity: To add an attachment for the activity Create an activity and click on ‘Add Attachment’ button from the ‘Create Activity’ pop up. Now choose the file to be attached as attachment and click on ‘Attach’ button and to remove the attachment click on ‘Remove’ button. Thereafter click on ‘OK’ button to proceed further. Attachment icon will be displayed on the activities in the calendar for which the attachments were added. Note: Attachments can only be added for the Email, Custom Activities and Appointment www.appjetty.com 25
USER MANUAL – All In One Calendar Share Activity: Now you can share the activities in which the multiple resources are involved. While creating the activities in which multiple resources are selected the particular activity will automatically assigned to the resources and those activities will be displayed in their calendar as well. Note: All the activities can be shared with multiple resources except ‘Task’ Activity Reminder of Activity: You will receive a notification for reminder of the activity before few minutes from the start time of the activity set from the backend default configurations. www.appjetty.com 26
USER MANUAL – All In One Calendar Calendar Views To view All In One Calendar in multiple views navigate to ‘Views’ dropdown list on the right hand side of the calendar. There are five types of views of All In One Calendar and they are as follows: List View Gantt View Top Down View Timeline View Agenda View Day Span View www.appjetty.com 27
USER MANUAL – All In One Calendar List View This view provides you a complete list of the activities sorted by date and time. In addition you can also view the calendar in the list view as per the Day, Week and Month format. Day View: You can see the activities for the particular day in the List View. www.appjetty.com 28
USER MANUAL – All In One Calendar Day Span View: You can view the calendar as per the configured number of days from Default Configurations in List View. www.appjetty.com 29
USER MANUAL – All In One Calendar Week View: You can see the activities for the particular week in the List View. www.appjetty.com 30
USER MANUAL – All In One Calendar Month View: You can see the activities for the particular month in the List View. www.appjetty.com 31
USER MANUAL – All In One Calendar Gantt View This view provides you a Gantt view in which you can view the team members in top down manner and date range will be shown horizontally. In Gantt view, you can also view all or individual Events (Activities) along with its details like Name of the event, Start date, End date and resource name. In addition you can view the calendar in Gantt View as per the Day, Week or Month format. Day View: You can see the activities for the particular day in the Gantt view. www.appjetty.com 32
USER MANUAL – All In One Calendar Day Span View: You can view the calendar as per the configured number of days from Default Configurations in Gantt View. www.appjetty.com 33
USER MANUAL – All In One Calendar Week View: You can see the activities for the particular week in the Gantt View. www.appjetty.com 34
USER MANUAL – All In One Calendar Month View: You can see the activities for the particular month in the Gantt View. www.appjetty.com 35
USER MANUAL – All In One Calendar Top Down View This view provides you a Top Down view of the calendar in which you can view a column per member on the horizontal axis and time on the vertical axis, and a plain view of activities. In addition you can view the calendar in Top Down View as per the Day, and Week view format. Day View: You can see the activities for the particular day in the Top Down View. www.appjetty.com 36
USER MANUAL – All In One Calendar Day Span View You can view the calendar as per the configured number of days from Default Configurations in Day Span View. www.appjetty.com 37
USER MANUAL – All In One Calendar Week View: You can see the activities for the particular week in the Top Down view. www.appjetty.com 38
USER MANUAL – All In One Calendar Timeline View This view provides you a Timeline view of the calendar in which you can view the simple sequential overview of the calendar- separated by day and team members. In addition you can view the calendar in Timeline View as per the Day, Week or Month format. Day View: You can see the activities for the particular day in the Timeline view. Day Span View You can view the calendar as per the configured number of days from Default Configurations in Day Span View. www.appjetty.com 39
USER MANUAL – All In One Calendar Week View: You can see the activities for the particular week in the Timeline view. Month View: You can see the activities for the particular month in the Timeline view. www.appjetty.com 40
USER MANUAL – All In One Calendar Agenda View This view provides you an Agenda view of the calendar in which you can view a sequential list view with grouping options for other members, resources or by date as per the requirements. In addition you can view the calendar in Timeline View as per the Day, Week or Month format. Day View: You can see the activities for the particular day in the agenda view. Day Span View: You can view the calendar as per the configured number of days from Default Configurations in Agenda View. www.appjetty.com 41
USER MANUAL – All In One Calendar Week View: You can also see the activities for the particular week in the agenda view. Month View: You can also see the activities for the particular month in the agenda view. www.appjetty.com 42
USER MANUAL – All In One Calendar Full Screen View To view the calendar in the full screen view navigate to right hand side of the calendar and click on ‘Full Screen View’ icon. www.appjetty.com 43
USER MANUAL – All In One Calendar Print Calendar: To print the calendar navigate to right hand side of the calendar and click on ‘Print’ icon. www.appjetty.com 44
USER MANUAL – All In One Calendar Un-installation Steps To uninstall the Solution, go to Settings - > Solutions. Check on the Plug-In Name and click on ‘Delete’. Click on ‘OK’ to Delete and uninstall the solution from CRM. www.appjetty.com 45
USER MANUAL – All In One Calendar Contact Us We simplify your business, offer unique business solution in digital web and IT landscapes. Live Chat Tickets Get instant support with our Live Chat. Raise tickets for your specific question! Send an email to support@appjetty.com or you can login to my account www.appjetty.com and click on My Support Tickets on your account dashboard, to get answers to your specific questions. Visit our product page at: https://www.appjetty.com/dynamicscrm- all-in-one-calendar.htm and click on the Live Chat button for instant support. Customization: If you would like to customize or discuss about additional feature for All In One Calendar, please write to sales@appjetty.com www.appjetty.com 46