Download

1 / 20
620 likes | 1.67k Vues
Touring adobe Premiere Pro CS6. What is Adobe Premiere pro CS6. Adobe Premiere Pro CS6 is a video- editing system that supports the latest technology and cameras with powerful tools that are easy to use and that integrate perfectly with almost every video acquisition source. Adobe Premiere Pro.

E N D
What is Adobe Premiere pro CS6 • Adobe Premiere Pro CS6 is a video- editing system that supports the latest technology and cameras with powerful tools that are easy to use and that integrate perfectly with almost every video acquisition source.
Adobe Premiere Pro • Increase demand for high-quality video content as well as an ever-changing landscape of old and new technologies. • Goal: take your footage and shape it using your original vision so that you can effectively communicate with your audience (or even the world).
Nonlinear editing • Premiere pro is a nonlinear editor (NLE) • Lets you place, replace, and move footage anywhere you want in your final edited video. • You can adjust any parts of the video clips at anytime. (Don’t have to perform edits in any order) • You’ll combine multiple clips to create sequence that you can edit simply by clicking and dragging with your mouse.
Continued… • You can work on any part of your sequence, in any order, and even combine multiple sequences. You can jump to any moment in a video clip without needing to fast-forward or rewind. It’s easy to organize clips as it is to organize files on your computer. • Supports both tape and tapeless media formats. • Bringing footage into your project is fast and easy, and it is usually unnecessary to convert your video files before using them.
Presenting the Standard digital Video workflow • Acquire the Video. This can mean recording original footage or gathering assets for a project • Capture (transfer or Infest) the video to your hard drive. With tape-based formats, Adobe Premiere Pro can convert the video into digital files. With tapeless media, it can read the media directly-there’s no need for conversion. If working with tapeless media, be sure to back up your files to a second location. • Organize your clips. These days, there can be quite a lot of video shots to choose from in your project…
Continue… • (Organize your Clips cont…) Spend time to organize clips together into special folders (called bins) in your project. You can also add color labels and other metadata • Build your edited sequence by selecting the parts of the video and audio clips you want and adding them to the Timeline. • Place special transition effects between clips, add video effects, and create combined visual effects by placing clips on multiple layers (tracks)
Continued… • Create titles or graphics and add them to your sequence in the same way you would add video clips. • Mix your audio tracks to get the combined level just right, and use transitions and special effects on your audio clips to improve the sound. • Export your finished project to videotape, to a file for a computer or for Internet playback, to a mobile device or to a DVD or Blu-ray Disc.
Enhancing the workflow • Advanced audio editing: Create and place 5.1 surround-sound audio channels, make sample-level edits, apply multiple audio effects to audio clips or tracks • Color correction: correct and enhance the look of your footage with advanced color-correction filters. You can also make secondary color-correction selections that allow you to adjust isolated colors and adjust parts of an image to improve the composition. • Keyframe controls: gives precise control you need to fine-tune visual and motion effects without exporting to a compositing or motion graphics application. • Multicam editing: You can easily and quickly edit productions shot with multiple cameras.
Continued… • Project Manger: Manage your media through a single dialog box. View, delete, move, search for, and reorganize clips and bins. Consolidate your projects by moving just the media actually used in a project and copying that media to a single location. • Creative titles: Create titles and graphics using the Premiere Pro Title Designer.
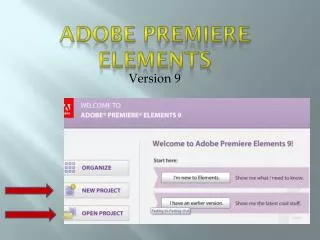
Touring the Adobe Premiere Pro Interface • Launch Premiere Pro • Click Open Project • In the Open Project Window, navigate to the Lesson 01 folder (On Digital Media Drive) Double Click the Lesson 01.prproj project file to open the first lesson in the Premiere Pro workspace (NOTE: All Adobe Premiere Pro project files have a .prproj extension.)
Workspace Layout • Make sure you are looking at the default workspace. Choose Window>Workspace>Editing. • To reset the Editing workspace, choose Window>Workspace>Reset Current Workspace. Click Yes in the confirmation dialog.
Timeline Panel • This is where you will do most of your actual editing. You view and work on sequences (edited video segments or entire projects) in the Timeline panel. • Strength: …you can nest the (place sequences inside other sequences). In this way, you can break up a production into a manageable chunks or create unique special effects.
Tracks • You can layer-or composite-video clips, images, graphics, and titles on an unlimited number of tracks. Video clips on upper video tracks cover whatever is directly below them on the Timeline. • Note: You need to give clips on higher tracks some kind of transparency or reduce their size if you want clips on lower tracks to show through.
Monitor Panels • Use the source monitor to view and trim raw clips (your original footage) • To view a clip in the Source Monitor, double click it in the Project panel. The Program Monitor is for viewing your sequence. (sb)
Workspace… • Project Panel: This is where you place links to your projects’ media files: video clips, audio files, graphics, still images, and sequences. You can use bins-similar to folders… • Media Browser: This panel helps you browse your hard drive to find footage. It’s especially useful for file-based camera media. • Effects Panel: Contains all the clip effects you will use in your sequences, including video filters, audio effects, and transitions. Effects are grouped by type to make them easier to find.
Workspace • Audio Mixer: • Effects Controls Panel: Displays the controls for any effects applied to a clip you select in a sequence. Motion, Opacity, and Time Remapping controls are always available for visual clips. • Tools Panel: Each icon in this panel represents a tool that performs a specific function, typically a type of edit in sequence.
Workspace • Info Panel: Presents information about any asset you select in the Project panel or any clip or transition selected in a sequence • History panel: tracks the steps you take and lets you back up easily. It’s a kind of visual Undo list. When you select a previous step, all steps that came after it are also undone.
Review Questions • Why is Premiere Pro considered a nonlinear editor? • Describe the basic video-editing workflow. • What is the Media Browser used for? • Can you save a customized workspace? • What is the purpose of the Source Monitor? What is the purpose of the Program monitor? • How can you drag a panel to its own floating panel?