Master Page Style Sheet
Master Page Style Sheet. การออกแบบด้วย Master Page. เว็บไซต์ทั่วไปมักมีการจัดวาง (layout) ส่วนต่างๆ ดังนี้ ส่วนหัว ( header ) และเมนู ( menu ) เนื้อหา ( content ) ส่วนท้าย ( footer ) มาสเตอร์เพจ คือ เพจต้นแบบ ซึ่งเว็บเพจใดๆ ที่มีการใช้มาสเตอร์เพจจะมีรูปแบบเหมือนกัน ทั้งหมด

Master Page Style Sheet
E N D
Presentation Transcript
การออกแบบด้วย Master Page • เว็บไซต์ทั่วไปมักมีการจัดวาง (layout) ส่วนต่างๆ ดังนี้ • ส่วนหัว (header) และเมนู (menu) • เนื้อหา (content) • ส่วนท้าย (footer) • มาสเตอร์เพจคือ เพจต้นแบบ ซึ่งเว็บเพจใดๆ ที่มีการใช้มาสเตอร์เพจจะมีรูปแบบเหมือนกันทั้งหมด • ภายในมาสเตอร์เพจจะมี tag <asp:ContentPlaceHolder> เพื่อบ่งบอกว่าตำแหน่งนี้สามารถเปลี่ยนแปลงแก้ไขได้
การสร้างMasterPage • สร้างไฟล์ใหม่ เลือก template เป็น MasterPage • ตกแต่งหน้า MasterPage ตามต้องการ <asp:ContentPlaceHolder>
การกำหนดให้เว็บเพจหน้าอื่นๆ ใช้MasterPage แบบที่ 1 สร้างไฟล์เว็บเพจใหม่ขึ้นมา • สร้างไฟล์เว็บเพจใหม่ขึ้นมา แล้วเลือก Select master page • จากนั้นเลือกชื่อ master page ที่ต้องการใช้งาน
การกำหนดให้เว็บเพจหน้าอื่นๆ ใช้MasterPage (ต่อ) แบบที่ 2 มีไฟล์เว็บเพจเดิมอยู่ก่อนแล้ว • เพิ่ม <% … MasterPageFile=“~/MasterPage.master” ... %>ลงในบรรทัดแรกของ source page ของเว็บเพจหน้านั้น • ลบแท็ก<!DOCTYPE>, <head>, <title>, <style>, <body>, <div>เพื่อลดความซ้ำซ้อนของการจัดรูปแบบ • เพิ่ม <asp:Content ID=“ProductPage” ContentPlaceHolderID="ContentPlaceHolder1" Runat="Server">………………. </asp:Content>ระหว่าง source code ของเว็บเพจนั้น
Style sheet • สร้างไฟล์ Style Sheet ขึ้นมาใหม่ โดยไปที่ Project > add new item > style sheet • ไฟล์ที่ได้นามสกุลจะเป็น .css
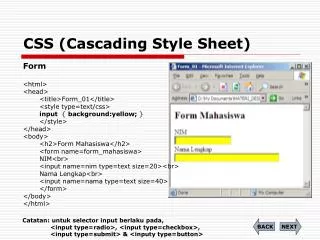
What is CSS? • CSSstands for Cascading Style Sheets • Styles define how to display HTML elements
ตัวอย่างcss • p{color:red;text-align:center; font-family:arial; } • CSS comment begins with "/*", and ends with "*/"
The class Selector • is used to specify a style for a group of elements. • This allows you to set a particular style for any HTML elements with the same class. • defined with a "." .center {text-align:center;} //จัดให้กลางทั้งเอกสาร p.center {text-align:center;} //จัดให้กลางเฉพาะ<p>
The id Selector • The id selector is used to specify a style for a single, unique element. • The id selector uses the id attribute of the HTML element, and is defined with a "#".
Three Ways to Insert CSS • External Style Sheet <head><link rel="stylesheet" type="text/css" href="mystyle.css" /></head> • Internal Style Sheet <head><style type="text/css">hr {color:sienna;} p {margin-left:20px;} body {background-image:url("images/back40.gif");}</style></head> • Inline Style <p style="color:sienna;margin-left:20px">This is a paragraph.</p>
Background color • used to define the background effects of an element. • body {background-color:#b0c4de;} • The background color can be specified by: • name - a color name, like "red" • Hex - a hex value, like "#ff0000“ • an RGB value - like "rgb(255,0,0)"
Background Image • By default, the image is repeated so it covers the entire element. • body{background-image:url('gradient2.png'); background-position:righttop; }
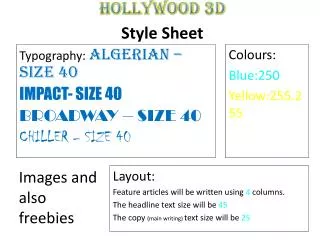
Text Decoration / Text transformation • h1 {text-decoration:overline;}h2 {text-decoration:line-through;}h3 {text-decoration:underline;}h4 {text-decoration:blink;} • p.uppercase {text-transform:uppercase;}p.lowercase {text-transform:lowercase;}p.capitalize {text-transform:capitalize;}
Fonts • Difference Between Serif and Sans-serif Fonts • On computer screens, sans-serif fonts are considered easier to read than serif fonts.
CSS Font Families • CSS Font Families
CSS Font family/style/size • p {font-family:"Times New Roman", Times, serif;} • p.normal {font-style:normal;}p.italic {font-style:italic;} • body {font-size:100%;}h1 {font-size:40px;}h2 {font-size:2.5em;} /* 40px/16=2.5em */p {font-size:14px;}
Link • The four links states are: • a:link - a normal, unvisited link • a:visited - a link the user has visited • a:hover - a link when the user mouses over it • a:active - a link the moment it is clicked
Link • a:link {color:#FF0000;} /* unvisited link */a:visited {color:#00FF00;} /* visited link */a:hover {background-color:#FF704D;} /* mouse over link */a:active {text-decoration:underline;}/* selected link */
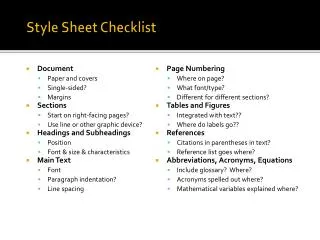
Box model • Margin - Clears an area around the border. The margin does not have a background color, it is completely transparent • Border - A border that goes around the padding and content. The border is affected by the background color of the box • Padding - Clears an area around the content. The padding is affected by the background color of the box • Content - The content of the box, where text and images appear
Border • border-style
Padding • The CSS padding properties define the space between the element border and the element content. • padding:25px 50px 75px 100px; • top padding is 25px • right padding is 50px • bottom padding is 75px • left padding is 100px • padding:25px 50px 75px; • top padding is 25px • right and left paddings are 50px • bottom padding is 75px • padding:25px 50px; • top and bottom paddings are 25px • right and left paddings are 50px • padding:25px; • all four paddings are 25px
Margin • The CSS margin properties define the space around elements.
External Style Sheet • เพิ่มคำสั่งด้านล่าง ลงไปในไฟล์ .aspxภายในแท็ก head เพื่อเรียกใช้งาน stylesheet • <head> <link rel="stylesheet" type="text/css" href="mystyle.css" /></head>
แบบฝึกหัด • สร้างไฟล์ master page จัดแต่งรูปแบบตามต้องการ โดยกำหนดให้มีส่วนชื่อของเว็บไซต์ และเมนูการใช้งาน • สร้างไฟล์ใหม่ให้ครบทุกเมนู แล้วกำหนดให้ใช้รูปแบบจาก master page • ลิงค์เมนูต่างๆ เข้ากับหน้าเว็บเพจนั้นๆ
แบบฝึกหัด ภายในมาสเตอร์เพจ กำหนดให้มีการใช้ tag ต่างๆเพื่อแบ่งส่วนหน้าออกเป็นโดยเขียนเป็น external style sheet แยกไว้อีกไฟล์หนึ่งในการจัดรูปแบบ • bodyมีการกำหนด color, background-color, width, font-family, margin, padding, border-width, border-style, • div.headerมีการกำหนด margin, border, background-color,text-align • div.menuul li a มีการกำหนด margin, padding, border, background-color, width, line-height, vertical-align • div.menuul li a:hover มีการกำหนด background-color, color, text-decoration • div.contentมีการกำหนด font-size, background-color • div.footerมีการกำหนด background-color, font-size, text-align