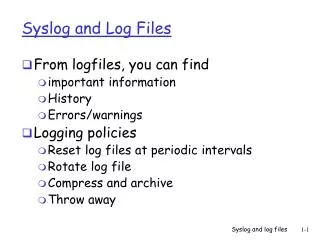
Log Files
Log Files. eValid Log Files. eValid validate s your WebSite by recogniz ing and record ing both successful and unsuccessful events. D etailed records are stored in its Log Files . eValid: Creating Log Files Step 1 of 9.


Log Files
E N D
Presentation Transcript
eValid Log Files eValidvalidates your WebSite by recognizing and recording both successful and unsuccessful events. Detailed records are stored in its Log Files.
eValid: Creating Log FilesStep 1 of 9 There are three logging methods that can be set from the Settings > Record/Play Preferences.
eValid: Logging MethodsStep 2 of 9 In the Project/Log Management settings screen, click on the Logging you prefer: .: Simple .: Standard .: Detailed
eValid Log Files: Start RecordingStep 3 of 9 In the address bar, type the URL of the WebSite you want to test. Then, Start Recording all the pages you wish to analyze.
eValid Log Files: Stop RecordingStep 4 of 9 From the pulldown menu, select Stop Recording when you are satisfied with the event.
eValid Log Files: Start PlaybackStep 5 of 8 Hitting Playback > Start Playback will report all the movement, steps and mouse clicks you executed.
Viewing eValid Log FilesStep 6 of 9 The Event Log contains all events that occurred during script playback. To view the Event Log,select Window > Logs Event Log.
eValid Log Files: Simple MethodStep 7 of 9 The Event Log is shown here using a Simple logging format, as set in Step 2.
eValid Log Files: Standard Method The Event Log is shown here using a Standard logging format, as set in Step 2.
eValid Log Files: Cache Manager If you desire to use Detailed logging, make sure that Never Use Cache is selected from Settings > Cache Managerbefore running the playback with detailed logs.
eValid Log Files: Detailed Method The Event Log is shown here using a Detailed logging format, as set in Step 2.
eValid Log Files: Select Your FormatStep 8 of 9 For a quick result check, click on View > Icon in the upper left of the log file. Choose from different log formats: View all data as Java Applet Graph. View data from a Spread sheet. View data as HTML Table.
eValid Log Files: Log GraphsStep 9 of 9 For more detailed results, use the log files to generate graphical output. Select Window > Graphs > Log Graphs.
eValid Log Files: Chart Selection On the resulting page, select the graphical chart you are looking for.
eValid Log Files: Chart Sample A sample of the color-codedPerformance Chart is shown on the left, with detailed download times from the last playback.
eValid Log Files: Chart Descriptions A detailed explanation of each dynamic analysis Chartcan be accessed by clicking the Explanation link.
eValid Log Files: Explanation Sample A sample of the chart explanation is shown on the left. It gives detailed analysis of the download times for the web pages you tested.