Comprehensive Guide to 720A Float Valve Repair and Maintenance
This guide provides a detailed overview of the repair and maintenance procedures for the 720A float valve, which has been in production since 1984. Important modifications, such as the repositioning of test cocks in 2010, are highlighted. Step-by-step instructions include canopy and bonnet removal, float poppet service, and check valve spring and disc replacement. Key reassembly notes ensure correct torque and sealing. This resource is essential for technicians seeking to maintain or service the 720A float valve effectively.

Comprehensive Guide to 720A Float Valve Repair and Maintenance
E N D
Presentation Transcript
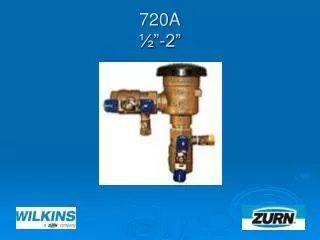
Modification Overview • Production of the 720A began in 1984 and is current. • In 2010 the test cocks were moved from the body to the inlet and outlet shutoff valves.
Canopy Removal • The canopy is secured by three screws.
Bonnet Removal • The bonnet is threaded into the body and sealed by an o-ring and a plastic washer. • Unscrew the bonnet counter clockwise. • There is no spring load.
Float Poppet Removal • The float is free once the bonnet has been removed.
Float Poppet Service • To replace the upper disc, unscrew the guide stem from the poppet.
Check Valve Spring Removal • The check spring is held in place by a groove in the body. • Work the spring until it clears the body and lift out.
Check Disc Replacement • AKA spider assembly. • The check poppet is free once the spring is removed. • The disc is free once the screw and guide are removed.
Check Seat Replacement • The check seat is part of the body. • If the seat is damaged the assembly must be replaced.
Reassembly Notes • Reassemble in reverse order. • Place the small end of spring down in the body. • Make sure the large end of the spring is secured in the body groove. • Lubricate the bonnet o-ring.