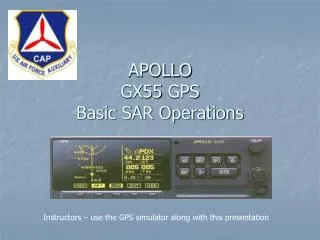
APOLLO GX50/55 GPS Basic Operations
APOLLO GX50/55 GPS Basic Operations. Introduction . This presentation is designed to introduce the basics of the GX50/55 GPS Focus will be placed on use of the GX50/55 for CAP operations This presentation is not designed to replace hands on instruction or the owners manual


APOLLO GX50/55 GPS Basic Operations
E N D
Presentation Transcript
Introduction • This presentation is designed to introduce the basics of the GX50/55 GPS • Focus will be placed on use of the GX50/55 for CAP operations • This presentation is not designed to replace hands on instruction or the owners manual • Always use your Quick Reference Guide for assistance until you are proficient using this equipment
GX50/55 Simulator • The GX50/55 Deluxe simulator is available for download from the Garmin website http://www8.garmin.com/include/gxsimulator/SimulatorPopupGX.html • You should use the simulator to gain proficiency before you get in the airplane • Using the arrow keys on your keyboard you can fly the simulator • The up and down arrows control speed and the left right arrows control direction • Be sure that you have the SAR function checked under the options menu before you turn the simulator on
Apollo Models Apollo GX50 – IFR enroute & approach certifiedApollo GX55 – IFR enroute onlyApollo GX60 – Same as 50 plus com radioApollo GX65 – Same as 55 plus com radio
Knobology On / Off Data Card Slot Soft (Smart) Keys Hard Keys Large (Outer) Knob Small (Inner) Knob
Knobology “Chapters” selected by the buttons and, “Pages” viewed by scrolling with the large and small knobs
Pre-flight actions • Power on – GPS self test • Database message • If the database is out of date the GPS is VFR only • IFR output tests • A series of unit interfaces are tested
Hard Key Functions INFO (Information) Key Supplemental information about a waypoint. Press twice to return to the previous page NAV (Navigation) Key Press to reach the NAV functions Press twice to go to the HOME page SEL (Select) Key Activates editing or selection of options. Press a second time to deactivate NRST (Nearest) Key Displays the closest waypoints to your position Enter Key Save key D> (Direct To) Key MAP Key Starts the moving map function
Soft (Smart) Key Functions Provide custom controls for specialized functions . They change depending on the page you are on.
Knobs – large and small The Outer (Large) knob changes pages or cursor position The Inner (Small) knob changes flashing items or lists more data when there is a diamond on the screen (unless in MAP mode)
Enter or Select? Enter is used to accept what is on the screen. Most times you only have to hit Enter once, two times to enter a search pattern. Select is used when you want to prompt the GPS to accept a change in the data shown
Exceptions In some cases there is nothing to change, so all you can do is hit enter to accept it
Database Functions • Everything in the database has a name: Ex: MGJ, SWF, HUO (3 letter APT identifiers no K) • The database has in it’s memory; Airport, VOR’s, NDB’s, INT’s, and USER waypoints • If it is NOT in the database, you can’t go there using the GPS Remember! You must press the NAV Hard Key then the DB Soft Key to enter the database
Database Functions • You can navigate to any point on the map using the GPS… But……. • If it is not already in the database, you have to enter it first • Think of it this way – If it does not have a name - you can’t get there from here!
Database Functions The waypoint database is divided into five categories. • Airports • VOR’s • NDB’s • INT’s • USER waypoints
Database Functions What’snotalready in the Database? • Lat / Lon Coordinates • Points on a U.S. (CAP) Grid (299A1 etc.) • 15 NM on the 150 deg Radial from UKW • The possible wreckage that you just spotted • Texas Motor Speedway
Adding Waypoints to the Database • You have to be in the NAV screen to add anything to the database (except a SAR mark) 2 1
Adding Waypoints to the Database To enter a new waypoint you have to: 1, Be in the NAV screen 2, Press the DB (Database) soft key 3, Turn the Outer Knob to the appropriate screen 4, Press Enter to accept that selection
Adding Waypoints to the Database Now you have to give it a Name You can call other types of waypoints anything you want. (AAB – 2B1 – SAR001 etc.) CAP Grid waypoints must be named using the point on the grid that you are navigating to (299A1, 302B4 etc.)
Create User Waypoint by Lat/Long 1, Press the NAV button 3, Turn Outer Knob to Create User Waypoint by Lat / Lon 2, Press the DB soft key 4, Press Enter to accept 6, Turn Outer Knob to right to move cursor to the next position – repeat previous step until you have completed naming the waypoint and entered the Lat / Lon. Press Enter to accept 5, First cursor position will be flashing turn Inner Knob to enter first digit
Selecting a waypoint Press NAV and DB or press Direct To button The waypoint type will flash Turn the small knob to select APT, VOR, NDB, INT, or USER
Selecting a waypoint Turn the large knob to move the flashing cursor Turn the small knob to change the flashing character Press DIRECT TO and the ENTER to fly to that waypoint
Deleting a Waypoint • Press NAV • Press DB • Turn the Large Knob to “DELETE USER WAYPOINT” • Press ENTER and the waypoint point identifier will flash • Turn the Small Knob to find your waypoint • Press ENTER to delete
Modify a Waypoint • Press NAV • Press DB • Turn the Large Knob to “MODIFY USER WAYPOINT” • Press ENTER and the waypoint point identifier will flash • Turn the Small Knob to find your waypoint • Press ENTER to edit • Press ENTER again when done
Where am I? The Ground Team calls and says “Where are you right now?” 3, You are Here! Degrees, minutes, seconds or UTM coordinates 2, Turn the Outer Knob until the GPS Position screen appears 1, Press the NAV Button
Nearest Function Press the NRST Key to see the nearest airport Turn the outer Knob to see other types of waypoints – VOR, NDB etc. Turn the Inner Knob to see the next closest waypoint
Information Key The INFO (Information) Key is an onboard facility directory at the touch of a button After pressing the INFO Key, turn the Inner Knob to access multiple pages of information WARNING – If you database is not current, you may be getting bad info! Always Double Check!
Map Pages Pressing the MAP Key brings you to the moving map screen
Map Pages Full Screen Map SAR Map Split Screen Map Map Setup Screen Note: The diamond means more data on this page – turn Inner Knob Use the Outer Knob to move between screens
Map Pages The Inner Knob changes map scale on these three But it changes pages on this one (remember the diamond?)
Flight Plans • The GX50 will store up to 30 flight plans with up to 20 legs each • The flight plan name can be up to 8 characters • You must enter a flight plan to use the SAR Route Search functions • You must have a flight plan with a destination airport to load IFR approaches
Create Flight Plans 1, Press NAV 2, Press FPL 3, Turn Outer Knob Until you see Create A New Flight Plan You are prompted to press SEL 4, Press SEL
Create Flight Plans 1, Name the Flight Plan Turn Inner Knob to select first letter 4, Turn Small Knob to insert waypoints 3, Press Enter 2, Turn Outer Knob to move to next position Repeat until done 6, Press Enter to begin inserting waypoints 5, Press Select
Create Flight Plans Select start point using Inner and Outer knobs Hit Enter to load next waypoint Repeat last steps Press Enter when done Your Flight Plan is now STORED in the database and can be retrieved at any time until it is deleted Once you have your waypoints loaded hit Select to accept the flight plan
Activate Flight Plans 1, Press NAV 4, Press Select 3, Turn Outer Knob to the desired flight plan 2, Press FPL 5, Press Enter to activate Flight plan is now active
Deleting Flight Plans • Press NAV and FPL • Scroll to the Flight Plan name you wish to delete • Pre SEL and scroll to DELETE PLAN • Press ENTER