Download

1 / 93
980 likes | 1.09k Vues
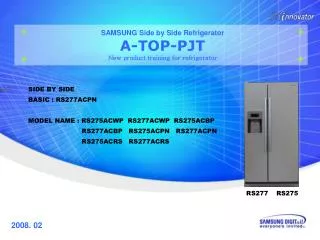
SAMSUNG Side by Side Refrigerator A-TOP-PJT New product training for refrigerator. SIDE BY SIDE BASIC : RS277ACPN MODEL NAME : RS275ACWP RS277ACWP RS275ACBP RS277ACBP RS275ACPN RS277ACPN RS275ACRS RS277ACRS. RS277 RS275.

E N D
SAMSUNG Side by Side Refrigerator A-TOP-PJT New product training for refrigerator SIDE BY SIDE BASIC : RS277ACPN MODEL NAME : RS275ACWP RS277ACWP RS275ACBP RS277ACBP RS275ACPN RS277ACPN RS275ACRS RS277ACRS RS277 RS275 2008. 02
Contents • Product information • Product function • Full disassembly and assembly • Troubleshooting and major adjustment • Circuit Descriptions • Reference Information
1. Product Information 1-1. New feature
1. Product Information 1-1. New feature
1. Product Information 1-2. Comparison of functionality vs competitor Performance
1. Product Information 1-3. Parts Name Xtra SpaceTM Door Bin Ice Maker Ice chute Glass Shelf Door Bin for RS275 (Tilt Pocket for RS277) Plastic Drawers Cover Leg Front
1. Product Information 1-3. Parts Name Water Filter Dairy Compartment Light(Upper) Gallon Door Bin Spill-proof Glass Shelf Lights (lower) (RS277) Egg Tray Chilled Bin for RS275 (Coolselectzone for RS277) Door Bin Top Lips Plastic Drawers Gallon Door Bins
1. Product Information 1-4. Product feature Twin Cooling System Multi-Flow System Xtra SpaceTM Door Alarm CoolSelectZoneTM
1. Product Information 1-5. Model Specification &Specification Chart
1. Product Information 1-6. Electric Parts Specification Components for Freezer Room Temperature Sensor Components
1. Product Information 1-6. Electric Parts Specification Defrost Related Components
1. Product Information 1-6. Electric Parts Specification Electric Components
1. Product Information 1-6. Electric Parts Specification Electric Components
1. Product Information 1-7. Dimensions of Refrigerator (inches)
1. Product Information 1-8. Optional Material Specification
1. Product Information 1-9. Cool cycle Compressor → Sub-condenser → Side Cluster Pipe(FRE) → Side Cluster Pipe(REF) → Hot Pipe→ Dryer → Capillary Tube → Refrigerator Evaporator → Freezer Evaporator→ Suction Pipe → Compressor ☜ Double Click
1. Product Information 1-10. Cooling Air Circulation Refrigerator Freezer
1. Product Information 1-11. Digital panel For RS275 For RS277 FREEZER BUTTON To set the freezer temperature, press the button repeatedly to change the set temperature in sequence between 8℉and 14℉. FRIDGE BUTTON To set the fridge temperature, press the button repeatedly to change the set temperature in sequence between 34 ℉and 46℉. COOLING OFF Cooling off stops cooling in both the freezer and refrigerator compartments but does not shut off electrical power to the refrigerator. To use this feature, press freeze and power freeze buttons simultaneously for 3 seconds until the "Ding-Dong" sounds. To cancel this mode, press the same buttons again for 3 seconds. Even though power off and on again, it remains exhibition mode. POWER COOL Speeds up the cooling process in the refrigerator LIGHTING & CHILD LOCK BUTTON When this button is pressed just one time, the dispenser light(under the display) will be on constantly. If you would like the dispenser light to come on only when using the dispenser, turn the “Light” feature off. When this button is pressed for 3 sec., the Power Freeze, Power Cool, Freezer Temp. and Fridge Temp. are locked and can not be modified. The Water and Ice dispensers are not locked and can still be used. To cancel this function, press Child Lock button again. POWER FREEZE BUTTON Speeds up the freezing process in the freezer. ICE TYPE BUTTON Use this button to choose Cubed or Crushed Ice or Ice off. When this button is pressed for 3 sec., the Filter Reset will be on.
2. Product function 2-1. Temperature Control Operation 2-1-1. Temperature Control Function When the system power is initially engaged, the default set temperature are -4℉(-20℃) for the freezer and 38℉(3℃) for the set refrigerator, respectively. The numbers shown on the digital display panel stand for the actual compartments temperatures. When thecompartment temperatures go down, so do the numbers on the display panel, and finally they reach the set temperatures. Once the system is stabilized, the display temperatures are the set temperature. 1) Freezer Temperature Control. To select a set temperature, press the Freezer Temp. button. The display shows the set temperature from -14℉(-25℃) to -8℉(-14℃) in sequence. 2) Quick Ice Freezer Temperature Control Interior Temperature of the freezer will be controlled with -14℉(-25℃) until the ice bucket is filled up with ice cubes. When the ice bucket is filled up with ice cubes, the freezer will run with original set temperature. Also, whenever the ice bucket isreleased from being filled with ice cube, the freezer will repeat to be controlled with -14℉(-25℃) degrees Celsius. But if you select "Ice Off, the freezer always will be controlled with original set temperature. 3) Refrigerator Temperature Control. To select a set temperature, press the Fridge Temp. button. The display shown the set temperature from 34℉(1℃) to 46℉(7℃) in sequence.
2. Product function 2-1. Temperature Control Operation 2-1-2. Power Freeze and Power Cool Functions • Select the Power Freeze or Power Cool buttons separately. • These buttons are toggled ON and OFF and the indicators as well. • Although you select Power Freeze or Power Cool, the set temperatures in the freezer and refrigerator are not changed. • The set temperatures for the compartments can be changed while these functions are in use. 1) Power Freeze function 1-1) When you press the Power Freeze button, the LED indicator lights right away, but there is 10 seconds lag time to an actual operation. When this button is pressed again, the Power Freeze function stops and the indicator is of immediately . 1-2) If you select Power Freeze, both the compressor and the freezer fan run for 2.5 hours continuously. 1-3) During Power Freeze, the freezer retains the current settings. 1-4) When Power Freeze expires, the indicator goes off and the freezer set temperature will be restored. 2) Power Cool function 2-1) Power Cool operation and the indicator work exactly same as the Power Freeze function. 2-2)When Power Cool is selected, COMP and Refrigerator Fan operate continuously until the refrigerator reaches -24℉(-4℃). This function will be terminated after 2 ½ hr running.
2. Product function 2-1. Temperature Control Operation 2-1-2. Power Freeze and Power Cool Functions 3) When you select Power Freeze and Power Cool together Each function works at the same time. The COMP and Freezer Fan run continuously and the Refrigerator Fan runs until -24℉(-4℃) in the refrigerator. 4) Initial Power-On 4-1) When the freezer and the refrigerator temperatures are higher than 14℉~50℉ (-10℃~10℃), respectively, if Power Freeze is selected, then the Refrigerator Fan will be off. If Power Cool is selected, then the Freezer Fan will be off. 4-2) When both functions are selected, there is no benefit of fast cooling for each compartment. 2-1-3. CHILD LOCK FUNCTION When the child lock button is pressed for 3 seconds, the child lock indicator is on with an audible tone. -When it is locked, no function commands. -This function will prevent accidental setting that may be caused by children or pets. -To unlock the setting functions, press this button for 3 seconds again.
2. Product function 2-2. Ice Dispenser and Water Dispenser • Among several ice-maker functions, the ice extraction function is performed by mechanical system. Only the relay control for a cubed-ice dispensing and the SSR control for the ice chute door are performed electronically. 1) Select Cubed/Crushed/Ice-off function 1-1) The Ice Type button selects Cubed/Crushed/Ice-off options in sequence. 1-2) A default setting is Cubed option. 1-3) If Cubed ice is selected, the Crushed ice bypass solenoid and the geared motor will allow Cubed ice to by pass the ice Crusher. 1-4) If Ice-off is selected, the ice maker will stop working. This option will be terminated when Cubed and Crushed options are selected. 1-5) The ice chute door must remain open for 5 seconds after dispensing ceases. After this 5 seconds delay, SSR will be controlled to shut the ice chute door. When the Ice-off indicator is on, only Cubed ice will be dispensed from the ice bucket. Note Do not force to close the ice chute door. Try to dispense some more ice again to work it automatically. Caution 2) Water Dispenser function 2-1) To dispense water, depress the water dispenser lever located in the dispenser recess. 2-2) When the lever is depressed, the water solenoid valve located in the machine compartment is open to flow water.
2. Product function 2-3. C-Fan Motor Delay Function of the Machine Compartment • According to the ambient temperature, the condenser fan located in the machine compartment is operated with different modes. Ranges of ambient temp. Operation Condenser-Fan is ON as soon as the compressor is on. Above 66℉(19℃) Condenser-Fan is ON with 5 minutes delay from the compressor on. Condenser Fan Delay function 60℉ ~ 65℉(16℃~18℃) Condenser-Fan is OFF regardless of the compressor operation. Below 59℉(15℃)
2. Product function 2-4. COOLSELECT ZONE FUNCTION • To select this function, open the refrigerator door and press the button on the control panel of CoolSelect Zone TM drawer. • When the CoolSelect Zone TM function is selected, the damper inside fan ductwork is open. So the refrigerator cooling is performed first, then the damper is closed to control the CoolSelect Zone TM temperature. 1) Select function 1-1) Using Select button, Cool, Chill(30℉(-1℃)), and Soft Freeze(23℉(-5℃)) options can be selected in sequence. Cool option maintains a set temperature of the refrigerator. 2) Quick Cool function2-1) If the Quick Cool is selected, LEDs will flash 60 and Min. The count will be decreased in every minute. 2-2) To cancel this function, press Quick Cool button again or Thaw button or Select button. Otherwise, it will be terminated 60 minutes later automatically. 2-3) After this function ends, this drawer will come back to Cool option. 2-4) A defrost cycle will be postponed until Quick Cool option is finished. 3) Thaw function 3-1)When the thaw button is pressed, LEDs will flash 4, 6, 10, and 12 in sequence and Hr. 3-2) The count will be decreased in every hour. 3-3) A cancellation of this function is the same as Quick Cool function. 3-4) After this function ends, this drawer will be maintained with 30℉(-1℃). 3-5) While the compressor is on, this drawer retains a certain temperature and while the compressor is off, the defrost heater is activated and Refrigerator Fan is on with a closed position of the damper.
2. Product function 2-5. WATER FILTER INDICATOR FUNCTION 1) Filter Indicator 1-1)This indicator initially lights in green. The light color will be changed to orange after 5 month operation then to red at the 6th month. The EEPROM in the control board counts a period of time regardless of a power failure. 1-2) Press Ice Type button for 3 seconds 1-3) If Ice Type button and Child lock button for 5 seconds simultaneously, this function will cease. 1-4) To restore this function, press Ice type button again for 3 seconds.
2. Product function 2-6. Ice-Maker Function • The Ice-maker is referred to the device with an automatic ice production, storage in the ice bucket and dispensing through the ice chute. 1) Ice-maker parts
2. Product function 2-6. Ice-Maker Function 2) Preparation of Ice-maker 2-1) Connect the water line to the water supply valve of refrigerator to supply water. (See how to connect a water supply line in the owner’s manual.) 2-2) Push the bucket back fully so that the guide-ice of ice maker should not touch the back of bucket. (If the back of bucket is touched the guide-ice of ice maker, the ice maker will not make ice any more because of a ice full signal.) 2-3) It takes 6 hours to harvest a first ice, and throw away 2-3 times of these ice to make sure the supplied water clean.
2. Product function 2-6. Ice-Maker Function 3) Initial Operation function 1-1) Whenever the power is on, the control board checks the ice tray leveling with the leveling switch within 2 seconds. 1-2) If the leveling switch is not off position, the geared motor will turn to the initial position to make the ice tray leveled. 1-3) When the ice tray is leveled, it will remain this position for 2 hours (1 cycle time for ice production). 1-4) After 2 hours, the sensor located under the ice tray will measure the tray temperature. If the temperature is maintained lower than 1℉(-17℃) for 5 minutes, and the ice full switch is off position, the ice tray twisting process will begin. 4) Water Supply function 4-1) When the ice tray is levelled again after ejecting ice, the water solenoid value will be controlled to supply water by time check basis. (See the “Time to supply water” Table) [Reference table]
2. Product function 2-6. Ice-Maker Function 5) Ice production 3-1) After 60 minutes pass from the water supply, the control board will check the temperature. 3-2) If the sensor reads the temperature lower than 1℉(-17℃) for more than 5 minutes, than the ice production process is completed. 6) Test function ● In order to operate a test function, press the knob (Test Switch) for 1.5 second. ● This function can be used to check a proper working, to clean the ice tray, and to adjust the water level in the ice tray. 4-1) This function only works when the ice tray is leveled and the ice full signal is cleared. 4-2) When the water line is connected, each process such as a water supply, ejection, and leveling, can be investigated by this button. 7) Ice off function 5-1) When the Ice off option is selected by Ice Type button, the ice making process will cease. 5-2) When the ice making process ceases, the final state will be the ice tray with supplied water. 5-3) When Cubed or Crushed option is selected again, the control board will check an accumulated time period. After making it 60 minutes and when the ice tray temperature is acceptable, ice ejection process will begin. 8) Functions when the freezer door is open ● When the freeze door is open, all ice maker related processes will cease in order to minimize noise and to prevent ice from dispensing. 6-1) The ice tray stops moving regardless of the position. 6-2) The water supply process remains working as usual. 6-3) If the ice tray is in the middle of ice ejecting process, close the freezer for 30 seconds and check if the tray is leveled. If it is not leveled, it must be out of order.
2. Product function 2-7. Defrosting Function 1) A defrost is determined based on the accumulated compressor on-time. 2) When the power is engaged for the first time, the defrost cycle for the freezer and the refrigerator will begin after 4 hours of the accumulated compressor on-time. 3) A defrost interval depends on the ambient temperature, the number of door openings, and the door open time. 4) A minimum interval is 6 hours and a maximum is 8 hours for the refrigerator, and 12 hours and 16 hours for the freezer, respectively. 5) The defrost heater on-time is determined by the defrost sensors as follow :
3. Full disassembly and assembly Be careful not to scratch If you want to reassemble, follow the reverse order
3. Full disassembly and assembly Be careful not to scratch If you want to reassemble, follow the reverse order
3. Full disassembly and assembly Be careful of injury If you want to reassemble, follow the reverse order
3. Full disassembly and assembly When disassembling, make sure the unit turned off If you want to reassemble, follow the reverse order
3. Full disassembly and assembly Be careful of injury Part name Work order Remarks CONTROL PANEL 1. Remove the screw under the cover 2. Insert a hand on the slot as shown,and unlock the tabs. 3. Disconnect the wire connector in the direction of the arrow. DOOR GASKET The door gasket is a molded gasket set into a channel located in the door liner. 1.Open the door 2.Grasp the gasket and pull in an outward motion until the molded gasket separates from the door liner. DOOR HANDLE The door handles allow access into the refrigerator and freezer. They are front mounted with screws. Lift the handle upward motion with on. If you want to reassemble, follow the reverse order
3. Full disassembly and assembly Be careful not to scratch If you want to reassemble, follow the reverse order
3. Full disassembly and assembly Be careful of injury If you want to reassemble, follow the reverse order
3. Full disassembly and assembly Be careful of injury If you want to reassemble, follow the reverse order
3. Full disassembly and assembly When disassembling, make sure the unit turned off If you want to reassemble, follow the reverse order
3. Full disassembly and assembly Be careful not to scratch Part name Work order Remarks DOOR BIN IN FREEZER The door bins allow storage of perishable items. 1. Push the bin up and slide it out. FREEZER DOOR LIGHT SWITCH The switch is located in the left-hand portion of the freezer and sends a signal to the processor. 1. With a small flat-blade screwdriver, unlock the locking tabs and pull the switch out until the wire connector is visible. 2. Disconnect the wire connector and remove the switch. DRAWER IN FREEZER The switch is located in the left-hand portion of the freezer and sends a signal to the processor. 1. With a small flat-blade screwdriver, unlock the locking tabs and pull the switch out until the wire connector is visible. 2. Disconnect the wire connector and remove the switch. FREEZER SHELF The shelves slide out for easy access for frozen items. 1. Slide the shelf out until it reaches its stop. 2. Tilt down and slide it out of the compartment. If you want to reassemble, follow the reverse order
3. Full disassembly and assembly When disassembling, make sure the unit turned off Part name Work order Remarks ICE DISPENSER & ICE MAKER The ice dispenser is located in the upper portion of the freezer. This assembly stores ice made by the icemaker and dispenses ice. 1. Lift the ice bucket up ① and slide out the ice dispenser assembly ②. ICE MAKER KIT 1. Remove the screws. 3. Unlock the locking tabs to separate the ice maker kit. 2. Disconnect the ice maker wire connector. Partition AUGER MOTOR CASE This shelf is designed to support the ice maker & ice dispensed and Xtra Space TM. 1. Remove the Xtra Space TM cover to push it down and pull front. 2. Slide the partition out. 3. Remove the screws (2) on the bottom front of the case. 4. Slide out the case while disconnecting the wire connect. Screw If you want to reassemble, follow the reverse order
3. Full disassembly and assembly When disassembling, make sure the unit turned off
3. Full disassembly and assembly When disassembling, make sure the unit turned off If you want to reassemble, follow the reverse order
3. Full disassembly and assembly When disassembling, make sure the unit turned off If you want to reassemble, follow the reverse order
3. Full disassembly and assembly When disassembling, make sure the unit turned off Ambient Thermistor If you want to reassemble, follow the reverse order
3. Full disassembly and assembly When disassembling, make sure the unit turned off If you want to reassemble, follow the reverse order
4. Troubleshooting and major adjustment 4-1. Troubleshooting 4-1-1. If power is not ON ☜ Double Click
4. Troubleshooting and major adjustment 4-1. Troubleshooting 4-1-2. If the compressor and cooling fan motor don’t work normally ☜ Double Click
4. Troubleshooting and major adjustment 4-1. Troubleshooting 4-1-3. If defrost function don’t work normally ☜ Double Click
4. Troubleshooting and major adjustment 4-1. Troubleshooting 4-1-4. If there is a trouble with self-diagnosis ☜ Double Click