Download
1 / 16
160 likes | 194 Vues
An introduction to the many ways to take pleasing digital photographs through your microscope. Concentrating on practical, simple, low cost solutions, but mindful of some of the technical problems that can beset the beginner. Some of the solutions offered will be available as demonstrations.

E N D
An introduction to the many ways to take pleasing digital photographs through your microscope. Concentrating on practical, simple, low cost solutions, but mindful of some of the technical problems that can beset the beginner. Some of the solutions offered will be available as demonstrations. Photography through the MicroscopeDavid Linstead PhD
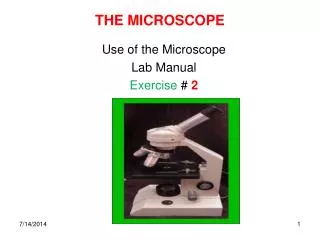
Photography through the Microscope • The first considerations to make when planning to take photographs through the microscope are: • What type of microscope is available, monocular, binocular or trinocular? • Is it the modern ‘infinity corrected’ type or the older finite tube length type? • What is its source of illumination? • What type of camera is available, digital compact or digital SLR (single lens reflex) • Some types of camera, e.g. digital compacts with large zooms greater than about X6 are simply unuseable through the microscope.
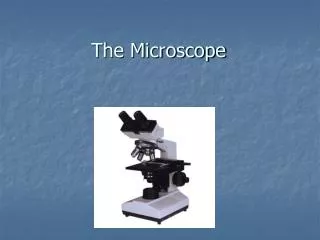
Photography through the Microscope • What type of microscope do you have ? Photo tube Trinocular head Binocular Microscope Trinocular microscope
Photography through the Microscope • For the best photographic results a trinocular head is desirable, but by no means essential. • Desirable features are: • A dedicated place where a camera can be semi-permanently attached. • The subject can be located and the photograph composed through the eyepieces, and then the light path switched to the camera. • Some trinocular heads have a permanent light split between the eyepieces and the phototube allowing immediate capture of the image seen in the eyepieces. • It is usually possible to make the image at the camera ‘parfocal’ with the image at the eyepieces. That is if the image is in correct focus visually it will be correctly focused at the camera sensor. • The trinocular head is an ideal solution for the DSLR
Photography through the Microscope • Tube Length and Correction for Chromatic Aberration • Most older (pre-mid 1980s) microscopes that are available to the amateur however, will be the older finite tube length type, usually with a 160mm designated tube length. • Microscopes of this age split the task of correcting for chromatic aberration (CA, colour fringing) between the objective and the eyepiece. • Using an eyepiece to take photographs that is incompatible (wrong type, different manufacturer) with the objective, can lead to disturbing CA in the form of coloured (typically purple) fringing of edges in the image. • Infinity corrected microscopes (marked ‘∞’ on the objective) make all CA correction in the objective, making photography easier. • The lens of a compact camera may also cause problems with CA when it is introduced into the light path after the eyepiece.
Photography through the Microscope • What is the source of illumination? • The type of illumination used can make an important difference to the quality of the photographic image obtained. • Built in illuminators using halogen lamps give good results, as they produce light which is closer to daylight, but there may still be a colour cast which needs the be corrected in post processing. • Illuminators using older filament lamps have a cooler colour temperature and will produce a yellowish cast that needs to be corrected either in post processing or with a suitable filter. • Electronic flash produces ideal illumination in many ways, but is tricky to set up for the beginner.
Photography through the Microscope • Choice of Camera • There is no doubt that combining a DSLR camera with a trinocular microscope gives the greatest flexibility for taking good pictures through the microscope. • A simple and effective means of coupling the camera involves using an adapter which positions the camera minus lens at the right distance above an eyepiece to intercept the image with the camera’s sensor. • The eyepiece can be a specialist projection eyepiece designed for photomicrography, or an ordinary one, both work well. • It is important that the eyepiece, whether projection or not, matches the objective for colour correction or CA will result.
Photography through the Microscope Leitz X4 compensating projection eyepiece Canon EOS 40D camera mounted in a Zeiss Standard trinocular microscope with a Pentax adapter
Photography through the Microscope • Digital SLR cameras provide a number of additional features that simplify taking high quality photographs through the microscope. • DSLRs often have a ‘Live View’ facility which allows a live magnified image of the subject to be viewed on the camera’s LCD screen, making accurate focussing easier. • Many DSLRs have a mirror lock up or ‘silent mode’ facility which eliminates the vibration associated with ‘mirror slap’ as the reflex mirror swings up and down. This vibration is an inherent problem of reflex cameras not present in digital compacts. • Many DSLRs have a facility to remotely release the shutter which is essential to reduce vibration and is often not present in compact cameras. • Some advanced DSLRs offer the facility to completely control camera function from a computer which has numerous benefits. • For the advanced photomicrographer DSLRs work much better with external electronic flash.
Using a compact camera through the microscope It is possible to get very good images from the microscope using a cheap compact camera and a simple adapter to connect it to one of the eyepieces of a binocular or monocular microscope. The important thing is to get the front element of the compact camera lens as close as safely possible to the eyepiece so that it is in the same position as the eye would be. Camera zoom should be as low as possible, super zoom cameras are useless as the zoom magnification will be added to the eyepiece magnification. Less than X6 zoom is best. Cameras which don’t extend the front of the lens when zooming are ideal, but now uncommon. Some zooming will usually be necessary to remove vignetting which would otherwise reduce the field of view to a just a central circle. Eyepieces should be as wide field as possible and ideally of magnification less than X10, say X7 or X8 Photography through the Microscope
Photography through the Microscope • Using a compact camera through the microscope II • Eyepieces should be compatible with the objective otherwise there will be CA which could be made worse by the camera lens. • The compact camera should have a large LCD screen to make focus checking easier. • A camera with a swing out, tiltable LCD is an advantage. • High pixels counts are not essential, 4 megapixels will provide adequate resolution for everything except expensive high numerical aperture planapochromat objectives. The only advantage of a higher pixel number is to allow greater cropping of the final image. • Compact cameras I have used successfully are the Nikon Coolpix 4500, Nikon Coolpix 5100 and Canon G9. • It is easier to attach to the microscope if the camera has an adapter available to add a filter thread to the front of the lens when extended. • Adapters are available to cope with cameras without this facility.
Photography through the Microscope • Some examples of adapters for compact cameras Nikon Coolpix 4500 with female 28mm filter thread built in and non-extending X4 zoom + Zeiss Jena X10 wide angle eyepiece with male 28mm thread = simplest possible method of coupling and good results! A cheap and quite effective generic version of this eyepiece is available from Indiaon Ebay for £31.
Photography through the Microscope 28mm threaded eyepiece screwed onto the Coolpix 4500 and remote release plugged in ready to attach to a microscope instead of the existing eyepiece
Photography through the Microscope Three part adapter to attach a Nikon Coolpix 5100 to a microscope. The tube screws onto the camera body and provides a 28mm thread and the eyepiece gripping adapter attaches to it via a 28mm to a 52mm adapter. The 28mm adapter can also be used to attach to a threaded eyepiece.
Photography through the Microscope Nikon Coolpix 5100 12 Mpixel camera with adapter assembled. It is attached via a 28mm to 52mm thread converter to a simple adapter which slides over the existing eyepiece and is held in place by tightening the three screws. No remote release is available for the Coolpix 5100, so the 10 second self timer must be used to avoid shake.