UNIX
UNIX. Session 1. UNIX OS. UNIX is an Operating System just like MS-DOS. But MS-DOS is a single user OS where as UNIX is a Network OS. UNIX is one of the oldest OS available on computers today. UNIX is in use from 1970’s - making it one of the most reliable and trusted OS.

UNIX
E N D
Presentation Transcript
UNIX Session 1
UNIX OS • UNIX is an Operating System just like MS-DOS. • But MS-DOS is a single user OS where as UNIX is a Network OS. • UNIX is one of the oldest OS available on computers today. • UNIX is in use from 1970’s - making it one of the most reliable and trusted OS. • Today, UNIX has over 50% of Network OS market share.
NETWORK OS ROLES • A network OS like UNIX has the following roles: • Sharing of resources. For e.g. a printer connected to server can be used by all network users. • Account Management. User needs to login to work with a network. • Security. Security is provided by User Login, File and Directory permissions. • Network Services. Users can send and receive messages across terminals. • Memory Management. All users processes run in Server sharing available memory.
UNIX OS ROLES • UNIX as a Network OS, has the following roles: • Peripheral Management : Manages all peripheral devices connected to network. • Memory Management : Allocates and monitors memory to client computers. • Account Management : Manages user accounts and passwords. • Network Management : Establishes connection between nodes and server and manages the connection. • Process Management : Monitors the processes that are running on the server.
FEATURES OF UNIX OS • MULTI USER : The ability to maintain a network • MULTI TASKING : The ability to run many programs at the same time • BACKGROUND PROCESSING : The ability to send a process in Background there by running another process in Foreground • TIME SHARING : The processor time in Server is shared among all nodes. • UTILITIES : UNIX comes with a lot of small utility programs. • PORTABILITY : A program written in Unix OS can be run on any other OS without changing.
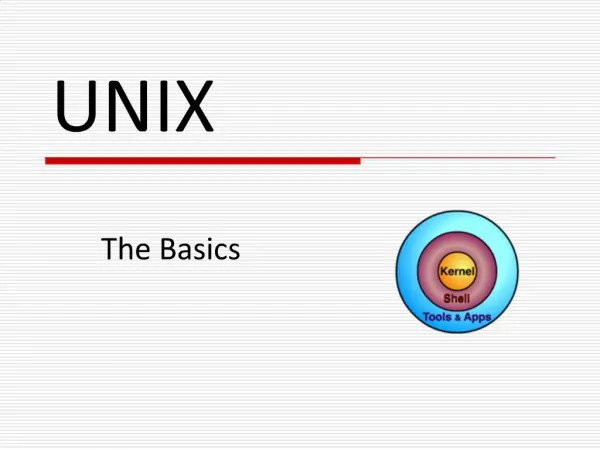
INSIDE UNIX • UNIX OS has the following structure: SHELL KERNEL User UTILITIES
UNIX STRUCTURE • KERNEL : It controls the Hardware. Eliminates the need for user to know the internals of Hardware. • SHELL : The interface between the user and Kernel. It accepts user commands and executes them. Acts like a Command Interpreter. • UTILITIES : These are small shell programs run by user.
Working with UNIX • In order to work with UNIX, one has to connect to UNIX Server. • This is done by using a Communication S/W such as Telnet. • Start Telnet by typing ‘Telnet’ at StartRun. • Select Connect Remote System. • Type the IP address of Unix. • In our lab, use 200.100.100.130 as the IP Address. • After some delay, login prompt appears.
Logging on to UNIX Network • Once you get the Login screen, type your user name and press enter. • Type your password and press enter. • If you provide user name and password correct, the Shell prompt ‘$’ appears. • If User name or Password is incorrect, you must re-enter them. • To disconnect from UNIX, type ‘logout’ at ‘$’ prompt or Press Control+D. • Select ConnectExit to close Telnet.
UNIX FILE SYSTEM • Unlike DOS, UNIX has a Hierarchical File System. • User rights are established through File Access Permissions. • The following is the directory structure of UNIX:
USERS IN UNIX ENVIRONMENT • root : This user is the Super User in UNIX. ‘root’ is the System Administrator. Responsible for startup, shutdown, user account management, backup etc. • users : All other users come under this category. For each such user, a home directory exists under /usr directory with the login name. • group : Contains a collection of users with similar interests. Groups also can be assigned permissions. • guests : Any other users who don’t have a local account but want to access the system.
UNIX Commands • Unix OS treats directories also as files. Hence, commands can be divided into: file commands, directory commands and utilities. • File commands work on files. They allow you to do common tasks like copying files, deleting files etc. • Directory commands work on directories. Tasks such as creating, changing, removing directories etc. come under this category. • Utilities enhance productivity. UNIX OS comes with lot of utilities which help the user to carry out different tasks.
Usage of Simple commands • DATE command • The date command tells us the current date and time. • WHO command abc tty0 Jun 4 11.17 xyz tty4 Jun 4 11.30 asd tty9 Jun 5 11.40 • WHO AM I • you ttya Jun 4 12.20 • $
Continued … • Fingercommand • In larger systems, you may get a far longer list than the one used in our who command , and the identifies of some of the users may not be clear to you. To get more information about specific users, use the finger command. • Eg: finger gopi (gives information about the specific user I.e gopi) • Eg: finger (of all)
Continued … • Writecommand • This command allows you to send messages to other users over the UNIX network. • Write command allows you to communicate with other users, by copying lines from your terminal to theirs. • A write command appeared in version 6 AT&T UNIX.
Continued … • Syntax: • Write <username> • Example: • write suresh • Note: • If user has not logged in you will get a message that the user has not logged in.
Continued … • TALK command • This command is used to talk to another user • This command is a visual communication program which copies lines from your terminal to that of another user. • This command appeared in 4.2BSD (Berkeley Distribution) April 22, 1991 • (Before Use Talk Make message as y [mesg ypress enter]).
Continued … • Syntax: • talk <user name> • Example: • talk scott • Note: • If the user has not logged in a message gets displayed “your party is not logged on” or “connection not established” • Press ctrl+alt+del to disconnect from talk command.
Continued … • MAIL command • This command is used to send and receive mail • To send a message to one or more people, mail can be invoked with arguments which are the names of the people to whom the mail will be sent. • Syntax: • mail <username>
Directory Commands - pwd 1. pwd (print working directory) : Since UNIX has a hierarchical file system, it would be helpful for the user to know what is his/her current working directory. ‘pwd’ command displays current working directory. E.g.: After logging in, if you type $ pwd <enter> /home/<your login name> $ cd / <enter> $ pwd <enter> / (since we changed to ‘/’ root)
‘cd’ command 2. This command does the following: (a) without arguments, takes you to your HOME directory (cd) (b) changes to a given directory (cd <dir>) (c) takes you to parent of current directory (cd..) E.g.: $ cd /etc <enter> (changes to /etc dir) $ pwd <enter> /etc $ cd .. <enter> (takes you to parent dir) $ pwd <enter> (to know current dir) / $ cd <enter> (takes you to home dir)
‘mkdir’ command 3. To create a directory, use ‘mkdir’ command. You should have ‘write’ permission to the parent directory to create a new directory. E.g.: $ mkdir shell <enter> (create a dir - shell) $ cd shell <enter> (change to new dir) $ pwd <enter> /<current dir>/shell $ mkdir /home/<your login>/c <enter> $ cd <enter> (go to your home) $ cd c <enter> (change to new dir) $ pwd <enter> (it would be ‘c’ dir)
‘rmdir’ command 4. To delete directories, provided they are empty, use this command. E.g.: $ mkdir files <enter> $ cd files <enter> $ pwd <enter> /home/<your login>/files $ cd .. <enter> (change to parent dir) $ rmdir files <enter> (remove files dir)
‘ls’ command 5. To display a list of files in current directory, use ‘ls’ command. It is similar to MS-DOS ‘dir’. E.g: $ ls <enter> … … … (displays sorted list of current dir) • The following options can be used with ‘ls’ command: • l long listing of files • r reverse listing i.e. z to a • R includes sub dirs also (same as dir/s) • x width wise display Continued...
‘ls -l’ Command • The following is the output of ‘ls -l’ command: total 3 (total number of blocks occupied) -rw-r--r-- 1 user3 users 33 Jan 2 10.00 names drw-r--r-- 2 user3 users 88 Jan 12 03.45 test Group File name Size Date & time User (Owner of file) No. of blocks File Access permissions (First letter indicates type of file - ‘d’ for dir and ‘-’ for ordinary file. Next nine letters indicate File Access Permissions)
File commands - ‘cat’ 1. ‘cat’ : displays contents of files (same as MS-DOS ‘type’ command). E.g.: $ cat <enter> (without arguments …) takes input from keyboard until Control+d is pressed (same as MS-DOS ‘copy con’) $ cat <file1> <file2> (more than one arg) displays contents of <file1> and then contents of <file2> • The message ‘cat : can’t open <file>’ is displayed if given file doesn’t exist.
‘cp’ command 2. This command is useful to copy files. Syntax: cp <source> <destination> - both source and destination must be given. E.g.: $ cp test names <enter> the file ‘test’ is copied as ‘names’ $ cp test /home/ftp/backup <enter> the file ‘test’ is copied into /home/ftp/backup directory
‘rm’ command 3. To delete files, use ‘rm’ command. Syntax: rm <file> E.g.: $ rm test <enter> deletes the file test under current directory $ rm /home/<your login>/c/core <enter> deletes the file ‘core’ under ‘c’ directory under your HOME directory (if file exists !)
‘mv’ command 4. To rename or to move files, use ‘mv’ command. Syntax: to rename: mv <file> <new file name> to move: mv <file> <directory> E.g.: $ mv names names1 <enter> rename ‘names’ as ‘names1’ $ mv names1 /home <enter> move ‘names1’ file to ‘/home’ directory
Head and Tail command • This command is used to display the initial part of a text file. This can be thought of as a complement command to the tail command which displays the last part of a text file. By default head command displays first 10 lines of a file and the tail command the last 10 lines. • Syntax: • $ head [ -count] [filename …] • Example: • $ head – 4 fruits (will display the first four lines of a file called fruits)
UNIX Wildcards • UNIX OS supports the following wildcards: * - indicates all files in current directory or more than one char ? - indicates one char [ ] - used for range of chars \ - removes the wildcard meaning. E.g: $ cat * <enter> (displays contents of all files)
Continued … $ cp a* /ftp <enter> (copy all files starting with ‘a’ to /ftp) $ ls -l f?? <enter> (files starting with ‘f’ then two chars) $ ls -l [ab]* <enter> (files starting with either ‘a’ or ‘b’) $ rm [a-g]* <enter> (files starting with any letter between a to g) $ cat ab\? <enter> (display contents of file ‘ab?’)
Getting help through ‘man’ command • UNIX OS displays online help using ‘man’ command. • Syntax: man <command>. • Use arrow keys to move forward and backward. • Type ‘q’ to exit from help. • Use ‘/<search>’ to search in displayed help. • Use ‘/’ to repeat search. • E.g.: $ man cd <enter> displays help about ‘cd’ command.
Changing password using ‘passwd’ • If you wish to change your password, use ‘passwd’ command. • At ‘$’ prompt, type ‘passwd’ and press <enter>. • UNIX will ask for your old password. • Type your old password and press <enter>. • If old password is typed correctly, UNIX will ask for new password. Type the new password and press <enter>. • UNIX will ask you again to type new password for confirmation. Type it and press <enter>. • The new password would come into effect from next time you login. • Passwords are stored in ‘passwd’ file in /etc dir in encrypted form.
Rules for Passwords • The following are general rules for passwords (which may change from network to network due to the password policies in effect): • min length : 6 chars • max length : 14 chars • should contain : alphabets, digits and atleast one special character • can’t be : user name, dictionary word such as name of persons, places etc. • If a user forgets password, system administrator can assign a generic password and user can change it later.
FILE ACCESS PERMISSIONS • As you are already aware, UNIX offers security to files and directories through File Access Permissions (FAP). • The permissions that can be given to files and directories are: • ‘r’ read. User can copy, view files • ‘w’ write. User can edit, rename,delete files • ‘x’ execute. User can run the programme. • These permissions can be given to ‘User’, ‘Group’ and ‘Others’ by the creator of the file or system administrator (root). Continued...
Giving FAP using ‘chmod’ command • To give FAP, use ‘chmod’ command. • Syntax: chmod <permissions> <files> • Use ‘+’ to give a permission and ‘-’ to remove a permission. • Use ‘u’ for user,‘g’ for group and ‘o’ for others • In the output of ‘ls -l’ command, from second letter, first three letters indicate FAP for user, next three for group and last three for others. • You can use the following numerics to assign permission: r4, w2 and x1. For user, multiply these by 100, for group multiply by 10 and for others multiply by 1.
‘chmod’ command examples FAP before chmod command FAP after r w - r - - - - - chmod 644 <file> r w - r - - r - - r w - - - - - - - chmod 764 <file> r w x r w - r - - r w x r - - r - - chmod 600 <file> r w - - - - - - - r w - r - - r - - chmod g +w <file> r w - r w - r - - r w - r w - - - - chmod ug +x <file> r w x r w x --- r - - - - - - - - chmod +r <file> r - - r - - r - - r w - r - - r - - chmod 611 <file> r w - - - x - - x
Setting group using ‘chgrp’ command • To change the group of file(s), use ‘chgrp’ command. • Only the owner of file(s) or system administrator can change the group. • Syntax: chgrp <group> file(s) • E.g.: $ chgrp students test <enter> changes the group of file ‘test’ to ‘students’ • To see whether the group has changed or not, use • command.
Redirection • Redirection changes the assignments for standard input and standard output. • Output Redirection • When output from a process is redirected to sources other than the standard output, it is called Output Redirection. The Shell command line format for redirecting output to a file is, • Syntax: • $ command > file
Continued … • Example: • $ date > today • $ cat today • Input Redirection • We can redirect the input for a command using input redirection. • Syntax: • Command < file • Here file is the source of the data for command.
Continued … • Example: • Cat < names Siny Siju Simi Suni • Redirecting both Standard Input & Output: