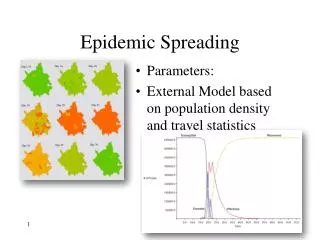
Lepidoptera Spreading Techniques
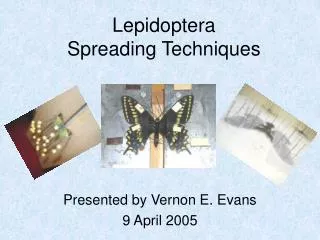
Lepidoptera Spreading Techniques. Presented by Vernon E. Evans 9 April 2005. Techniques discussed. Standard groove board spreading with pins Vern’s upside down non-groove board method Magnetic groove board spreading. But wait…. First we need to…. prepare the specimen.

Lepidoptera Spreading Techniques
E N D
Presentation Transcript
LepidopteraSpreading Techniques Presented by Vernon E. Evans 9 April 2005
Techniques discussed • Standard groove board spreading with pins • Vern’s upside down non-groove board method • Magnetic groove board spreading
But wait… First we need to… prepare the specimen.
The injection method • Take a syringe with warm water and inject it into the thorax of the specimen. Advantages Disadvantages 1. Fast way to prepare specimen for spreading. 2. Very little setup preparation needed. 3. Easy to learn. • Does not provide a completely relaxed specimen. • Sticking a syringe into a dried specimen could cause damage.
Freezer method • All freshly emerged specimens and fresh field caught specimens are placed directly into the freezer to spread be spread soon thereafter. • Remove from freezer and let specimen thaw and spread. Advantages Disadvantages • No setup required. • No materials needed. • Fast and easy. • Potential problem with spouse when they find dead bugs near their food. • Specimen will eventually dehydrate and another method must be used.
Vern’s Relaxing chamber I utilize a relaxer similar to what others may use with only a few modifications for speed.
Differences in MY relaxer • I use only water on my multiple layers of paper towels. • I place my specimens directly onto the damp paper towels. • Data goes on a corresponding board in the same order the specimens are in the relaxer.
Advantages of MY relaxer • Complete specimen is relaxed • Because specimen is in direct contact with moist towel re-hydration occurs very quickly. Time to re-hydrate Lycaenidae 20-30 minutes Papilionidae 2-3 hours Saturniidae 6-10 hours
Possible disadvantages • You can not leave the specimens in the relaxer too long or mold will occur. • There is a possibility of the relaxer being disturbed while the specimens are in it and this would cause a problem since the data will no longer correspond with their location in the relaxer. ** This have never happened to me.
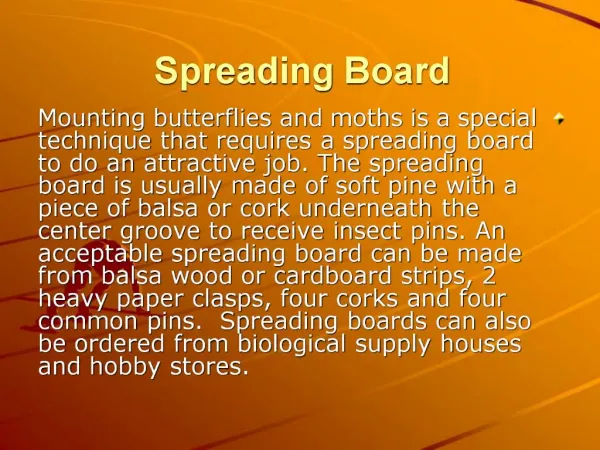
Standard groove board with pins This is the most commonly described way to spread lepidoptera. • Materials needed: • Grooved spreading board
Standard groove board with pins This is the most commonly described way to spread lepidoptera. • Materials needed: • Grooved spreading board • Pins
Standard groove board with pins This is the most commonly described way to spread lepidoptera. • Materials needed: • Grooved spreading board • Pins • Paper strips
Standard groove board with pins This is the most commonly described way to spread lepidoptera. • Materials needed: • Grooved spreading board • Pins • Paper strips • Don’t forget the Specimen.
Todd Stout is demonstrating this method with a pima orangetip • Insert pin into specimen’s thorax
Todd Stout is demonstrating this method with a pima orangetip • Insert pin into specimen’s thorax • Set specimen into grooved board
Todd Stout is demonstrating this method with a pima orangetip • Insert pin into specimen’s thorax • Set specimen into grooved board • Set body flush with board
Todd Stout is demonstrating this method with a pima orangetip • Place clear strips over wings to aid in positioning
Todd Stout is demonstrating this method with a pima orangetip • Place clear strips over wings to aid in positioning • Use pins to position and hold wings in place
Todd Stout is demonstrating this method with a pima orangetip • Place clear strips over wings to aid in positioning • Use pins to position and hold wings in place • Use as many pins as necessary to secure wings in desired position
Todd Stout is demonstrating this method with a pima orangetip • Todd places this device under the abdomen to keep it level with the thorax.
Todd Stout is demonstrating this method with a pima orangetip • Todd places this device under the abdomen to keep it level with the thorax. • Here Todd is putting it into place.
Todd Stout is demonstrating this method with a pima orangetip • Todd places this device under the abdomen to keep it level with the thorax. • Here Todd is putting it into place. • Todd uses this device to position the head and antennae properly.
Todd Stout is demonstrating this method with a pima orangetip • Todd places the data label with the specimen.
Todd Stout is demonstrating this method with a pima orangetip • Todd places the data label with the specimen. • The specimen is now ready to dry. Finished product!
Magnetic grooved board This method is similar to the previous method. The major difference being the use of a metal spread board and magnets in place of pins to hold the wings in place until the specimen is dry. • Materials needed: • Grooved METAL spreading board
Magnetic grooved board This method is similar to the previous method. The major difference being the use of a metal spread board and magnets in place of pins to hold the wings in place until the specimen is dry. • Materials needed: • Grooved METAL spreading board • Magnets
Magnetic grooved board This method is similar to the previous method. The major difference being the use of a metal spread board and magnets in place of pins to hold the wings in place until the specimen is dry. • Materials needed: • Grooved METAL spreading board • Magnets • Pins
Magnetic grooved board This method is similar to the previous method. The major difference being the use of a metal spread board and magnets in place of pins to hold the wings in place until the specimen is dry. • Materials needed: • Grooved METAL spreading board • Magnets and pins • Paper strips • Still need a specimen
Jack Harry is demonstrating this method with a nitra form anise swallowtail • Jack places the insect pin through the thorax with tweezers.
Jack Harry is demonstrating this method with a nitra form anise swallowtail • Jack places the insect pin through the thorax with tweezers. • Jack set specimen in groove of metallic board and prepares to place strip over wings.
Jack Harry is demonstrating this method with a nitra form anise swallowtail • Jack places the insect pin through the thorax with tweezers. • Jack set specimen in groove of metallic board and prepares to place strip over wings. • Notice Jack uses one long continuous strip on each side for the wings. These continuous strip will be used for all specimens on the board.
Jack Harry is demonstrating this method with a nitra form anise swallowtail • Now the specimen’s wings are under the strip and ready for positioning.
Jack Harry is demonstrating this method with a nitra form anise swallowtail • Now the specimen’s wings are under the strip and ready for positioning. • Jack now uses magnets in place of pins to hold the wings in the desired position. He uses the grid lines in the metal to ensure a proper spread.
Jack Harry is demonstrating this method with a nitra form anise swallowtail • Now the specimen’s wings are under the strip and ready for positioning. • Jack now uses magnets in place of pins to hold the wings in the desired position. He uses the grid lines in the metal to ensure a proper spread. • Jack utilizes an insect pin to manipulate the wings into the desired position.
Jack Harry is demonstrating this method with a nitra form anise swallowtail • He positions the forewings first. Placing magnets to maintain their position.
Jack Harry is demonstrating this method with a nitra form anise swallowtail • He positions the forewings first. Placing magnets to maintain their position. • Jack then places the hind wings in the desired position.
Jack Harry is demonstrating this method with a nitra form anise swallowtail • He positions the forewings first. Placing magnets to maintain their position. • Jack then places the hind wings in the desired position. • He now uses insect pins to place and hold the antennae in place.
Jack Harry is demonstrating this method with a nitra form anise swallowtail • Now Jack uses insect pins to support the abdomen and prevent it from falling down into the grove.
Jack Harry is demonstrating this method with a nitra form anise swallowtail • Now Jack uses insect pins to support the abdomen and prevent it from falling down into the grove. • Now the specimen is set and ready to dry. Finished product
Vernon’s upside down non-groove board method This method breaks away from the traditional teachings somewhat. It is designed to take full advantage of the pronounced ventral side of the specimen. It optimizes space allotted on the spreading surface allowing you to spread many specimens at one time. This method was taught to me by Dr. Richard Howard, Director Natural History Museum Amarillo College. He was taught by his grandfather.
Materials needed • Styrofoam block
Materials needed • Styrofoam block (I use the back of this board)
Materials needed • Styrofoam block • Insect pins
Materials needed • Styrofoam block • Insect pins • Paper strips
Materials needed • Styrofoam block • Insect pins • Paper strips • And yes… the specimen
Vernon Evans is demonstrating this method with a scarlet mormon • I place the pin into the specimen the same as all other methods. This specimen will be a dorsal mounted specimen Notice the head of the pin going down into the foam.
Vernon Evans is demonstrating this method with a scarlet mormon • I place the pin into the specimen the same as all other methods. This specimen will be a dorsal mounted specimen • I now prepare the specimen to be placed VENTRAL SIDE UP on the flat spreading board.
Vernon Evans is demonstrating this method with a scarlet mormon • I place the pin into the specimen the same as all other methods. This specimen will be a dorsal mounted specimen • I now prepare the specimen to be placed VENTRAL SIDE UP on the flat spreading board. • Using forceps, I open the wings up to allow the specimen to lay flat on the board.
Vernon Evans is demonstrating this method with a scarlet mormon • The HEAD of the insect pin is pressed into the foam board.