MS Excel Project
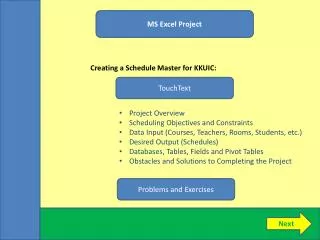
MS Excel Project. Creating a Schedule Master for KKUIC:. TouchText. Project Overview Scheduling Objectives and Constraints Data Input (Courses, Teachers, Rooms, Students, etc.) Desired Output (Schedules) Databases, Tables, Fields and Pivot Tables

MS Excel Project
E N D
Presentation Transcript
MS Excel Project Creating a Schedule Master for KKUIC: TouchText • Project Overview • Scheduling Objectives and Constraints • Data Input (Courses, Teachers, Rooms, Students, etc.) • Desired Output (Schedules) • Databases, Tables, Fields and Pivot Tables • Obstacles and Solutions to Completing the Project Problems and Exercises Next
MS Excel Project Overview: Schedule Master Create an MS Excel Workbook named “KKUIC Schedule Master” that allows the user to: • Enter KKUIC Data (lists) on courses, teachers, rooms, student cohorts, days & times, etc. • Assign these resources for the upcoming semester. • Create informative schedules that can be distributed to teachers and students, and posted in front of classrooms. Dictionary Take Notes Back Next
Current Schedule Master:Outliving Its Usefulness Problem: Growth in students, courses, teachers etc. is making old system untenable. Dictionary Note one entry for each student cohort (for each day). Old schedule. Monday only! Imagine expanding this to six day, into a readable, workable document …. much less constructing the schedule in the first place! Take Notes Back Next
Fresh Approach to Scheduling: Objectives & Constraints Dictionary Take Notes Back Next
How should I view this problem? Scheduling as a Matching Problem: Course, Teachers, Students, Day, Time, Room Dictionary Take Notes Back Next
Sequencing the Scheduling Process: List Of Classes On Offer Decide which classes will be on offer this semester, from a list of all possible classes (KKUIC Catalog). Dictionary Why not just enter actual courses offered instead of all KKUIC courses? Take Notes Back Next
Sequencing the Scheduling Process:List of Classes On Offer Limit all KKUIC courses to only those offered this semester by introducing another field called “Offered When”. Dictionary It would be very helpful if the “Offered When” field used data validation, and had data entries limited to those on a list. DATA > DATA TOOLS > DATA VALIDATION > (allow) LIST The course list can then be filtered by limiting records (courses) to those that are only currently or always offered! Take Notes Back Next
Sequencing the Scheduling Process: Assigning Lecturers to Courses Assign lecturers to the courses they will teach. Again, it would be very helpful if the “Teacher” field used data validation, and had data entries limited to those on a list. Dictionary DATA > DATA TOOLS > DATA VALIDATION > (allow) LIST Take Notes Back Next
Sequencing the Scheduling Process: Assigning Students to Courses Assign students to the courses they will take. This task is a difficult one because there is often more than one student cohort (e.g. GB1 and IM1) taking a single course. Dictionary What to do? (answer) MS Access is designed to handle such problems. To use MS Excel to handle this problem, we will have to be creative. Take Notes Back Next
Sequencing the Scheduling Process: Assigning Students to Courses Assign students to the courses they will take. What to do? (answer) Create a separate field for each student cohort. Then, for each course, indicate whether or not they are normally enrolled in that course. Dictionary Student Cohorts can then be concatenated Take Notes Back Next
Sequencing the Scheduling Process: Assigning Students to Courses 4-6 Schedule Time(s), Day(s), and Rooms(s) Courses require two meetings per room. What to do? (answer) Have two records for each class with the same Course, Offered When, Teacher, and Students fields, but unique Day, Time and Room fields. Dictionary Same Different Take Notes Back Next
Building the Schedule Master Mini-Projects will be assigned as group tasks. The MS Excel skills learned in these tasks will be used as building blocks for the Schedule Master Project. Dictionary • Groups of students will… • Learn assigned tasks • Create a Powerpoint presentation demonstrating their Excel skills related to these tasks. • Make their presentations in front of the entire class. • Dr. Chris will put everything together to build create the Schedule Master. Take Notes Back Next
Start With Raw Data (Lists to be used with Data Validation) Dictionary Take Notes Back Next
Project (Group 1): Create a Set of Lists of These Six Fields (and all possible values of these fields) • Create lists all possible courses (code and title), teachers, student cohorts, days, times and rooms. • Enter and format these lists (vertically, as shown) on an Excel worksheet. • Learn how cell entries can be forced to choose from a drop-down list from one of the lists you’ve created. Dictionary Data Validation Make a presentation on Data Validation (especially lists). See XL Bible 2010, ch. 25. Take Notes Back
Then Create a Table that Matches Values From the Fields Lists The lists create the possible values for the fields (when using Data Validation). The Tablematches six fields to create each scheduled course. Dictionary * Add another field “Offered” to filter out courses listed on the KKUIC catalog but not currently offered – and need not be scheduled. Possible values for “Offered” are identified in another list. Take Notes Back Next
Create the Schedule: Preliminary Steps to Creating the Scheduling Table. The procedure actually followed comprised the following steps. Before day/time/room scheduling is undertaken …. Dictionary • Create the background lists. The course code & description lists are treated separately, and include all courses from the catalog. These two fields start a new table. • Create a separate field for each student cohort, to the right of the course code and description fields, select “yes” or “no” (from another data validation list) to indicate whether or not they’re normally enrolled in the course. • Concatenate the student cohort IDs to get a single-cell student enrollment field. • Add a new field to indicate whether or not the course is currently offered this semester. This field is vital to filtering entries. • Add another field, “instructor”, to the right of the student enrollment field. From a data validation drop-down list, select which lecturer will be teaching each course. Take Notes Back Next
Create the Schedule: Steps to Creating the Room/Day/Time Schedule. Once a comprehensive table of all courses on offer this semester has been established (comprising course code, course description, offered (Y/N), teacher, and student cohorts) …. Dictionary • Copy the table to a new location, in the process creating two entries – one after the other – for each course. This is necessary because there are two lecture sessions per course per week. (The following page provides a method for doing this.) • Create additional fields for room, day and time, so that the KKUIC scheduling administrator can establish the schedule. The values for these fields should come from an appropriate drop-down list. • Add a new field to indicate whether or not the course is currently offered this semester. This field is vital to filtering entries. Take Notes Back Next
Project (Group 2): Create a Table Using the Six Fields (And Drop-Down Lists to Select Field Values) • Create and format a Table with six (plus one) fields. • Set up the table so that data validation > drop-down lists limit the selections. Dictionary Make a presentation on how to create and format Tables, and especially their advantages over standard ranges, with emphasis on sorting and filtering. See XL Bible, ch.5. Tables Take Notes Back Next
Shortcut: How to Create a Class Code & Name List With Duplicate Entries: Simple Example Create two duplicate, class code ordered lists (A > Z), name the lists, and merge them into one; then copy & paste special that list as values and re-order (again (A > Z). Then use a VLOOKUP() function to create the course description list to the right of the course code list. Dictionary Digital Help: Duplicate Rows Function to merge lists. Final duplicate list, code & description. Take Notes Back
KKUIC Scheduler’s Task Revisited Dictionary * Schedule every course (teacher, student cohort, room, day, time) compatible with constraints (i.e. no “two places at once). Take Notes Back Next
Completing the “Schedule Master”: Working Backwards From Desired Output From the “Schedule Master”, we are trying to accomplish the following: Dictionary • Create a workable, efficient KKUIC schedule for the coming semester. • Print out relevant schedules for lecturers, students, and to be posted on classroom doors. Info about course(s) here * Note that all the information we need for our schedules is already available from the fields and scheduling tasks. Take Notes Back Next
MS Excel Workbook Designer’s Task Dictionary Workbook Designer’s Task: Get from here to there Take Notes Back Next
Looking at the Structure: Where the Fields Go We want sometimes to look at specific teachers, specific student cohorts, or specific rooms. Dictionary *Day is always across the top (columns); and Time is always down the left (rows). * The course – and relevant info about the course, are always in the main content cells. Take Notes Back Next
Workbook Designers’ Task: End Up With Teachers’ Schedules Teachers’ Schedules Dictionary Take Notes Back Next
What we want to end up with: Student Cohort Schedules Students’ Schedules Dictionary Take Notes Back Next
What we want to end up with: Room Schedules Room Schedules Dictionary Take Notes Back Next
This seems like a lot of work. So ……. Dictionary Why don’t we simply figure out the schedule on a whiteboard, or a piece of paper, or something else convenient, and then just create a table and type in the information into Excel exactly as we want it formatted? Take Notes Back
Lecturers’, Students’, and Room Schedules Require Different Information – But All From Fields Teachers Students Rooms Dictionary Information Needed For Teachers – course, room, students For Students – course, room, teacher For Rooms – course, teacher, students Take Notes Back Next
Project (Group 3): Create Concatenated Fields (combining different text fields) • Excel has hundreds of functions, divided into “families”. • One such family comprises functions that manipulate text. One such function is CONCATENATE(). • Create concatenated fields in the schedule table. Specifically, concatenate the appropriate fields to create content for the text boxes in the teacher, student and room schedules. (See next page.) Dictionary Teachers Students Rooms Text Functions Make a presentation on Text Functions, especially CONCATENATE(). See XL Bible 2010, ch. 11. Take Notes Back Next
Pivot Table Limitations: Only Quantitative Data in Value Section The database must be properly constructed, and then fields must be “concatenated” to get the desired data into the derivative table. Dictionary * Solution: Reference fields in the databases table. Take Notes Back
Presenting and Organizing Data With Pivot Tables Pivot Tables (MS Excel: Insert > Pivot Table) allow the designer to select fields from a database and place them into the four sections of a pivot table. Dictionary The fields can easily be re-arranged, filtered, ordered, totaled, etc. using the pivot table tools. Structure of a Pivot Table * The main “Values” section must contain numbers. Take Notes Back Next
Presenting and Organizing Data With Pivot Tables The Pivot Table Fields List (right) provides a convenient way to move fields around the Pivot Table(left). Dictionary * The main “Values” section must contain numbers. Take Notes Back Next
Project (Group 4): Create a Pivot Table (using appropriate fields) Using a table consisting of the following fields: Day, Time, Course ID, Instructor, Room, Students, …. Dictionary • Create a properly formatted Pivot Table with • Days of the Week as the (horizontal) column labels. • Time of Day as the (vertical) row labels. • Course Code (and number of courses) as the main values entries. • Alternately, Instructor, Room, and Students as the report filter. Pivot Tables Make a presentation on Pivot Tables. See XL Bible 2010, ch. 34 and 35. In particular, demonstrate how fields can be organized and filtered. Take Notes Back Next
Pivot Table Limitations: Only Quantitative Data in Value Section Pivot Tables only allow quantitative data (numbers)in the main “value section” of the table. Dictionary * Solution: Treat Course ID’s as numbers. Take Notes Back
Creating a “Derivative” Pivot Table: The structure of the pivot table is ideal for the problem at hand. However ….. • Problem: The main “Values” section of the pivot table requires numbers. • Solution: • Treat course codes as numbers (not text) • Create a second “derivative” schedule table that feeds off of the pivot table. • Create lookup functions that replace the course codes with appropriate concatenated text. Dictionary * Solution: Use Course ID’s as index value to get other field information. Take Notes Back Next
Project (Group 5): Create a Derivative Pivot Table That Looks Up Appropriate Text Data We need to create a second table with is derivative from the pivot table containing course codes as values. This table should: Dictionary • Read course code values from the pivot table. • Use a lookup or index function to get the appropriate text information from the table. • Insert that information in the derivative table (see next page). • Appear appropriate for distribution and printing. LookUp Functions Make a presentation on LookUp Functions, specifically IF(), VLOOKUP(), HLOOKUP() and MATCH() & INDEX(). See XL Bible 2010, ch. 11 and 14. Take Notes Back Next
Creating a “Derivative” Pivot Table: Cells in the Pivot Table can be linked to a twin “derivative” table with desired information in addition to simply the course number. Dictionary * Solution: Use Course ID’s as index value to get other field information. Take Notes Back
Creating a User-Friendly Workbook • Workbooks should be designed for both efficiency and ease of use. In part, this means that the user should be able to: • Easily differentiate between inputs from formulas. • Quickly recognize what needs to be entered or updated. • Naturally navigate through the workbook. • Minimize errors, but recognize and solve errors or inconsistencies whenever they occur. • Focus on the work at hand, rather than on their Excel skills (or shortcomings). Dictionary Some Excel features are designed to make a workbook more user-friendly, not necessarily more efficient. But these features are still important to know and the use. Take Notes Back Next
Viewing a Workbook: Conditional Formatting Formatting refers to the appearance of cells or cell ranges. (e.g. colors, fonts, icons, size, borders, shading, etc.) Conditional Formatting is an Excel feature that allows one to format a cell(s) conditional on the value or properties of a cell. Conditional formatting is indispensable in creating (particularly large and complex) workbooks that are easy to work with. Dictionary To conditionally format a cell or range, go to: MS Excel: Home > Styles > Conditional Formatting Take Notes Back Next
Project (Group 6): Apply Conditional Formatting To Cell Ranges We wish to use conditional formatting in cells or cell ranges to highlight: Dictionary • When data needs to be entered or updated. • When cell values are inappropriate or unacceptable. • Important or critical values or results. Conditional formatting can be applied to font and fill colors, but Excel 2010 also allows for conditional formatting with • Data bars • Color Scales • Icons Conditional Formatting Make a presentation on Conditional Formatting, particularly using RULES for data bars, color scales and icons. See XL Bible 2010, ch. 20. Take Notes Back
Viewing a Workbook: Comments MS Excel Commentsare like post-it notes that can be attached to any cell. Comments are very useful for adding information or instructions about a cell and its contents, when one doesn’t want to put that information onto the worksheet. To enter a comment, simply right click the cell and choose “Insert Comment”. Normally, once comments have been entered, they appear when the mouse hovers over the cell. Comments can be viewed and managed on the Review tab of the ribbon. Dictionary Take Notes Back Next
Project (Group 7): Inserting, Editing and Reviewing Comments Comments should be inserted whenever there is a need to assist the workbook user in entering cell data or in understanding the function of particular cells. Dictionary • Demonstrate how particular cells can be enhanced with comments. • Show how all comments in a workbook can be comprehensively edited and/or viewed. Comments Make a presentation on how comments can be used and managed. Insert a phot into a comment. See XL Bible 2010, ch.4. Take Notes Back
Macros: Recording Repetitive Tasks • MS Excel Macrosare VBA code snippets that tell Excel what to do after a certain event triggers the macro.Macros are ideal for repetitive yet complex tasks, and to make even simple tasks more user-friendly. • To enable entering and using macros, one must first configure the workbook. Using the file tab (Excel 2010) or Microsoft button (2007) … • Add the developer tab to the ribbon by choosing File > Options > Customize Ribbon, and check “Developer Tab”. • Enable Macros by choosing File > Options > Trust Center > Trust Center Settings > Macro Settings and select “Enable All Macros”. • Save As the workbook as a macro-enabled workbook (.XLSM) Dictionary Once macros have been enabled, they can be recorded by selecting Developer > Record Macros. Take Notes Back Next
Project (Group 8): Record Simple Macros That Navigate or Perform Other Simple Tasks We will use macros in this project to perform repetitive tasks and to navigate the workbook. Dictionary • Use (only) the macro recorder, do NOT enter or edit VBA. • Insert an appropriate shape, clipart, photo, or other object, and attach the macro to (a click on) that object. • Ensure that the macro performs the desired task, and that the curser returns the Excel user to an appropriate place. Record Macros Make a presentation on recording, assigning and using macros, for both repetitive tasks and for navigating. See XL Bible 2010, ch. 39. assign macro, start macro by clicking Take Notes Back
End of Unit 3 Questions and Problems The following problems require the calculation of various statistics using MS Excel. The problems are linked to actual Excel spreadsheets, where students should do their work. Dictionary Take Notes Back END