Remote Connection to ENS
Internet. CERN Fire Wall. ISP. CERN General Purpose Network. Remote Connection to ENS. Contractor. cernts.cern.ch. Office PC. GPN/TN Fire Wall. cerntststs.cern.ch. CERN Technical Network. Station PC. RTU on NCC Lan. NCC Fire Wall. LINUX. NCC Lan. RTU on TechNet.


Remote Connection to ENS
E N D
Presentation Transcript
Internet CERN Fire Wall ISP CERN General Purpose Network Remote Connection to ENS Contractor cernts.cern.ch Office PC GPN/TN Fire Wall cerntststs.cern.ch CERN Technical Network Station PC RTU on NCC Lan NCC Fire Wall LINUX NCC Lan RTU on TechNet
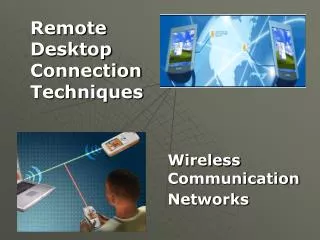
Windows Terminal Services • Windows Terminal Servers • cernts.cern.ch • Cluster managed by IT (access, security, anti-virus, etc.) • Accessible from outside CERN • Register to NICE to use it • cerntsts.cern.ch • Managed by TS and dedicated to TS • Unreachable from outside CERN • Trusted by Technical Network • Can cross the ENS Fire Wall • Register to Soren Poulsen
Condition 1: register to use WTS cernts.cern.ch URL http://terminalservices.web.cern.ch/terminalservices/ Login with your NICE account Click on “Register here to use the service”
Are you registered for cerntsts? URL http://terminalservices.web.cern.ch/terminalservices/ Login with your NICE account Click on “Register here to use the service”
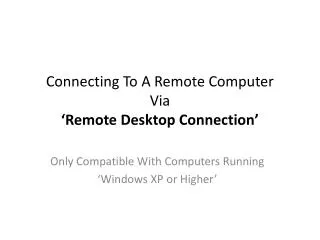
Step 1: RDC to cernts.cern.ch Start/All Program/Accessories/Communications/Remote Desktop Connection (Communication Bureau à Distance) Display Options: Full screen Maximum colours Login: Cernts.cern.ch NICE account
Step 2: Welcome to WTS - You are connected to a “virtual PC”, with your environment (desktop, files, servers, printers, applications, etc.) - From HERE you can have a RDC to cerntsts.cern.ch
Step 3: RDC to cerntsts.cern.ch Start/All Program/Accessories/Communications/Remote Desktop Connection (Communication Bureau à Distance) Display Options: Full screen Maximum colours Login: Cernts.cern.ch NICE account
Step 4: Welcome to cerntsts.cern.ch - You are connected to a “virtual PC”, with your environment (desktop, files, servers, printers, applications, etc.) - And D7i, Laser, Exceed for ENS interface
Step 5: Install LASER Java Applet (once) Click on “LASER Interface”, should install the applet! Always answer “yes”!
Step 6: Launch LASER GUI On the Desktop, click on icon named “LASER Alarm Console”
Step 7: Hummingbird Exceed In “Start/All Programs/HummingBird Connectivity/Exceed/Xconfig”
Step 8: Parameterize Exceed (once) • In “Network & Communication”, select “XDMCP Query” with Option “elsrv1” • validate • In “Display & Video”, select “Window Mode=single” & “Server Visual=PseudoColor” • validate • click on “create an icon”, select “for all users” and also “In start menu” • Launch application with current settings • You will be with the CDE environment as on X terminals!
Step 9: HPGL Viewer • The srv3_div volume is reachable via dfs then “Workspaces”, “s” and “st_el”