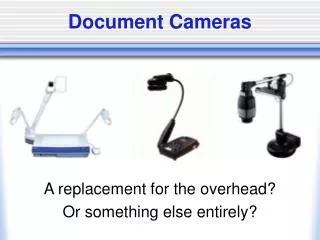
Document Center
Document Center. How to share documents and presentations in a virtual conference room. Features. Upload PPT, DOC, HTML, XLS, PDF, Image, Text, or any other type of file Auto-convert PPT/DOC/XLS/PDF files into HTML for display in the co-browser Upload any file for download by participants


Document Center
E N D
Presentation Transcript
Document Center How to share documents and presentations in a virtual conference room
Features • Upload PPT, DOC, HTML, XLS, PDF, Image, Text, or any other type of file • Auto-convert PPT/DOC/XLS/PDF files into HTML for display in the co-browser • Upload any file for download by participants • Upload entire folder of files • Upload Recordings (archives) • Display PPT into WhiteBoard • Play audio files LIVE in a conference room • Play a recording LIVE in the conference room • Utilize a “Private Document Center” for any documents or recordings (archives)
Uploading PowerPoint • Click on “Select File” • Find your PowerPoint presentation, select it and click Open • Click Upload
PowerPoint Options • HTML: Great results for in the conference room and for replaying a recording live, but won’t work for FireFox for OnDemand recordings • JPG: Usually best option if planned to make recording available on the Net due to FireFox compatability. Also should be used if planning to use in WhiteBoard • GIF: Same as JPG, but better option if presentation contains ONLY text and clipart (no photo images)
Word and Excel Documents • Follow same procedure as with PowerPoint • Option upload MS file or convert to HTML • NOTES: if upload in MS format and then load into browser, it will sometimes load for participants if they have MS Word installed. Other will get download prompt. Word Viewer does not count!
Uploading PDF • Provides option to upload in PDF format or convert to HTML: Conversion requires additional Plugin available at: http://www.talkingcommunities.com/apps/pdftohtml_plugin.exe • Conversion separates into pages • PDF file loading requires a PDF reader installed like Adobe Reader
Uploading Other Files • Image, HTML, and Text files can be uploaded using the same method. No conversions are needed • Other files such as EXE or ZIP files can be uploaded and then brought up in the co-browser for download
Uploading Folders • Click on Select Folder • Find the folder you wish to upload • Click on Upload
Using Uploaded Files • Click on “Manage Documents” • After documents are loaded and displayed, click on the desired document in the list and then click on the button of the desired action (Remove, Preview, Load Doc) • For JPG or GIF PowerPoint files, you can choose the “Load WB” option, but be sure to have the WB loaded in the co-browser before clicking this button.
Uploading Recordings (Archives) • Click on “Manage Archives” • Click on “Select Archive” • Choose the Recording (Must be in the My Documents\My Conference Recordings folder) • Click “Publish”
Accessing Archives • You can Preview an archive in IE by clicking the Preview button • You can obtain the URL to the archive by selecting it from the list and then copying the URL from the textbox at the bottom • You can load an archive directly into Replay in order to play the recording live into the conference room
Replay Archive • Play a recording LIVE in a room to different live audiences over and over • Real-time means participants that enter late are in synch with everyone in the room • Slides from the recording are automatically pushed into the co-browser • Queue is cleared, Talk key is locked, and Follow-me is turned on automatically when Play is pressed • Pause or Stop takes you back to your microphone automatically
Steps to Replay Archive • Have a recording made and available locally on the computer or published somewhere on the Net • Open Replay Archive • Select File or URL (to the .mp3 file) • Make sure the correct setting is selected in the Mixer • Press Play
Private Document Center • Allows you to store all your documents and archives on your own hosted domain • Requires you have a domain and FTP access • Must use a location that is available to Internet users (http://www….)