Essential First Aid: Managing Bleeding and Wound Care in Emergency Situations
Mastering first aid is crucial when faced with bleeding injuries. This guide emphasizes the importance of Personal Protective Equipment (PPE) to prevent disease transmission when dealing with bodily fluids. It covers various types of injuries, including small cuts, medium cuts, large cuts, and puncture wounds, outlining how to effectively manage bleeding and apply dressings. Learn vital techniques for head, eye, palm wounds, and penetrating injuries. These skills could be life-saving in emergency scenarios, ensuring proper care and minimizing complications.

Essential First Aid: Managing Bleeding and Wound Care in Emergency Situations
E N D
Presentation Transcript
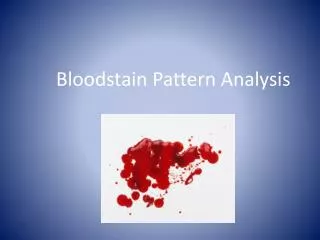
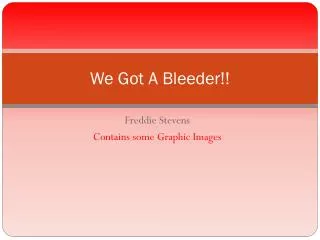
We Got A Bleeder!! Freddie Stevens Contains some Graphic Images
Personal Protective Equipment • PPE is important when potentially dealing with bodily fluids. • PPE examples • Gloves, apron, face shield… • Why? • Prevent transfer of disease/ infection…
Bleeding = Pressure! • Before applying any dressing or cleaning a wound, any bleeding should be managed. • This is done by applying pressure directly to the wound in most cases. • This should be done by getting the patient to apply pressure with their hand if possible, if not use your hand.
Small Cuts and grazes • These only really need treatment with a small plaster and an alcohol free wipe. • Beware that some people are allergic to plasters • Also a small wound like these could be the entry point for a more serious puncture wound, so make sure of a full and accurate history of the incident.
Medium cuts and larger grazes • These are injuries that are more likely to require cleaning with saline pods and gauze. • They are also likely to require a larger adhesive dressing and potentially a bandage. These may need a trip to hospital for a few stiches.
Large Cuts • These wounds may need to be cleaned by flushing out the cut directly using a ‘jet’ of saline from a pod. • These wounds WILL need to go to hospital, and most likely be painful so an ambulance is a sensible call.
Applying bandages • Place sterile pad on wound • Give small end to patent to hold, if possible • Wrap the long end around in a figure of 8 ensuring that the first 2 turns cove the edges of the pad • Decrease the size of the figure of 8s ending in a reef knot tied on top of the wound to apply extra pressure.
Head wounds • Head wounds present some potential complications with regard to unseen head and neck injuries, and should always be treated for the worst case scenario. • Head injuries also have a tendency to bleed a large amount too.
Head wounds cont. • A wound on the forehead can be easily bandaged in a similar fashion to a wound on the arm or leg. • A wound on the top of the head should be bandaged where possible to avoid tying under the jaw, as this can pose a communication and an airway problem.
Eye wounds • Tell the patent not to move their eyes, movement of the good eye will cause movement of the injured eye and may make any injuries worse. • To remove a foreign object in the eye a gentle saline wash can be used. • But, don’t attempt to remove and penetrating object.
Eye wounds cont. • Any bleeding or fluids can be controlled by use of a sterile non-fluffy dressing, gently applied to the affected area. • Any eye injury should be sent to hospital ASAP
Palm wounds • A cut across the palm should be treated by first asking the patent to make a tight fist to stem the flow of blood. • A bandage should be then partially unrolled and the sterile pad should be placed across the wound and the still rolled up part of the bandage placed in the palm to grip. • A dressing should then be used to tie the hand shut, leaving the thumb out to check for circulation.
Palm wounds cont. • A wound going down the palm should not be treated by making a fist as this will open the wound. • The fingers should be extended and a dressing applied in much the same way as if bandaging a leg or arm.
Puncture chest wounds • Extra complication with these!! (See image) • Wound management for this type of injury is different, and is accurately displayed in the image.
Puncture chest wounds • Treatment – ‘ impermeable layer’ (credit card, cut of space blanket, bit of cling-flim) taped on 3 sides, leaving the bottom open.
Puncture chest wounds cont. • This allows 1 way flow of air, thus attempting to remove some pressure in a potentially punctured lung. • The patient should also be put into the recovery position on the side of the injury. This applies pressure to the wound and allows the ‘good’ lung to function as best as possible.
Penetrating object • DON’T REMOVE THE OBJECT!! • Removing the object could cause more internal damage. • A penetrating object could be anything from a knife to a biro, and could even be an open fracture. • To attempt to stem any bleeding pressure should be applied to either side of the penetrating object.
Penetrating objects cont. • Still rolled up bandages should be used to build up around the object. • A bandage should then be gently applied over the built up bandages as to support the object and the built up bandages, but not to add pressure to the object. • These type of injury should go to hospital in an ambulance!
PRACTICE AND QUESTIONS Big wounds Head wounds Chest wounds Palm wounds Penetrating objects