SENTENCE BOUNDARIES: LEARNING WHERE SENTENCES BEGIN AND END
1.17k likes | 1.62k Vues
SENTENCE BOUNDARIES: LEARNING WHERE SENTENCES BEGIN AND END. by William Silver Evergreen Valley College San Jose, California. SENTENCE BOUNDARIES: LEARNING WHERE SENTENCES BEGIN AND END. Click on the Button. SENTENCE BOUNDARIES: LEARNING WHERE SENTENCES BEGIN AND END.

SENTENCE BOUNDARIES: LEARNING WHERE SENTENCES BEGIN AND END
E N D
Presentation Transcript
SENTENCE BOUNDARIES:LEARNING WHERE SENTENCESBEGIN AND END by William Silver Evergreen Valley College San Jose, California Previous slide # Use the keyboard arrow keys Next slide #
SENTENCE BOUNDARIES:LEARNING WHERE SENTENCESBEGIN AND END Previous slide # Use the keyboard arrow keys Next slide #
Click on the Button SENTENCE BOUNDARIES:LEARNING WHERE SENTENCESBEGIN AND END Previous slide # Use the keyboard arrow keys Next slide #
Talking is not the same as writing • When we talk, we don’t have to decide where sentences begin and end. We pause or we change the tone of our voice to express ourselves clearly. Previous slide # Use the keyboard arrow keys Next slide #
Talking is not the same as writing • When we talk, we don’t have to decide where sentences begin and end. We pause or we change the tone of our voice to express ourselves clearly. • When we write, we need to mark the start and end of each sentence to help the reader understand our thoughts. Previous slide # Use the keyboard arrow keys Next slide #
Talking is not the same as writing • When we talk, we don’t have to decide where sentences begin and end. We pause or we change the tone of our voice to express ourselves clearly. • When we write, we need to mark the start and end of each sentence to help the reader understand our thoughts. • The purpose of this computer presentation is to show a good method to determine sentence boundaries— where each sentence begins and ends. Previous slide # Use the keyboard arrow keys Next slide #
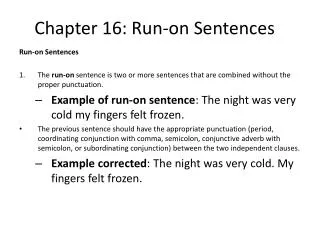
Fragments and Run-ons • There are two common types of errors that occur when your sentence boundaries aren’t correct. Previous slide # Use the keyboard arrow keys Next slide #
Fragments and Run-ons • There are two common types of errors that occur when your sentence boundaries aren’t correct. • 1. A sentence fragment is a broken or incomplete sentence. Previous slide # Use the keyboard arrow keys Next slide #
Fragments and Run-ons • There are two common types of errors that occur when your sentence boundaries aren’t correct. • 1. A sentence fragment is a broken or incomplete sentence. • 2. A run-on (also known as a comma splice) is really two sentences, but the writer has punctuated it as one sentence. Previous slide # Use the keyboard arrow keys Next slide #
Do you do this? • Most students decide where to end a sentence by how many words it has. They believe a sentence shouldn’t be too long or too short. Previous slide # Use the keyboard arrow keys Next slide #
Do you do this? • Most students decide where to end a sentence by how many words it has. They believe a sentence shouldn’t be too long or too short. • Sometimes students continue a single sentence by adding a second idea that’s closely related to the first idea. Previous slide # Use the keyboard arrow keys Next slide #
Do you do this? • Most students decide where to end a sentence by how many words it has. They believe a sentence shouldn’t be too long or too short. • Sometimes students continue a single sentence by adding a second idea that’s closely related to the first idea. • These two strategies will not work. Previous slide # Use the keyboard arrow keys Next slide #
Test Yourself • Are each of the following four word groups a single correct sentence? Here’s the first group . . . . • 1. He spoke loudly. • Yes or No? Previous slide # Use the keyboard arrow keys Next slide #
Test Yourself • Are each of the following four word groups a single correct sentence? Here’s the first group . . . . • 1. He spoke loudly. • Yes or No? Answer: yes. This sentence is short and not very informative, but it contains a subject and verb. All you need to make a complete sentence is a subject and verb, as you will see in the next few lessons. Previous slide # Use the keyboard arrow keys Next slide #
Test Yourself • Is the following word group a single correct sentence? • 2 When he spoke loudly to the audience gathered in the auditorium. • Yes or No? Previous slide # Use the keyboard arrow keys Next slide #
Test Yourself • Is the following word group a single correct sentence? • 2 When he spoke loudly to the audience gathered in the auditorium. • Yes or No? Answer: no. It’s a fragment. It has a subject and verb, but it also has the connecting word “when.” However, it doesn’t connect to another word group, so it’s not complete. You will learn about this in Lesson 3. Previous slide # Use the keyboard arrow keys Next slide #
Test Yourself • Is the following word group a single correct sentence? • 3. The sheriff’s deputy checked the computer in his car, he wrote out a ticket for speeding. • Yes or No? Previous slide # Use the keyboard arrow keys Next slide #
Test Yourself • Is the following word group a single correct sentence? • 3. The sheriff’s deputy checked the computer in his car, he wrote out a ticket for speeding. • Yes or No? Answer: no. It’s a run-on (also called a comma splice). It has two subject and verb pairs but no connecting word, which is a good way to put the two pairs in one sentence. Normally, you need two sentences for two pairs of subjects and verbs. You will learn about this in Lesson 3. Previous slide # Use the keyboard arrow keys Next slide #
Test Yourself • Is the following word group a single correct sentence? • 4. After the deputy checked the computer in his car, he approached my car and then after he walked around it looking for safety violations, he stepped up to the my window and asked for my driver’s license and vehicle registration. • Yes or No? Previous slide # Use the keyboard arrow keys Next slide #
Test Yourself • Is the following word group a single correct sentence? • 4. After the deputy checked the computer in his car, he approached my car and then after he walked around it looking for safety violations, he stepped up to the my window and asked for my driver’s license and vehicle registration. • Yes or No? Answer: yes, even though it’s a long sentence. There are enough connecting words in this sentence to join each word group. Previous slide # Use the keyboard arrow keys Next slide #
The Right Way • The only way to decide on sentence boundaries is to know some grammar. That’s what this computer presentation is all about. Do the lessons in this order: • • verbs • • subjects • • connecting words • Whenever you need to go back to review a lesson, just use your mouse to click on the buttons on top of each slide. • Good luck! Previous slide # Use the keyboard arrow keys Next slide #
Click on the Button Lesson 1: Verbs Previous slide # Use the keyboard arrow keys Next slide #
Lesson 1: Verbs • Every sentence must have at least one verb. The verb tells what is going on in the sentence. Previous slide # Use the keyboard arrow keys Next slide #
Lesson 1: Verbs • Every sentence must have at least one verb. The verb tells what is going on in the sentence. • There are two basic kinds of verbs: • action verbs • linking verbs Previous slide # Use the keyboard arrow keys Next slide #
Action Verbs • An action verb conveys some kind of action, either physical action or mental action. Previous slide # Use the keyboard arrow keys Next slide #
Action Verbs • An action verb conveys some kind of action, either physical action or mental action. • Examples: • He turned on the switch on the t.v. Previous slide # Use the keyboard arrow keys Next slide #
Action Verbs • An action verb conveys some kind of action, either physical action or mental action. • Examples: • He turned on the switch on the t.v. • We worry a lot about the final exam. Previous slide # Use the keyboard arrow keys Next slide #
Action Verbs • An action verb conveys some kind of action, either physical action or mental action. • Examples: • He turned on the switch on the t.v. • We worry a lot about the final exam. • In the glove compartment of my car, I keep a set of • road maps. Previous slide # Use the keyboard arrow keys Next slide #
Linking Verbs • A linking verb joins the subject of the sentence to some descriptive words about the subject. The usual word order in a sentence is — • subject ----- linking verb ---- description Previous slide # Use the keyboard arrow keys Next slide #
Linking Verbs • A linking verb joins the subject of the sentence to some descriptive words about the subject. The usual word order in a sentence is — • subject ----- linking verb ---- description • Commonly used linking verbs are: is, are, am, was, were, seem, and become. • Some of these verbs can also be used as helping verbs. (For more information on helping verbs, you can jump forward to the slides on helping verbs by clicking here.) Previous slide # Use the keyboard arrow keys Next slide #
Linking Verbs • Examples of linking verbs: • The textbookisdifficult to understand. subject descriptive words Previous slide # Use the keyboard arrow keys Next slide #
Linking Verbs • Examples of linking verbs: • The textbookisdifficult to understand. • Day or night, rain or shine, my brother was • always on time. subject descriptive words linking verb Previous slide # Use the keyboard arrow keys Next slide #
Common Helping Verbs • Sometimes a verb is assisted by a helping verb. A main verb can have one or two helping verbs before it. This is true for both action verbs and linking verbs. The usual word order is-- • helping verb ----- main verb Previous slide # Use the keyboard arrow keys Next slide #
Common Helping Verbs • Sometimes a verb is assisted by a helping verb. A main verb can have one or two helping verbs before it. This is true for both action verbs and linking verbs. The usual word order is-- • helping verb ----- main verb • Some common helping verbs are: is, are, was, were, be, been, being has, have, had, do, does, did, can, could, shall, should, would, will, may, or might. Previous slide # Use the keyboard arrow keys Next slide #
Examples of Helping Verbs • In these examples, notice that the helper verb comes before the main verb. Previous slide # Use the keyboard arrow keys Next slide #
Examples of Helping Verbs • In these examples, notice that the helper verb comes before the main verb. • We were worrying a lot about the final exam. helping verb main verb Previous slide # Use the keyboard arrow keys Next slide #
Examples of Helping Verbs • In these examples, notice that the helper verb comes before the main verb. • We were worrying a lot about the final exam. • I did not keep the roadmaps in the glove compartment. helping verb main verb main verb helping verb Previous slide # Use the keyboard arrow keys Next slide #
Examples of Helping Verbs • The next slides show two more examples. • The textbook has been difficult to understand. helping verb main verb Previous slide # Use the keyboard arrow keys Next slide #
Examples of Helping Verbs • The next slides show two more examples. • The textbook has been difficult to understand. • I should have bought the jacket at the sale price. helping verb main verb helping verbs main verb Previous slide # Use the keyboard arrow keys Next slide #
Verb Technique • Spotting the verbs in a sentence is more difficult in the longer, more complicated sentences that occur in normal writing. So it helps to have a trick or technique to help. Previous slide # Use the keyboard arrow keys Next slide #
Verb Technique • Spotting the verbs in a sentence is more difficult in the longer, more complicated sentences that occur in normal writing. So it helps to have a trick or technique to help. • Technique: To spot the verb, change the TIME of a sentence. • The next slide shows you how to do it. Previous slide # Use the keyboard arrow keys Next slide #
Verb Technique • Here are the three steps of the “Verb Technique”: Previous slide # Use the keyboard arrow keys Next slide #
Verb Technique • Here are the three steps of the “Verb Technique”: Step 1 — Put one of these words at the beginning of the sentence: yesterday today tomorrow Previous slide # Use the keyboard arrow keys Next slide #
Verb Technique • Here are the three steps of the “Verb Technique”: Step 1 — Put one of these words at the beginning of the sentence: yesterday today tomorrow Step 2 — Then check to see which other word in the sentence must change as well. Sometimes the change is at the end of a word. Look for “ed” “s” or “es” endings to see if they have been added or removed from a word in the original sentence. It may help to read the sentence aloud to yourself. Previous slide # Use the keyboard arrow keys Next slide #
Verb Technique • Here are the three steps of the “Verb Technique”: Step 1 — Put one of these words at the beginning of the sentence: yesterday today tomorrow Step 2 — Then check to see which other word in the sentence must change as well. Sometimes the change is at the end of a word. Look for “ed” “s” or “es” endings to see if they have been added or removed from a word in the original sentence. It may help to read the sentence aloud to yourself. Step 3 — The changed word is the verb, either the helper verb or main verb. Previous slide # Use the keyboard arrow keys Next slide #
Example of Verb Technique • She parked her car at the end of the parking lot. Today she parks her car at the end of the parking lot. Time changeword change: “ed” endingchanges to “s” ending on the verb “parked.” Previous slide # Use the keyboard arrow keys Next slide #
Example of Verb Technique • It is a good idea to study for the big history exam in class. Yesterday it was a good idea to study for the big history exam in class. Time changeword change:the verb “is” changes tothe verb “was” Previous slide # Use the keyboard arrow keys Next slide #
Example of Verb Technique • The rain came suddenly in the late afternoon. Tomorrow the rain will come suddenly in the late afternoon. Time changeword change: the verb “came” changes tothe verb “will come” Previous slide # Use the keyboard arrow keys Next slide #
Practice the Verb Technique • Directions: Use the Verb Technique for each sentence in the short paragraph on the next slide. On a separate piece of notebook paper, list from 1 to 10 (corresponding to the numbers at the beginning of each sentence). Identify the verb in each sentence and write it next to the sentence number. • Don’t forget to put either “yesterday,” “today,” or “tomorrow” in front of each sentence. Look for the word that changes. Check to see if the sentence has a helper verb as well as a main verb. Previous slide # Use the keyboard arrow keys Next slide #
Practice the Verb Technique • (1) Nearly everyone seems to own a pager. (2) Pagers used to be a sign of status and importance, but no more. (3) A cell phone is a better way to impress your friends and neighbors. (4)They are expensive to own. (5)The price made medecide not to buy one. (6)I bought a black plastic imitation cell phone at a toy story instead. (7)Nobody knew the difference. (8)I sat for a few minutes in front of my house. (9)I pretended to talk by moving my lips. (10)I was really enjoying the conversation immensely. • The answers are on the next slide. Previous slide # Use the keyboard arrow keys Next slide #