Introduction to Concrete and Masonry
Introduction to Concrete and Masonry. Next Generation Science/Common Core Standards Addressed!.


Introduction to Concrete and Masonry
E N D
Presentation Transcript
Next Generation Science/Common Core Standards Addressed! • CCSS.ELALiteracy.RST.9‐10.3Follow precisely a complex multistep procedure when carrying out experiments, taking measurements, or performing technical tasks, attending to special cases or exceptions defined in the text. • CCSS.ELALiteracy.RST.9‐10.4 Determine the meaning of symbols, key terms, and other domain‐specific words and phrases as they are used in a specific scientific or technical context relevant to grades 9–10 texts and topics. • CCSS.ELALiteracy.RST.9‐10.7Follow precisely a complex multistep procedure when carrying out experiments, taking measurements, or performing technical tasks; analyze the specific results based on explanations in the text • HSNQ.A.2 Define appropriate quantities for the purpose of descriptive modeling. (HS‐PS1‐4),(HS‐PS1‐7)
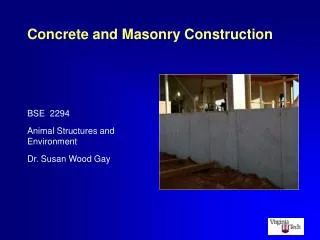
Bell Work! • Make a list of where concrete is used • Define concrete • Name rules for making quality concrete • List ingredients in concrete • Identify properties of concrete • What is masonry • Compare building with concrete versus building with masonry
Terms • A. Masonry Units: Blocks made from concrete, cinders, or other aggregates. • B. Laying Block: The process of mixing mortar, applying it to masonry block, and placing the block to create walls. • C. Mortar Bed: A layer of mortar. • D. Core: The hollow space in a masonry block. • E. Plastic Cement • F. Course: A row of masonry units. • G. Brick Set: Wide chisel used for breaking masonry units. • H. Hollow Core Block: Masonry block with two or three holes per block. • I. Masonry: Anything constructed of brick, stone, tile, or concrete unit held in place with portlandconcrete. • J. Concrete Forms • K. Mortar Board: Board used to hold mortar. • L. Troweling • M. Footer or Footing: A continuous slab of concrete which provides a solid, level foundation for block or brick • N. Aggregate
What is concrete? • One of the most widely used building materials in the world • There is no other building material in which the final product depends so much upon the user as concrete • It’s everywhere (share your lists from bell work)
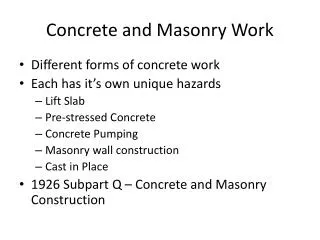
It’s going to be around for a while • Easy mixing process yields a product that weighs 150-160 lbs per cubic foot. • Components of concrete: water, cement, and aggregate, are plentiful • Requires little energy for production and use • Qualities that give concrete appeal are going to still be important down the road: • Strength • Versatility • Durability • Fire resistance
Rules for making concrete • Use proper ingredients • Proportion ingredients correctly • Accurately measure the ingredients • Mix the ingredients thoroughly • Follow proper finishing and curing methods
So what are the ingredients? (And how do they work?) • Portland Cement • Aggregate • Water • Portland and water forms a paste around each piece of aggregate • Changes from a plastic state to a hardened state • It’s not drying! It’s a chemical change. (Think release of heat.)( The Romans actually were the first to mix products similar to concrete!)
Properties of “plastic” concrete • Consistency (or slump)- wetness or dryness of the mix • Uniformity- thorough mixing of ingredients • Workability- ease with which it can be placed in forms and consolidated
Concrete Reinforcement • Concrete should be reinforced with steel reinforcing rods. Also known as rebar. The ridges in rebar allow the plastic mix to adhere to the steel which will expand and contract at the same rate as hardened concrete. Wire mesh may also be used.
Concrete Forms • In order to retain plastic cement mix it must be placed in restraining forms. Forms are commonly different sizes of lumber or perhaps metal held in place by stakes of some type.
Finishing Concrete • Once wet concrete has been placed in forms it should be tamped into place to eliminate air voids. This is commonly done with a tool called a “jitterbug”. The jitterbug is repeatedly lifted and pressed into the wet concrete.
Floating Concrete • The next step in the finishing process is “floating” the mix. Floating continues to eliminate air voids and begins the finishing/smoothing process. On small areas a hand float is used while a “bull float” is used on larger floors for example.
Floating Concrete • The hand float is moved back and forth across the concrete in a semi-circular motion. • The bull float is pulled across the mix in one direction. A bull float has multiple handle extensions.
Troweling Concrete • Troweling concrete is the final finishing/smoothing step in a concrete pour. • The objective is to bring water to the surface along with fine aggregate to yield a smooth long lasting surface. • Small areas are generally done by hand while larger surfaces are done with motorized multiple blade units.
Finishing touches! • Concrete should be edged to eliminate chipping along the edges when the forms are removed. • Expansion joints should also be applied to allow for movement during changes in temperature.
Special Surfaces! • Brooming the surfaces prevents a slick area.
Types of Blocks • A. Stretcher: Used in straight wall sections. • B. Corner: One flat end to create attractive walls at corners. • C. Sash: Has special grooves, can be laid to receive window. • D. Jamb: Use to make door ways so the openings are attractive and secure. • E. Half: Used to prevent cutting of blocks when only half a block is needed. • F. L-Block: Used as top course of block on a poured floor.
Estimating Block • A. Standard blocks are 8 inches or 2/3 foot high and 16 inches or 1 1/3 foot long when they are laid with a 3/8 inch mortar joint. • B. One foot is 3/4 the length of one block, therefore, when estimating the number of blocks needed for a job, the length of the wall in feet can be multiplied by 3/4; this gives the number of blocks per course. • C. One foot is 2/3 of the height of a block, therefore, the height of the wall in feet can be multiplied by 2/3 to determine the number of courses needed.
Procedure for laying blocks • A. Spread a layer of mortar called a mortar bed as the footer. • B. Position the block on the mortar bed so that its outside corner rests where the outside corner of the wall should be. Level the block by first placing the level across the block and then lengthwise along the block. • C. Turn several stretcher blocks on end and apply mortar to the ears with a wiping or swiping stroke of the trowel. • D. Lay several stretcher blocks in place by working away from the end or corner block.E. Use the end of the trowel handle to tap the block until each block is plumb, level, and the course is straight. • F. Apply a mortar bed on top of the first course in preparation for the second course. • G. If extra strength is needed in the wall, install reinforcement in the mortar bed.
Procedure for laying blocks • H. As the block laying progresses, cut off excess mortar with the trowel. • I. Use a line to keep the courses straight. The line is positioned to be level along the top of the block. • J. When a block must be cut, use a mason=s hammer and make multiple strikes along the line to cut; then make one sharp strike on the web. • K. Check the height to be sure each new course is an additional 8 inches high. • L. After the mortar dries and hardens slightly, finish the joints by rubbing it with a broken piece of block. • M. If a joint other than a flush joint is desired, use a jointer to compress the mortar and create a watertight joint. Tools are available to create joints that are concave, v-shape, flush or raked.
Illustrating common method of picking up and setting concrete blocks
A method of laying concrete blocks. Good workmanship requires straight courses with the face of the wall plumb and true.
Showing detail of joining an interior and exterior wall in concrete block construction.
Types of joint finishes used on block walls Concave V joint Flush Raked
The End • Hopefully you will do better!