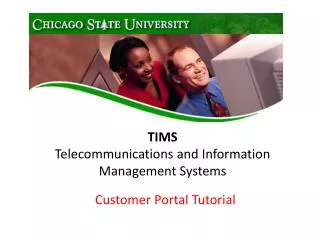
TIMS Telecommunications and Information Management Systems
250 likes | 421 Vues
TIMS Telecommunications and Information Management Systems. Department Portal Tutorial. Enter your user name and password and press the ‘Login’ button. If this is your first time, your user name and password is your email user name.

TIMS Telecommunications and Information Management Systems
E N D
Presentation Transcript
TIMSTelecommunications and Information Management Systems Department Portal Tutorial
Enter your user name and password and press the ‘Login’ button. If this is your first time, your user name and password is your email user name.
To submit and track trouble tickets, click the ‘services’ link at the top right of the screen. Future provisions will allow to submit and track service requests orders.
To submit a trouble ticket, click the ‘Services’ tab. Then search for the number, subscriber or location.
Check the department number you want to search. Then click the ‘Search’ button.
Select a number to report the trouble ticket. Then click the ‘Trouble Ticket’ link.
Make sure the user information at the top is correct. Select the type of trouble from the drop down menu. Make sure your name is selected if you are the contact or enter the information if you are completing the trouble ticket for someone else. Enter any additional information in the box provided. Enter the available time, if necessary in the space provided. If it is a secured location or you want a call back when the work is completed, check these boxes. Then click the ‘Submit Request’ button.
To view your trouble tickets, click the ‘Tickets’ tab. Select the department from the drop down menu. Then, then click the pre-order or ticket number. The information regarding the ticket will be displayed at the bottom of the screen.
To view and print call detail reports, call usage reports for your department or individual(s) in your department, or calls made through 11:59 p.m. the previous day, or search the directory, click the ‘reports’ link at the top right of the screen.
To view and print monthly CDR, click the ‘Dept Usage’ tab. Then select the department(s) from the drop down menu. Select the output method from the drop down menu. To see call detail, check the ‘Include Individual Detail’ box. Select the bill you want to view. The billing date represents the prior month, e.g. 01-Nov-2006 represents October 2006 bill. Select the report you want to view/print from the drop down menu. Then click the ‘Click Here’ link to run the report.
Your report will include a title page, a summary page, and the detail pages.
To view calls through 11:59 p.m. the night before, click the ‘Call Usage’ tab. Select the report from the drop down menu. Then, click the ‘Click Here’ link.
Select the output format from the drop down menu. To view detail, leave the ‘Display Detail’ field at ‘True’. Enter the start date in the dd-mmm-yyyy format, or just click the calendar and select the date. Enter the end date in the same format or just click the calendar and select the date. Make sure the Department Number is ‘TRUE’. Then click the ‘Run’ button.
You can view the report in pdf, Excel, HTML. You can save it, print it.
To run a report by individual(s) for one or more billing cycles, click the ‘Analysis’ tab. Select the department(s) from the drop down menu. Select the output method from the drop down menu. Enter the starting billing date (the billing date is found on the ‘Dept Usage’ page), the date the calls were billed, in the dd-mmm-yyyy or click the calendar and select a date. Enter the ending billing date or click the calendar and select a date. Check the desired charge types. Select the usage types, if more than one, usage the ‘ctrl’ key while clicking the type or check the select all box. Click the ‘Run Analysis’ link.
Select which individual(s) to view or check the ‘Check All’ box. Click the ‘Run’ button.
Review the selection criteria. Click the ‘Execute Report’ button.
To find numbers in the directory, click the ‘Directory’. You can search by first or last name, phone number, department, or email address. The results are in the bottom pane. To print, click the printer icon.
To change your password or view your information, click the ‘maintenance’ tab.
To change your password, click the ‘My Password’ tab. Enter your current password. Then enter your new password twice. Click the ‘Save button.
To view your personal information, click the ‘My Information’ tab. Please report any change in the information to the Office of Telecommunications at ext 3600 and ‘state the name’, then select option 3.
Some reports may take longer than others to run, depending on their complexity and the amount of server traffic. You can be notified when reports are complete, by turning the Email Notification feature on. To enable email notification, please enter your information below and click the "Save Changes" button.
To logout, click the ‘logout’ link at the top right of the page.
Please direct any problems or questions using TIMS to the Office of Telecommunications at ext 2559 and select option 3 or ext 3600 and ‘state the name’.