Download
1 / 26
310 likes | 594 Vues
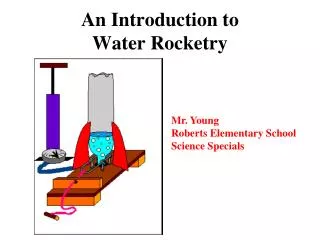
An Introduction to Water Rocketry. Mr. Young Roberts Elementary School Science Specials. Parts of a Basic Water Rocket. Nose Cone - For aerodynamic effect Ballast (not always necessary) but adds mass to rocket for increased stability. Fins - for stability

E N D
An Introduction to Water Rocketry Mr. Young Roberts Elementary School Science Specials
Nose Cone- For aerodynamic effect Ballast (not always necessary) but adds mass to rocket for increased stability. Fins- for stability Pressure vessel- source of rocket propulsion. Must be airtight! Parts of Rocket (cont.)
When preparing your 2-liter bottle do not use the following items: Hot/Boiling waterKnives/Razors SandpaperChemicals *These things may compromise the structural integrity of the bottle. Remember it is pressurized with air!
One 2-Liter bottle (or more bottles if you want to make a tall rocket) Materials for Fins Materials for Nose Cone Tape/Glue Scissors Marker What Do I Need?
One bottle is all that is needed for a basic rocket. If you want to make a taller rocket cut the bottom portion off another two liter bottle. The Rocket Body
If you want to add some ballast to your rocket you can use items such as: sand, foam peanuts, modeling clay, newspaper, etc. Rocket Body: Ballast
Push bottom half of two liter bottle upside down into top half – to keep ballast in place. Use small pieces of tape to secure bottom piece inside bottle. Rocket Body (cont.)
Place two liter bottle (pressure vessel) into top half. Try to make bottles straight. Use little pieces of tape to secure bottles. This is not necessary if you are using a single bottle. Rocket Body (cont.)
How Do I Attach Fins & Nose Cone? I have found these items work best. Also, PL Premium Glue from Home Depot is excellent. The packing tape with strings is my favorite. It holds really well and makes it easier to repair your rocket quickly!
Fins are the guidance system for your rocket. Square/Trapezoidal: Finsyield MORE stability, but create MOREdrag. Triangular/ Epsilon: Fins introduce LESS drag, but yield LESS stability.
Milk or Juice bottle Foam trays Unused election signs (work great & are water proof) Cardboard Corrugated Plastic Plastic Folders Poster board Materials for Fins
Use a template, a marker and draw fin patterns on the material you have chosen to use. Fins
Cut fins out. Fins (cont.)
Measure your rocket to make sure the fins are equally placed around bottle. Measure for Fins
Attach fins to rocket using tape or glue. Use either 3 or 4 fins. More than four adds unnecessary weight. Fins (cont.)
You can use many materials to make a nose cone. To create a rounded tip you can use an egg carton or a plastic egg shell. Small Nerf footballs, foam noodles, foam balls, etc. all work well & allow the rocket to make a soft landing! Materials for Nose Cone
Roll your material (plastic file folders work great) into a cone. Use tape to hold material in place. Place plastic egg shell on the cone as tip. Use tape to fasten tip to cone. Nose Cone
Fasten nose cone to the body with tape or glue. Nose Cone (cont.)
You may decorate with stickers, paint, wrapping paper, etc. The bottom of your rocket though must remain clear of any obstructions. Fins cannot extend past bottom half so that the rocket will fit on the launcher. Decorating Your Rocket
Tips • Lengthening the rocket adds stability • Experiment with different fin shapes • Try different body shapes • Try to make the body smooth (no kinks with tape). • Do not use a hot glue gun, super glue, masking tape, scotch tape, wood or metal on your rocket. • BE AS CREATIVE AS YOU WANT !! • HAVE FUN!!