Download

1 / 23
230 likes | 377 Vues
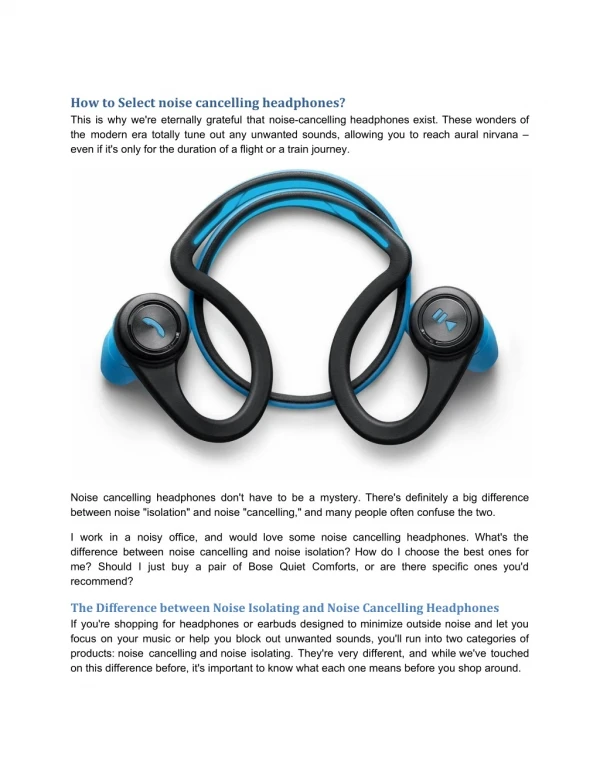
How to shield the ER-2 Headphones. Dr. Jengs Lab. First remove the Velcro strip from the black box Remove sound tube. Next remove the 5 screws with a small flat head screwdriver. Open and tape box onto a secure surface to prevent small wires from ripping. Important wires!!

E N D
How to shield the ER-2 Headphones Dr. Jengs Lab
First remove the Velcro strip from the black box • Remove sound tube
Open and tape box onto a secure surface to prevent small wires from ripping Important wires!! Be very careful opening/moving box Secure Box (surface)
Cut copper wires at stared locations • Bend wires away from box, indicated by arrow • These parts will be removed
Chip or file down black plastic to make room for larger black wire • Note: at this point gold springs will be cut, picture not accurate
Using Cable strippers cut open black wire exposing conductive grey, white, and blue wires. • Use cable strippers to remove protective rubber on blue and white wires • Solder white and blue wires onto gold wires • Make sure all conductive (grey) wires are pulled back outside of box • Picture not accurate, gold springs will be sticking out and not completely removed like current picture, see slide 6
Secure soldered wires by using epoxy glue • Be sure to allow proper time for epoxy to harden • Twist grey wire together
Solder white wire to top portion of ¼ jack (soldered on left gold spring inside black box) • Solder blue and grey wires to bottom portion of ¼ jack
Screw box back together making sure grey conductive wire is still outside the box
Solder black wire to the grey conductive wire • Use electrical strippers to strip end of wire • Reattach sound tube
Use template measurements to cut CO-NET AA sheet • Thickness of CO-NET AA sheet: 0.002”
A pre-cut template can be found in box containing shielding material • Once cut, Form shielding material around box • Make sure wire is not being rubbed/cut by sharp pieces of shielding material
To test shielding plug 3 electrodes into the Neuroscan system.
Connect alligator clamps to electors and to the resistors. Resistor used should be ___ohms • Secure alligator clamps to table with tape
To test impedance with shielding put the shielding material on box secured by tape • View impedance levels with the ground not touching the shielding material • Then touch the black wire to the shielding material and see if impedance levels improve
If impedance is reduced: • Solder case together • Solder black wire to case
Wrap boxes in electrical tap • Label ER-2 • Wrap excess black wire
New Epoxy method • The spring coils inside were preserved and tined. • The two conductors of the shielded cable are tined and inserted into the tow “chambers”, separately. • solder the tined coil and conductor within each chamber. Make sure the solder does not overflow into the other chamber. • Use Epoxy to fill out the entire two chambers. Also, use Epoxy to consolidate the exposed segments of the two conductors.
E Epoxy