Goals
410 likes | 534 Vues
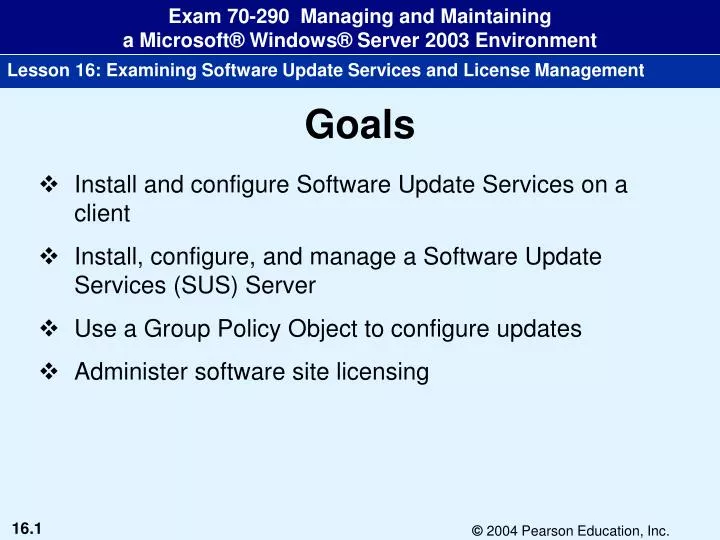
Goals. Install and configure Software Update Services on a client Install, configure, and manage a Software Update Services (SUS) Server Use a Group Policy Object to configure updates Administer software site licensing. (Skill 1).

Goals
E N D
Presentation Transcript
Goals • Install and configure Software Update Services on a client • Install, configure, and manage a Software Update Services (SUS) Server • Use a Group Policy Object to configure updates • Administer software site licensing
(Skill 1) Installing and Configuring Software Update Services on a Client • Software Update Services • Provides the ability to download, control, and deploy updates, service packs and patches to the operating system and its components • Gives the administrator unparalleled control over the bandwidth used by Windows Update and the service packs and updates applied by client computers using the Automatic Updates service • Software Updates components • The client-side service retrieves your updates from your Software Update Services (SUS) server or the Internet and installs them • The server-side service can be the central point for distributing updates to clients
(Skill 1) Installing and Configuring Software Update Services on a Client (2) • Software Updates • A Software Update Services (SUS) server is not required • Dedicating a server can significantly reduce your update bandwidth requirements • In order for Software Updates to work at all, the client-side service must be properly installed and configured • The client-side service is known as the Automatic Updates service
(Skill 1) Installing and Configuring Software Update Services on a Client (3) • Automatic Updates service • Included with Windows Server 2003 • Is available as a free download for the following operating systems • Windows 2000 Professional (SP2) • Windows 2000 Server (SP2) • Windows 2000 Advanced Server (SP2) • Windows XP Home • Windows XP Professional
(Skill 1) Installing and Configuring Software Update Services on a Client (4) • After installation of Automatic Updates • The service tries to contact the default SUS server (normally the Microsoft Windows Update server on the Internet) • The Automatic Updates service displays a Wizard to the Local Administrator 24 hours after establishing contact with the server in order to configure the service • If this period is unacceptable, a Local Administrator can configure the computer manually • In Windows XP or Windows Server 2003, you can access Automatic Updates in the System Properties dialog box • In Windows 2000, you can access the Automatic Updates applet in the Control Panel
(Skill 1) Installing and Configuring Software Update Services on a Client (5) • From the client side, there are only a few manual configuration options • Keep my computer up to date • Notify me before downloading any updates • Download the updates automatically and notify me when they are ready to be installed • Automatically download the updates and install them on the schedule that I specify
(Skill 1) Figure 16-1 Automatic Updates Settings in System Properties (Windows Server 2003)
(Skill 1) Figure 16-2 The Automatic Updates applet in Control Panel (Windows 2000 Professional)
(Skill 1) Figure 16-3 Configuring Automatic Updates
(Skill 1) Installing and Configuring Software Update Services on a Client (6) • Some options included with Automatic Updates are not configurable using the Control Panel applet or through System Properties • Reschedule Wait Time • No Automatic Restart with logged-on users • Specify intranet Microsoft update service location • To configure these options, you must use Group Policy or manually edit the Registry on each computer
(Skill 2) Installing, Configuring, and Managing a Software Update Services (SUS) Server • SUS is the server-side service responsible for providing updates to client computers in order to reduce the bandwidth requirements for your network and increase manageability • To install SUS on a server, Microsoft recommends that the server meets specific requirements • Windows 2000 (SP3)or Windows Server 2003 • Pentium III at 700 MHz, or equivalent • 512 MB of RAM • 6 or more GB of free disk space on an NTFS partition • The system partition should be an NTFS partition • IIS 4.0 or higher installed
(Skill 2) Installing, Configuring, and Managing a Software Update Services (SUS) Server (2) • To install SUS, download SUS 1.1 from Microsoft at http://go.microsoft.com/fwlink/?LinkId=6930 • After you download SUS, double-click the executable (currently SUS10SP1.exe) to install SUS • After the installation is complete, you will be presented with the Software Update Services Web page
(Skill 2) Installing, Configuring, and Managing a Software Update Services (SUS) Server (3) • Typically, the default settings for each of these options will be adequate • Select a Proxy Server configuration • Specify the name your clients will use to locate this update server • Select which server to synchronize content from • Select how you want to handle new versions of previously approved updates • Select where you want to store updates • Synchronize installation packages only for these locales
(Skill 2) Figure 16-4 The Software Update Services Web page
(Skill 2) Allows you to configure how the SUS server connects to the Microsoft Windows Update servers on the Internet This setting determines whether or not you will be required to manually approve new releases of previously approved updates This setting is set, by default, to the NetBIOS name of your server; if you use DNS naming exclusively, you will need to change the name to follow DNS naming conventions This option lets you choose whether or not to store all updates locally or leave the updates on the Microsoft Servers This section allows you to specify the locales supported by the SUS server This section allows you to choose between direct synchronization of updates from the Microsoft Windows Update servers on the Internet, or local SUS servers on our intranet Figure 16-5 The Set options page
(Skill 2) Figure 16-6 The Synchronize server page
(Skill 2) Figure 16-7 The Schedule Synchronization dialog box
(Skill 2) Figure 16-8 The synchronization status is shown during the synchronization process
(Skill 2) Figure 16-9 The Approve updates page
(Skill 2) Figure 16-10 Selecting updates to approve
(Skill 2) Figure 16-11 The approve updates warning dialog box Figure 16-12 The license agreement dialog box for the approved updates
(Skill 2) Figure 16-13 The approval confirmation dialog box Figure 16-14 The Approve updates page, showing the status of the approved updates as “Approved”
(Skill 3) Using a Group Policy Object to Configure Updates • After SUS is installed, the new Group Policy administrative template wuau.adm is installed by default • This template adds the Windows Update node to the Windows Components node under Administrative Templates in the Computer Configuration node in the Group Policy Object Editor
(Skill 3) Using a Group Policy Object to Configure Updates (2) • The Windows Update node includes four new configuration options for your Windows Update clients • Configure Automatic Updates • Specify intranet Microsoft update service location • Reschedule Automatic Updates scheduled installations • No auto-restart for scheduled Automatic Updates installations
(Skill 3) Figure 16-15 The Windows Update section in the Default Domain Policy
(Skill 3) Figure 16-16 The Configure Automatic Updates Properties dialog box
(Skill 3) Figure 16-17 The Specify intranet Microsoft update service location Properties dialog box
(Skill 3) Figure 16-18 The Reschedule Automatic Updates scheduled installations Properties dialog box
(Skill 3) Figure 16-19 Opening the Group Policy Object Editor for the default domain policy from the GPMC
(Skill 4) Administrating Software Site Licensing • Windows Server 2003 requires Client Access Licenses (CALs) • CALs are licenses to access the server • CALs can be utilized in one of two modes • Per Server • Per Device or User
(Skill 4) Administrating Software Site Licensing (2) • Per Server licensing mode • A single CAL is necessary for each concurrent connection to the specific server • In this mode, you apply CALs to the servers themselves, and when the maximum number of concurrent connections to that server has been reached, no additional users can access the server • Per Device or User mode • A CAL is required for each client connection • It doesn't matter to which server the clients connect
(Skill 4) Administrating Software Site Licensing (3) • Microsoft has changed its licensing requirements in Windows Server 2003 • Multiple users logged on to a single machine now require multiple licenses • A single user using more than one machine also requires multiple licenses
(Skill 4) Administrating Software Site Licensing (4) • Licensing tool • Helps keep track of your licensing • View the maximum number of concurrent licenses being used • View the servers that are or are not in compliance • Review your license purchase history • License Logging service must be enable in the Services console in order for the Licensing tool to function • After this service is enabled, you can access the Licensing service to add licenses and monitor license usage
(Skill 4) Figure 16-20 The Licensing Tool
(Skill 4) Figure 16-21 The License Logging service in the Services console
(Skill 4) Figure 16-22 The Products View tab in the Licensing tool
(Skill 4) Figure 16-23 The Properties of Windows Server dialog box
(Skill 4) Figure 16-24 The Clients tab
(Skill 4) Figure 16-25 The Properties dialog box for a user account
(Skill 4) Figure 16-26 The Server Browser tab
(Skill 4) Figure 16-27 The Choose Licensing Mode dialog box