Computer Cleaning: Tips, Tricks & Techniques for Equipment Maintenance
Learn the best practices for cleaning your computer to prevent dust buildup and ensure optimal performance. Follow our guide on safely cleaning your computer components and peripherals to extend their lifespan and functionality.

Computer Cleaning: Tips, Tricks & Techniques for Equipment Maintenance
E N D
Presentation Transcript
Computer Cleaning Broas, Angela Mae L. Co, V. Ann Crishna B. Celis, Chezlad J. Mendoza, Elvin Joseph P.
Computer fans pull a lot of dust inside the chassis. If undisturbed, the dust can interfere with ventilation, eventually causing parts to fail. If you have a service contract that covers maintenance, have your computer taken apart and professionally cleaned. Otherwise, follow these steps. ComputerCleaning
General Precautions When working around electronics there are some precautions you should always take when cleaning.
General Precautions • The best way to clean any computer component or device is to follow the manufacturer's instructions in your user manual. • Always power off the system first • Always use anti-static wristband or other professional grounding devices • Never work on carpeted surfaces ComputerCleaning
General Precautions • Never spray cleaning fluids directly onto computer components. Always spray the cleaner onto a cloth then wipe • Do not allow any cleaner to run or drip near circuit boards, or near seams on device casings. • Never allow circuits or electronics to become damp or wet. ComputerCleaning
General Precautions • Some cleaning solvents can damage components. In most cases, water will work just as well. • Cleaning electronics and circuit boards requires experience, knowledge and special electronics cleaners. This type of cleaning is best left to professionals. ComputerCleaning
Tricks & Tips • If compressed air is too strong for little dust jobs, try using a plastic liquid medicine plunger style dispenser. • Pull the plunger all the way back to fill it with air and then push it forward quickly for a quick output of air to blow away dust in small places such as USB ports or SD memory card slots. • The small ends of these dispensers enable you to reach a more concentrated area with the air then you could get with just blowing our air yourself (from your mouth). ComputerCleaning
Tricks & Tips • When using compressed air, always release in short blasts. Longer blasts can actually result in condensation. • Anti-static cloths are great for attracting dust and are safe to use around computer equipment. • The cleaner you keep your work space, the cleaner your equipment will be • Be sure to hang on to your user manuals as they provide you with the best cleaning methods for that particular device. ComputerCleaning
Dust Inside The Case • Turn off your computer. • Remove the side cover of the computer case, exposing the motherboard and other hardware components. • Inspect all cables and connections. Be sure to look for cables that are frayed, loose, pinched, snug or otherwise damaged. Replace snug cables with longer ones before it accidentally snaps. ComputerCleaning
Dust Inside The Case • Shoot the canned air at everything in your computer. A vacuum may help suck out the dust while you knock it loose with the compressed air. • Replace the side cover of the computer, but check first that there aren't any cables that are lying next to any fans. Fasten the cover and restore the power. ComputerCleaning
Optical Mouse Cleaning • Disconnect the optical mouse from the back of the computer. • Dampen one of your lint-free cloths with some isopropyl rubbing alcohol. • Clean the outside of the mouse with the cloth. (DO NOT attempt to clean the optical sensor) • Reconnect the optical mouse to the back of the computer. ComputerCleaning
Keyboard Cleaning • Disconnect the keyboard from the back of the computer. • Hold the keyboard upside down over a desk or counter and smack the bottom of the keyboard to knock out any filth. • Lay your keyboard back down on a table. • Use compressed air and shoot it between the keys to get out anything loosened, but not removed from the good smacking you gave it. ComputerCleaning
Keyboard Cleaning • Use your isopropyl rubbing alcohol dampened cloth and clean the surface of each key along with the surrounding areas of your keyboard. This should restore the natural brilliance of your keyboard! • Reconnect the keyboard to the back of the computer. ComputerCleaning
Monitor Cleaning • Turn off your monitor if you feel uncomfortable cleaning it with the power on. • Spray the monitor cleaner. Use a lint-free cloth and rub the monitor and screen in a circular pattern to remove the dirt and grime. • Restore power to the monitor if need be. ComputerCleaning
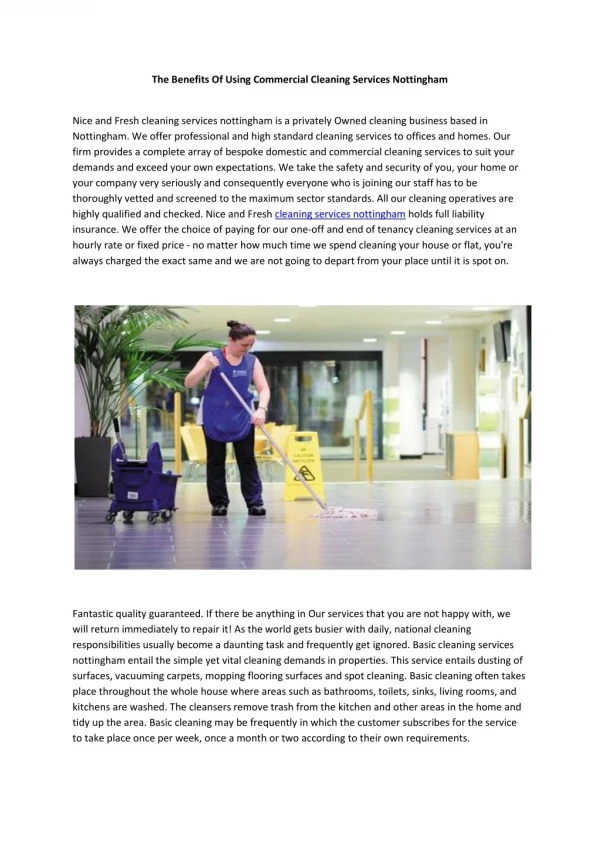
Cleaning the Outside of Your Printer • Turn your printer off before cleaning. • Clean the outside of your printer with a moist, lint-free cloth. Flour sacking or 100% cotton white t-shirt material works well. • Usually a solution of one part vinegar and one part water is safe to use, but when moistening a cloth, be sure to wring out all the excess. Distilled or RO (reverse osmosis) water minimizes mineral residues. If you do use a prepared cleaner, make sure it is safe for both electronics and plastics. • Always moisten the cloth. Never spray an aerosol directly onto your printer. ComputerCleaning
Cleaning a Laser Printer • Turn the printer off, unplug it, and allow it to cool down before you begin. • Remove the internal paper trays. • Remove the toner cartridge and place it on a piece of clean paper. • Clean inside the toner cavity with a dry, lint-free cloth and printer brush. • Clean the printer mirror gently with the brush. Don't touch the mirror if a brush isn't provided. • Wipe away dust and spilled toner. Remove paper fragments. • Clean the rollers, but don’t touch the transfer (sponge) roller. • Replace the toner cartridge. ComputerCleaning
Cleaning a Laser Printer Exposure to light can damage toner cartridges. Always cover your toner cartridge with an extra lint-free cloth or piece of paper after removing it. ComputerCleaning
Cleaning an Inkjet Printer • Inkjet cleaning cartridges flush dirt and debris out of clogged printer nozzles, restoring the quality of your prints and prolonging the life of your print heads. However, take care that the cleaning fluid you use is approved for your brand and model of printer. • Before cleaning inside your inkjet, turn it off and unplug it. Let it cool down if necessary. • Dust, hair, and lint from inexpensive papers can gum up your printer’s rollers. A computer vacuum is usually a safe way to remove debris. • Roller cleaning sheets can help in cleaning print rollers. Again, check documentation before use. ComputerCleaning
Cleaning an Inkjet Printer Most manufacturers recommend against using compressed air since the propellant may add moisture to the inside of your printer. ComputerCleaning
Speaker Cleaning • Remove the grille from the speaker. Be careful doing this as you do not want to damage the grille. • Clean the grille of your speakers. The grille on your speakers can get dusty. If the grille is soiled or stained gently rinse with warm water and lay them out to dry before putting them back on. • Clean the driver in the speaker. Dust can accumulate in the drivers. When removing the dust use a soft bristle paintbrush. • Look for other areas within the speakers that have accumulated dust. Use a dry cloth or pant brush to remove any other dust in the speakers. • For sensitive small parts of the speaker use a micro-fiber cloth to remove the dust. ComputerCleaning
Speaker Cleaning Even if the dust or soil does not come off a speaker grille do not use more water on the cloth because if you get any wetness in the driver it can ruin your speaker. ComputerCleaning
Speaker Cleaning • If you have a non-removable grille on your speaker clean them with a dry cloth. • There are compressed-air cans that are made especially for dusting electronic equipment that can be used to clean your speakers. ComputerCleaning
Clean the entire system at least three or four times a year. • Place computer in a well ventilated room. • Position the case on top of a shelf, never on the ground. • Place plastic computer bags over the case and monitor when not in use. • Always use a mouse pad, whether you own a ball or optical mouse. • Upgrade your computer case to one with at an intake and outtake fan, including an air filter. • Never allow anyone to eat at your computer workstation. ComputerCleaning
Sources http://www.directron.com/cleaning.html http://www.geeksaresexy.net/wp-content/uploads/2008/06/dust2.jpg http://dropline.net/cats/images/my-mouse.jpg http://upload.wikimedia.org/wikipedia/commons/thumb/6/6a/Light_bulb_icon_tips.svg/304px-Light_bulb_icon_tips.svg.png http://cdn1.iconfinder.com/data/icons/gnome-desktop-icons-png/PNG/64/Gnome-Edit-Clear-64.png http://www.techdigest.tv/series-9-monitor.jpg http://icons.iconarchive.com/icons/visualpharm/must-have/256/Information-icon.png http://www.youtube.com/watch?v=mrEG4A8v0b8 http://www.youtube.com/watch?v=Rlzas7S8f_I http://www.youtube.com/watch?v=3MsLJYIabdI http://www.youtube.com/watch?v=vqbUyNMATXU http://www.youtube.com/watch?v=mJyOsx6kzWA