Bendix King GPH Command Portable Radio
220 likes | 439 Vues
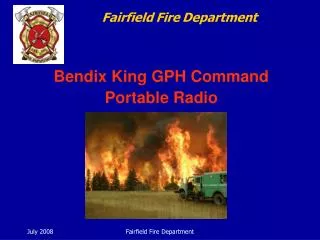
North Zone Communications Committee. Bendix King GPH Command Portable Radio. Important Information.

Bendix King GPH Command Portable Radio
E N D
Presentation Transcript
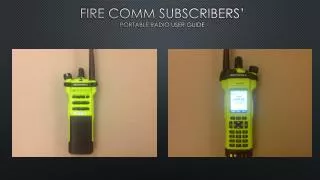
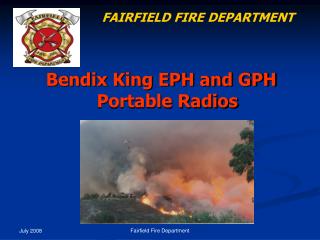
North Zone Communications Committee Bendix King GPH Command Portable Radio North Zone – Communications
Important Information The content of this PowerPoint covers the basic operation of a Bendix King GPH Command portable radio. It will not cover the various priority settings or the toggle options available since these may be configured differently to meet specific agency needs. It will show the more common configurations utilized and found. North Zone – Communications
Objectives • Review basic specifications & features • Learn to switch between groups • Learn to create and alter a scan list • Learn to select a tone • Learn to switch to the Command Group • Learn to build and delete a Command Group • Learn to operate within the Command Group North Zone – Communications
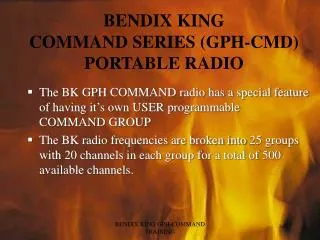
Specifications & Features • 136-174 MHz VHF ‘narrowband” frequency range. • 5 watts RF output. • 500 channels, 25 users groups with 20 channels per group. • On demand Command Group – enables building a 20 channel “Command Group” from any of the 500 programmed channels. Note: Group 15 left open for incident radio plan cloning North Zone – Communications
Battery Removal & Installation • Lock tab on right side. • Twist battery ¼ turn • Battery twists 30 degrees • Twist either direction North Zone – Communications
Clamshell • Holds 9 AA batteries • Twice the life of the NiCad rechargeable battery North Zone – Communications
Opening A Clamshell • Press dot on terminal end • Case pops up and out North Zone – Communications
Battery Capacity • Some “older” clamshells may take 10 batteries • Do not remove installed spacer. • Will “Overvolt” and damage the radio North Zone – Communications
Top Of Radio Squelch Volume Transmit Indicator (red) Channel Select – No bezel stops DIR/RPT Scan Priority Busy Light (green) Remember, when the toggles are toward the front, the feature is OFF, when the toggles are toward the back, the feature is ON. When programming, all features should be in the OFF position North Zone – Communications
Common Toggle Configuration and Labeling Left Toggle • DIR/TA • DIR = Direct • TA = Talk Around Middle Toggle • SCAN Right Toggle • PRI NOTE: Toggle configuration and function can be individually configured by the agency. Some CAL Fire GPH Command Radios may be labeled Hi/Lo but the toggle function is RPT/DIR North Zone – Communications
Switching Groups • Press “#” • Enter desired group number • Press “ENT” or wait five seconds • Press “#” by itself to display the current group. North Zone – Communications
Adding Channels To A Scan List Turn off SCAN & PRI • Switch to desired channel. • Press “ENT” to add to channel list. Beep will sound. • Display will indicate “SCN” above channel description • To scan to channels in the scan list, turn the SCAN toggle up • Can’t scan across groups NOTE: Channels which should be in the scan list for an incident are: Command, Tactical, Air to Ground and Air Guard if in the Incident 205 North Zone – Communications
Deleting Channels From A Scan List Turn off SCN & PRI • Turn channel selector to desired channel • Press “CLR” button • Channel removed from scan list North Zone – Communications
Selecting A Tone Turn DIR/RPT toggle to RPT • Press tone number on keypad. • Tone number will be momentarily displayed in the display. North Zone – Communications
Building a Command Group • The radio allows construction of a Command Group of up to 20 channels, drawn from any of the programmed channels from any group in the radio. • To add channels to the Command Group, turn both scan switches down before programming. • Once a Command group is built, it will have all the same functions as found in any other group. North Zone – Communications
Building A Command Group • While operating in a group other than the Command Group (Groups 1-25), the user selects a channel in the radio and presses the [ * ] key to enter the channel into the Command Group • After adding a channel, the display momentarily shows, “CMND CHAN XX” where “XX” is the channel number (1-20) North Zone – Communications
Accessing The Command Group • To change from current group to the “Command Group”: press[ # ] twice and then press [ ENT ] key • The rotary channel knob selects channels in the group. • The channels brought into the Command group bring the attributes from the group they came from. North Zone – Communications
Accessing The Command Group • To delete channels in the Command group, press [ * ] while on the selected channel. • To delete the entire Command Group, press and hold [* ] until display reads “CMND EMPTY”. If the Command group is empty, continuous beeps will sound. • To get out of the Command group navigate to another group. Press [#], the group number and [ENT] North Zone – Communications
The “#” Button • Press “#” once to display the Group • Press”#” again to display the channel and tone you are currently using. North Zone – Communications
Priority Toggle • There are several options for setting the PRI channel on either a EPH or GPH radio. As such, these settings may be agency specific. • One of the more common settings is: • With a scan list entered • What ever the channel selector is turned to will become the PRI channel when the PRI toggle and the SCAN toggle are both in the UP position. • You are now scanning what is in the scan list, but giving priority to any transmission received on the channel selected using the channel selector knob. • If you no longer wish to use the PRI function, turn the PRI toggle down. You will still continue to scan your scan list North Zone – Communications
Locking The Key Pad • To lock the keypad, press and hold the FCN key until the display reads LOCKED. • To unlock the keypad press and hold the FCN key until the display reads UNLOCKED. North Zone – Communications
After An Incident • If your portable was cloned by the Communications Unit at the incident, have your agencies communication technician reprogram the radio with your agencies data file. This will ensure that all of the programming parameters are returned to their original settings. North Zone – Communications