Unity mode
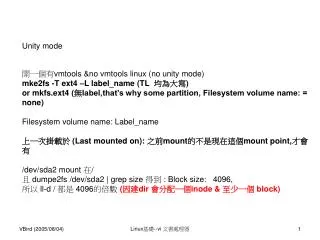
Unity mode. 開一個有 vmtools &no vmtools linux (no unity mode) mke2fs -T ext4 –L label_name (TL 均為大寫 ) or mkfs.ext4 ( 無 label,that’s why some partition, Filesystem volume name: = none) Filesystem volume name: Label_name 上一次掛載於 (Last mounted on): 之前 mount 的不是現在這個 mount point, 才會有

Unity mode
E N D
Presentation Transcript
Unity mode 開一個有vmtools &no vmtools linux(no unity mode) mke2fs -T ext4 –L label_name (TL 均為大寫)or mkfs.ext4 (無label,that’s why some partition, Filesystem volume name: = none) Filesystem volume name: Label_name 上一次掛載於 (Last mounted on): 之前mount的不是現在這個mount point,才會有 /dev/sda2 mount 在/ 且 dumpe2fs /dev/sda2 | grep size 得到 : Block size: 4096, 所以 ll-d / 都是 4096的倍數(因建dir 會分配一個inode & 至少一個 block) Linux基礎--vi 文書處理器
7.3 檔案內容查閱 less • less (一頁一頁翻動) • 空白鍵 :向下翻動一頁; • [pagedown] :向下翻動一頁; • [pageup] :向上翻動一頁; • /字串 :向下搜尋『字串』的功能; • ?字串 :向上搜尋『字串』的功能; • n :重複前一個搜尋 (與 / 或 ? 有關!) • N :反向的重複前一個搜尋 (與 / 或 ? 有關!) • q :離開 less 這個程式;
head 略 • 7.3.3 資料擷取 • head (取出前面幾行) [root@www ~]# head [-n number] 檔案 選項與參數: -n :後面接數字,代表顯示幾行的意思 [root@www ~]# head /etc/man.config # 預設的情況中,顯示前面十行!若要顯示前 20 行,就得要這樣: [root@www ~]# head -n 20 /etc/man.config
tail • tail (取出後面幾行) [root@www ~]# tail [-n number] 檔案 (略) 選項與參數: -n :後面接數字,代表顯示幾行的意思 -f :表示持續偵測後面所接的檔名,要等到按下[ctrl]-c才會結束tail的偵測 [root@www ~]# tail /etc/man.config # 預設的情況中,顯示最後的十行!若要顯示最後的 20 行,就得要這樣: [root@www ~]# tail -n 20 /etc/man.config • tail -n 5 -f /var/log/messages (若沒-n 5,default =20) • <==要等到輸入[crtl]-c之後才會離開tail這個指令的偵測! • 由於/var/log/messages隨時會有資料寫入,你想要讓該檔案有資料寫入時就立刻顯示到螢幕上,就利用 -f 這個選項,他可以一直偵測/var/log/messages這個檔案,新加入的資料都會被顯示到螢幕上。直到你按下[crtl]-c才會離開tail的偵測喔!
od 略 • 7.3.4 非純文字檔: od • tail (取出後面幾行) [[root@www ~]# od [-t TYPE] 檔案 選項或參數: -t :後面可以接各種『類型 (TYPE)』的輸出,例如: a :利用預設的字元來輸出; c :使用 ASCII 字元來輸出 d[size] :利用十進位(decimal)來輸出資料,每個整數佔用 size bytes ; f[size] :利用浮點數值(floating)來輸出資料,每個數佔用 size bytes ; o[size] :利用八進位(octal)來輸出資料,每個整數佔用 size bytes ; x[size] :利用十六進位(hexadecimal)來輸出資料,每個整數佔用 size bytes ;
7.3 檔案內容查閱 • 7.3.5 修改檔案時間或建置新檔: touch • modification time (mtime): • 當該檔案的『內容資料』變更時,就會更新這個時間!內容資料指的是檔案的內容,而不是檔案的屬性或權限喔! • status time (ctime): • 當該檔案的『狀態 (status)』改變時,就會更新這個時間,舉例來說,像是權限與屬性被更改了,都會更新這個時間啊。 • access time (atime):(file沒變,重複cat就不會改了) • 當『該檔案的內容被取用』時,就會更新這個讀取時間 (access)。舉例來說,我們使用cat 去讀取 /etc/man.config ,就會更新該檔案的 atime 了。 • touch file m s a time全改成now
7.4 檔案與目錄的預設權限與隱藏權限 • 7.4.1 檔案預設權限:umask • 若使用者建立為『檔案』則預設『沒有可執行( x )權限』,亦即只有 rw 這兩個項目,也就是最大為 file default=666 分,預設權限如下: • -rw-rw-rw-(因為大多數檔案建立時,無X需求) • 若使用者建立為『目錄』,則由於 x 與是否可以進入此目錄有關,因此預設為所有權限均開放,亦即為 dir default=777分,預設權限如下: drwxrwxrwx (建立資料夾就是要讓人瀏覽&進入,至於是否要開放w,由個人的umask來控制) • umask • umask -S (以符號表示, umask) • 修改 umask
預設umask: /etc/bashrc (勿修改), vi出來看一下 search/umask Linux基礎-- Linux 檔案與目錄管理
練習建一帳號gab(同步建group gab) 加a &b > group gab, ch7-p31 useradd gab; passwd -d gab;chmod -R 750 /home/gab 建a & b, 加入gab groupusermod -G gab a; usermod -G gab b(vigr 確認一下加成功) a$> cd /home/gab 沒問題,但無法touch file,因GroupMode為5=r-x,所以,應改為7 /home/gab GroupMode改為7後a$> touch /home/gab/afile (666-002=664,同group可w)b$> vi /home/gab/afile(readonly??>其實w!可w, owner會換為b)再換為a$> rm /home/gab/afile (a還可以刪b的afile咧!因為6) Linux基礎-- Linux 檔案與目錄管理
7.4 檔案與目錄的預設權限與隱藏權限 • 7.4.2 檔案隱藏屬性 • chattr (設定檔案隱藏屬性) [root@www ~]# chattr [+-=][ASacdistu] 檔案或目錄名稱 選項與參數: + :增加某一個特殊參數,其他原本存在參數則不動。 - :移除某一個特殊參數,其他原本存在參數則不動。 = :設定一定,且僅有後面接的參數 A :當設定了 A 這個屬性時,若你有存取此檔案(或目錄)時,他的存取時間 atime將不會被修改,可避免I/O較慢的機器過度的存取磁碟。這對速度較慢的電腦有幫助 S :一般檔案是非同步寫入磁碟的(原理請參考第五章sync的說明),如果加上 S 這個屬性時,當你進行任何檔案的修改,該更動會『同步』寫入磁碟中。 a :當設定 a 之後,這個檔案將只能增加資料,而不能刪除也不能修改資料,只有root 才能設定這個屬性。 append only c :這個屬性設定之後,將會自動的將此檔案『壓縮』,在讀取的時候將會自動解壓縮,但是在儲存的時候,將會先進行壓縮後再儲存(看來對於大檔案似乎蠻有用的!)
7.4 檔案與目錄的預設權限與隱藏權限 d :當 dump 程序被執行的時候,設定 d 屬性將可使該檔案(或目錄)不會被 dump 備份 i :這個 i 可就很厲害了!它可以讓一個檔案『不能被刪除、改名、設定連結也無法寫入或新增資料!』對於系統安全性有相當大的助益!只有 root 能設定此屬性 immutable s :當檔案設定了 s 屬性時,如果這個檔案被刪除,它將會被完全的移除出這個硬碟空間,所以如果誤刪了,完全無法救回來了喔! u :與 s 相反的,當使用 u 來設定檔案時,如果該檔案被刪除了,則資料內容其實還存在磁碟中,可以使用來救援該檔案喔!>> scalpel 注意:屬性設定常見的是 a 與 i 的設定值,而且很多設定值必須要身為 root 才能設定每一個檔案都有 e 屬性,為extent format,指的就是 Ext2/Ext3/Ext4 file
練習 chattr +i (& -i) file, lsattr file (一般users皆可做)test rm file with i permission • 練習 chattr +a (& -a) file, lsattr file(This option is designed for log files, only root can do this) Linux基礎-- Linux 檔案與目錄管理
練習 chattr +i, -i root# touch ifile root# chmod 777 ifile root# chattr +iifile root# rm ifile (即便是 777, 也刪不掉) root# chattr -i ifile root# rm ifile (可刪,一定要-i 才可刪)其它自行練習,簡單. -u 可 undelte (install scalpel)if yum search scalpel not found,yum -y install http://dl.fedoraproject.org/pub/epel/6/x86_64/epel-release-6-8.noarch.rpm (更新套件庫,不然找不到 scalpel) yum -y install scalpel
練習root copy .bashrc給一般user cp .bashrc ~jj/bashrc(別用同filename,由user自行操作) chown jj:jj ~jj/bashrc
7.4 檔案與目錄的預設權限與隱藏權限 • lsattr (顯示檔案隱藏屬性) [root@www ~]# lsattr [-adR] 檔案或目錄 選項與參數: -a :將隱藏檔的屬性也秀出來; -d :如果接的是目錄,僅列出目錄本身的屬性而非目錄內的檔名; -R :連同子目錄的資料也一併列出來! [root@www tmp]# chattr +aij attrtest [root@www tmp]# lsattr attrtest ----ia---j--- attrtest
7.4 檔案與目錄的預設權限與隱藏權限 • 7.4.3 檔案特殊權限:SUID, SGID, SBIT • Set UID • SUID 權限僅對二進位程式(binary program)有效; • 執行者對於該程式需要具有 x 的可執行權限; • 本權限僅在執行該程式的過程中有效 (run-time); • 執行者將具有該程式擁有者 (owner) 的權限。 SUID程式執行的過程示意圖
passwd ok, cat not ok Linux基礎-- Linux 檔案與目錄管理
7.4 檔案與目錄的預設權限與隱藏權限 • Set UID • ll /usr/bin/passwd • ll /usr/mount-rwsr-xr-x 一般user在執行其間會變root • vbird 對於 /usr/bin/passwd 這個程式來說是具有 x 權限的表示 vbird 能執行 passwd; • passwd 的擁有者是 root 這個帳號; • vbird 執行 passwd 的過程中,會『暫時』獲得 root 的權限; • /etc/shadow (& passwd)就可以被 vbird 所執行的 passwd 所修改。
Set UID 設定, • 除了原來的3個數字permission外,在最左邊再加上4即為set UID • 一般user亦可做 • touch a • chmod 4755 a -rwsr-xr-x./a 可執行,合理 • chmod 6755 a -rwsr-sr-x以 group member 來執行 ./a 可執行,也合理 • 但是chmod 7666 a (6就沒有x mode了,何來其他人執行轉成owner or group) -rwSrwSrwT大寫 S & T 表示空的suid, 空的sgid, 空的sticky bit Linux基礎-- Linux 檔案與目錄管理
set gid一般users直接cat mlocate.db是不可能的,也就是無讀取mlocate.db權限, 那要怎麼執行locate,locate也要讀取mlocate.db啊, • ll locate (找不到, which 一下)-rwx--s--x. 1 root slocate … /usr/bin/locate • 對group, set gid • ll mlocate.db (找不到, updatedb & locate 一下)-rw-r-----. 1 root slocate … /var/lib/mlocate/mlocate.db • 只有root & slocate group 成員可以讀此檔一般 user 不能讀 那要怎麼locate???注意看slocate group 支援,亦即執行locate 過程,取得該group x permission (也就是 斬時 變成該 slocate group成員) Linux基礎-- Linux 檔案與目錄管理
7.4 檔案與目錄的預設權限與隱藏權限 • SUID/SGID/SBIT 權限設定 • 4 為 SUID • 2 為 SGID • 1 為 SBIT • chmod u+s,g+s file • chmod o+t dir
Sticky bit • 只對dir有效 • ll -d /tmp (permission:1777) • file /tmp (/tmp: sticky directory) • stat /tmp (1777/drwxrwxrwt) • 當使用者對於此目錄具有 w, x 權限(一般也會有r,也就是對dir有7 mode),亦即具有寫入的權限時; • 當使用者在該目錄下建立檔案或目錄時,僅有自己與 root 才有權力刪除該檔案Sticky bit • 練習: • user a touch /tmp/aaa, chmod 777 /tmp/aaa • user b rm aaa, or mv aaa bbb 都不行, 但可 vi aaa(rm or mv 都不可以)
7.4.4 觀察檔案類型:file 查 ascii or binary(type 是 用來查可執行檔是否內建)
file 指令:ascii or binary executable yum -y install gcc cd vi abc.c // #include <stdio.h> main() { printf(“hello,kitty\n”); } // gcc -o abc.o abc.c ./abc.o file abc.c file abc.o Linux基礎-- Linux 檔案與目錄管理
7.5 指令與檔案的搜尋 • 7.5.1 指令檔名的搜尋 • which (尋找『執行檔』)應為search $PATH中的具x權限檔案 [root@www ~]# which [-a] command 選項或參數: -a :將所有由 PATH 目錄中可以找到的指令均列出,而不止第一個被找到的指令名稱 範例一:分別用root與一般帳號搜尋 ifconfig 這個指令的完整檔名 [root@www ~]# which ifconfig /sbin/ifconfig <==用 root 可以找到正確的執行檔名喔! [root@www ~]# su - vbird <==切換身份成為 vbird 去! [vbird@www ~]$ which ifconfig /usr/bin/which: no ifconfig in (/usr/kerberos/bin:/usr/local/bin:/bin:/usr/bin :/home/vbird/bin) <==見鬼了!竟然一般身份帳號找不到! # 因為 which 是根據使用者所設定的 PATH 變數內的目錄去搜尋可執行檔的!所以, # 不同的 PATH 設定內容所找到的指令當然不一樣啦!因為 /sbin 不在 vbird 的 # PATH 中,找不到也是理所當然的啊!瞭乎? [vbird@www ~]$ exit <==記得將身份切換回原本的 root Linux基礎-- Linux 檔案與目錄管理
7.5 指令與檔案的搜尋 • which (尋找『執行檔』
阿晃覺得 whereis 是很棒的指令,但bird講得不清楚 • [root@www ~]# whereis [-bmsu] 檔案或目錄名whereis 只找整個路徑中最後一個token,而且必須是一個完整的token才會找到,不管該token是file or dir 都可以, 但是: • 1.) 必須是完整的keyword (whereis ttpd不會找到 httpd)想像一下若沒有這規則, whereis cat會有幾千個結果 (可以whereis cat看看,可精確的找到你要的), locate cat | wc -l結果有 2千多個結果 • 2.) 必須是 整個路徑中最後一個 • whereis etc 只找到 /usr/local/etc DIR (裡面已無 dir,所以 etc是此路徑最後一個token),不會找到 /etc (因為/etc裡面還有一堆有的沒的) • 觀察locate httpd 與 whereis httpd 輸出,就知, whereis 不會把”中間有httpd”的 show出來 • (也可比交 locate cat 與 whereis cat 輸出)選項與參數: • -b :只找 binary 格式的檔案 (whereis cat; whereis -b cat) • -m :只找在說明檔 manual 路徑下的檔案(whereis cat ; whereis -m cat) • -s :只找 source 來源檔案 • -u :搜尋不在上述三個項目當中的其他特殊檔案
7.5 指令與檔案的搜尋 • find
練習 • touch -d "2 days ago" 2daysAgoFile • touch -d “7 days ago" 7daysAgoFile • find . -mtime -3 (3天內) • find . -mtime -8 (8天內) • find . -mtime 0 (現在到24hrs前) • find . -mtime 3 (72hrs前~[72+24hrs]前) • find . -name abc.c -delete (找到馬上刪掉) • mv abc.c ./1/2/3/. • find . -name abc.c -exec gcc -o abc.exe {} \;(-exec 表示指令開始,{}為 find到的file, 一定要加\;表示結束) • touch -t 0802150202 preFile Linux基礎-- Linux 檔案與目錄管理
mimia 7.6 極重要!權限與指令間的關係 • 一、讓使用者能進入某目錄成為『可工作目錄』的基本權限為何: • 可使用的指令:例如cd 等變換工作目錄的指令; • 目錄所需權限:使用者對這個目錄至少需要具有 x 的權限 • 額外需求:如果使用者想要在這個目錄內利用 ls 查閱檔名,則使用者對此目錄還需要 r 的權限。 • 二、使用者在某個目錄內讀取一個檔案的基本權限為何? • 可使用的指令:例如本章談到的 cat, more, less等等 • 目錄所需權限:使用者對這個目錄至少需要具有 x 權限; • 檔案所需權限:使用者對檔案至少需要具有 r 的權限才行! • 三、讓使用者可以修改一個檔案的基本權限為何? • 可使用的指令:例如 nano 或未來要介紹的 vi 編輯器等; • 目錄所需權限:使用者在該檔案所在的目錄至少要有 x 權限; • 檔案所需權限:使用者對該檔案至少要有 r, w 權限
7.6 極重要!權限與指令間的關係 • 四、讓一個使用者可以建立一個檔案的基本權限為何? • 目錄所需權限:使用者在該目錄要具有 w,x 的權限,重點在 w 啦! • 五、讓使用者進入某目錄並執行該目錄下的某個指令之基本權限為何? • 目錄所需權限:使用者在該目錄至少要有 x 的權限; • 檔案所需權限:使用者在該檔案至少需要有 x 的權限
安裝 vsftp server & ftp client command service iptables status; service iptables stop yum -y install vsftpd ftp filezilla windows 7 install g6 練習傳檔 Linux基礎-- Linux 檔案與目錄管理
重要,練習, yum search filezilla > 這麼重要的軟找不到, 更新 yum 軟體庫 yum_repo_base_update_for_package_not_found (for example: filezilla & HA package...) --- EVEN YOU HAVE DONE: cd /etc/yum.repos.d cp CentOS-Base.repo CentOS-Base.repo_backup sed -i 's,mirror.centos.org/centos,ftp.cse.yzu.edu.tw/pub/CentOS,g' CentOS-Base.repo STILL NOT FOUND SEVERAL PACKAGES --- yum serach filezilla; yum -y install filezilla 不能裝 >>No Matches found. AFTER: yum -y install http://dl.fedoraproject.org/pub/epel/6/x86_64/epel-release-6-8.noarch.rpm (or http://mylady.tw/public/linux/rpm/repo_update/epel-release-6-8.noarch.rpm) yum search filezilla >> Found it! INSTALL:yum -y install filezilla; which filezilla 使用:filezilla
順便安裝一下 rdesktop & tree & lynxyum -y install rdesktop; rdesktop ip:80 (沒打為 3389) TEST tree command; tree -a | less lynx http://www.ncu.edu.tw (沒有 firefox 時, test www browser) lynx http://mylady.tw/ip.asp (阿晃寫的一個簡單 asp, 可查出 對外 ip) 要用 yum 安裝 google chrome, 怎麼到 google 問這個問題: keyword: ???yum -y install xxx >> 已不支援 用別人好的 install.sh 裝裝好後執行 google-chrome & Linux基礎-- Linux 檔案與目錄管理
fdisk /dev/sda 建一個1GB partition /dev/sda6 # fdisk /dev/sda p n start cylinder 為 最後一個partition (應為 /dev/sda5) end cylindar + 1 +1000M p w # reboot # cd / # mkfs -t ext4 /dev/sda6 (應為 sda6) # mkdir /mnt/part6 # mount -t ext4 /dev/sda6 /mnt/part6 # df -h | grep sda6 win7 g6 & eagle.iso linux 安裝 filezilla mkdir /mnt/movie mount -o loop eagle.iso /mnt/movie
開機自動掛載/dev/sda6 至 /mnt/part6 vi /etc/fstab # Device Mount point filesystem parameters dump fsck LABEL=/1 / ext3 defaults 1 1 LABEL=/home /home ext3 defaults 1 2 LABEL=/boot /boot ext3 defaults 1 2 tmpfs /dev/shm tmpfs defaults 0 0 LABEL=SWAP-hdc5 swap swap defaults 0 0 # 上述特殊字體的部分與實際磁碟有關!其他則是虛擬檔案系統或 # 與記憶體置換空間 (swap) 有關。
開機自動掛載/dev/sda6 至 /mnt/part6& partition毀損 or /etc/fstab error導致無法開解法 • 設定 /dev/sda6 label 為: part6,e2label /dev/sda6 part6 • vi /etc/fstabcopy /home 那一列, 修改 for /dev/sda6 mount to /mnt/part6test1: • 第一欄 (Device name or Lable name),先以 Label name 來 test: LABEL=part6存檔後 reboot; df -h; vi /mnt/part6/abc.txt • test2 • 第一欄 (Device name or Lable name),再以 Device name 來 test: /dev/sda6存檔後 reboot; df -h; vi /mnt/part6/abc2.txttest3: • 第一欄 (Device name or Lable name),Label name做意打錯: /dev/sda7存檔後 reboot; 掛掉,Linux 開不起來 Single User Mode試著 vi /etc/fstab (不能 modify 因為 / 被 mount 為 readonly)重新 mount / 為 rw: mount -n -o remount,rw /其中, remount,rw 是連在一起,無空格的再去 vi /etc/fstab 修改為正確值即可 reboot ok了!! df -h
mount -n -o remount,rw /-n 一般來說,當我們掛載檔案系統到 Linux 上頭時, Linux 會主動的將目前的 partition 與 filesystem 還有對應的掛載點,都記錄到 /etc/mtab中。不過,有些時刻 (例如不正常關機導致一些問題,而進入單人模式) 系統無法寫入 /etc/mtab 時,就可以加上 -n 這個參數來略過寫入 mtab 的動作。 -o :掛載時,額外加上的參數,比方說帳號、密碼、讀寫權限等: ro, rw: 此 partition 為唯讀(ro) 或可讀寫(rw)remount: 重新掛載,這在系統出錯,或重新更新參數時,很有用! Linux基礎-- Linux 檔案與目錄管理
linux iso image mount: mkdir -p /mnt/disk mount -o loop disk1.iso /mnt/disk keyword: google chrome for linux yumhttp://www.tecmint.com/install-google-chrome-on-redhat-centos-fedora-linux/ Linux基礎-- Linux 檔案與目錄管理