Download
1 / 9
90 likes | 112 Vues
Ku1ef9 nu0103ng chu01a1i game poker hay nhu1ea5t su1ebd giu00fap bu1ea1n ru1ea5t nhiu1ec1u u0111u1ed1i vu1edbi bu1ed9 mu00f4n tru00ed tuu1ec7 nu00e0y, khu00f4ng cu00f3 mu1ed9t game bu00e0i nu00e0o vu01b0u1ee3t qua game bu00e0i poker vu1ec1 khou1ea3n u0111u00f2i hu1ecfi ku1ef9 nu0103ng chu01a1i thu1eadt cao, yu1ebfu tu1ed1 chiu1ebfn thuu1eadt, tu00e2m lu00fd phu1ea3i luu00f4n luu00f4n cu00f3u2026chu00ednh vu00ec thu1ebf poker lu00e0 mu1ed9t tru00f2 chu01a1i ru1ea5t u0111u01b0u1ee3c u01b0u chuu1ed9ng tru00ean tou00e0n Thu1ebf Giu1edbi. Hu00f4m nay hu00e3y cu00f9ng DWthethao u0111i tu00ecm hiu1ec3u nhu1eefng ku1ef9 nu0103ng bu1eaft buu1ed9c phu1ea3i cu00f3 khi chu01a1i bu00e0i poker nhu00e9.

E N D
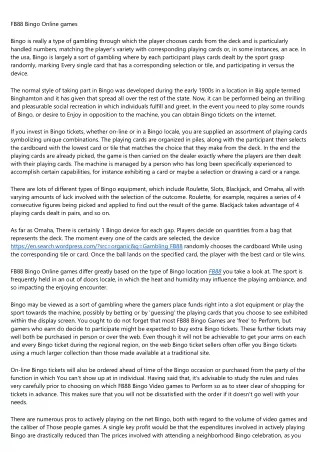
Making a Glass Orb (the short Process) Copyright 2004 Ugur Akinci, Ph.D. (www.writer111.com) 1. Develop a new Photoshop document, about four" X four"in size by picking File > New. Choose the "Transparent" radio-button for "Content material" to create the background clear. Also make sure the "Manner" is "RGB Color". Click on Okay. 2. Pick the Elliptical Marquee Resource (M) and draw a circle whilst urgent about the Change important. The circle must Exhibit "walking ants" all-around its circumference. three. Pick out a non-white foreground coloration. I choose Pink for this exercising. four. Fill the selected circle With all the foreground coloration by picking Edit > Fill > Foreground Coloration. five. Decide on the Go Resource (V) (the arrow with black idea). 6. Copy the Background layer by grabbing it then pulling it over the "Produce a New Layer" icon at the bottom from the Layers listing. 7. Select the History layer and lock it by clicking the Layer Lock Look at-box on prime. 8. Choose the Qualifications Copy click here layer. Appropriate-click on and choose Layer Homes within the pop-up menu. Change the identify on the Layer to "Orb Base". 9. Although the Orb Base layer is selected, simply click the "Incorporate a Layer Design and style" icon at the bottom of your Layers listing. From your pop-up record, choose "Internal Glow."
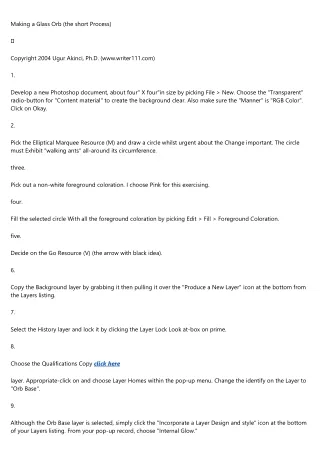
ten. Within the Layer Style dialog box that shows, pick out the subsequent configurations: Mix Manner: Regular. Opacity: 75% Color: pick a dark color close to Black. Dimension: All over a hundred-150, to flavor. 11. Click OK. 12. Click CTRL + D to deselect the choice circle (the "marching ants"). 13. Create a new layer on top by clicking the "Make a New Layer" icon at The underside in the Levels listing. fourteen. Pick the Elliptical Marquee Instrument (M) and attract an ellipse in the direction of the very best within your circle- sphere. 15. During the Software box, click on the Default Qualifications-Foreground Shades icon to change the colors back to Black and White. sixteen. Click the colour-switching double-arrow to generate White the foreground shade. 17. Find the Gradient Instrument (G). eighteen. From your Houses Bar along with your monitor, choose White to Transparent gradient (next from major- remaining). 19. Even though the best layer is still selected, click on and pull the gradient from major towards The underside to
create a white-to-transparent gradient on your sphere. 20. Pick out the Transfer Tool (V) (the arrow with black idea). 21. Click Ctrl + T to activate the Absolutely free Change function. 22. By pulling over the corners in the change sq., reshape your gradient to a little something like this: 23. Strike Enter to register The brand new condition. Click on CTRL + D to deselect the selection circle (the "marching ants"). 24. And you've got your "Glass Orb." BONUS STEPS -- How to Place an Object Within the Glass Orb? 1. While nevertheless in Photoshop, open up any picture file you wish. For instance we're utilizing the photo of the metro coach... ( Visit to the screenshots that accompany this tutorial.) 2. You should definitely have picked the Transfer Device (V) (the arrow with black tip). 3. Click on the new Image and drag it along with your Glass Orb window. This can import The brand new photo by quickly developing a new layer on leading. To illustrate The brand new Picture is just also massive and it has to be
resized. 4. Even though new layer remains to be chosen, Click on Ctrl + T to activate the Free of charge Completely transform purpose. five. You will see the selection sq. about the image. six. On the top Homes bar, enter an correct share price (for instance, "fifty") for W (Width). Click on the chain icon to be certain the H (Peak) might be scaled down by a similar share also. Ensure when you are concluded the square image covers the glass orb absolutely. seven. Press Enter to finalize the scaling. Click CTRL + D to deselect the choice circle (the "marching ants"). 8. Decide on the Elliptical Marquee Software (M) and draw a circle although pressing about the Shift key. The circle need to display "strolling ants" all over its circumference. 9. Center the chosen circle above your sq. picture. ten. Press Ctrl + Shift + I to inverse the selection. 11. Press Delete to delete the corners from the square. twelve. Simply click CTRL + D to deselect the choice circle (the "marching ants"). thirteen. Make sure you have picked the Shift Device (V) (the arrow with black suggestion). fourteen. Centre your round image more than your glass orb.
fifteen. Click the downward arrow appropriate next to the "Mixing Modes" field on top of the Layers box (which displays "Typical" by default). sixteen. Pick "Overlay" and Bingo! Your image is captured Within the glass orb. Be happy to experiment with other Blending Modes and Opacity options. Attempt for example "Variance" Mixing and fifty% Opacity. Your imagination is your limit. Enjoy! ------------------------------------------------------------------- Copyright 2004 Ugur Akinci, Ph.D. (www.writer111.com) 1. Make a new Photoshop doc, about four" X 4"in measurement by picking File > New. Pick out the "Clear" radio- button for "Written content" to produce the history transparent. Also ensure the "Mode" is "RGB Colour". Click on Okay. two. Pick out the Elliptical Marquee Resource (M) and attract a circle although urgent within the Shift essential. The circle ought to Exhibit "strolling ants" all-around its circumference. three. Decide on a non-white foreground color. I choose Crimson for this workout. four. Fill the selected circle While using the foreground colour by deciding on Edit > Fill > Foreground Shade. 5. Decide on the Transfer Device (V) (the arrow with black idea). six. Replicate the Background layer by grabbing it and then pulling it in excess of the "Produce a New Layer" icon at the bottom on the Layers list. 7. Find the History layer and lock it by clicking the Layer Lock check-box on top.
8. Select the History Copy layer. Right-simply click and choose Layer Attributes from the pop-up menu. Change the title in the Layer to "Orb Base". nine. Though the Orb Foundation layer is selected, simply click the "Insert a Layer Design" icon at the bottom in the Levels record. In the pop-up listing, pick out "Interior Glow." 10. Inside the Layer Fashion dialog box that displays, choose the next configurations: Blend Manner: Ordinary. Opacity: 75% Coloration: choose a darkish color near to Black. Sizing: All-around 100-one hundred fifty, to style. 11. Click OK. 12. Simply click CTRL + D to deselect the choice circle (the "marching ants"). thirteen. Create a new layer on major by clicking the "Create a New Layer" icon at the bottom from the Levels listing. fourteen. Select the Elliptical Marquee Resource (M) and draw an ellipse toward the very best of the circle-sphere. 15.
In the Instrument box, click the Default Background-Foreground Hues icon to shift the colors again to Black and White. 16. Click on the color-switching double-arrow to produce White the foreground color. 17. Choose the Gradient Software (G). 18. Through the Properties Bar on top of your display screen, find White to Transparent gradient (next from leading- remaining). 19. Although the highest layer continues to be chosen, click on and pull the gradient from leading to The underside to produce a white-to-clear gradient in your sphere. twenty. Select the Transfer Tool (V) (the arrow with black tip). 21. Simply click Ctrl + T to activate the No cost Transform operate. 22. By pulling within the corners from the renovate sq., reshape your gradient to a thing like this: 23. Hit Enter to sign-up The brand new shape. Click on CTRL + D to deselect the selection circle (the "marching ants"). 24. And you've got your "Glass Orb." Reward Ways -- How to put an Item In the Glass Orb? one. When even now in Photoshop, open any image file you need. To illustrate we've been utilizing the Picture of a metro practice... ( Visit for the screenshots that accompany this tutorial.)
two. You should definitely have chosen the Move Resource (V) (the arrow with black idea). three. Click on the new Picture and drag it on top of your Glass Orb window. This could import the new picture by routinely creating a new layer on best. As an instance The brand new Image is just as well significant and it must be resized. four. Although new layer is still picked, Click on Ctrl + T to activate the Cost-free Remodel function. 5. You will see the selection square about the image. six. On the best Attributes bar, enter an acceptable share benefit (as an example, "fifty") for W (Width). Click on the chain icon to make certain the H (Height) will probably be scaled down by exactly the same proportion as well. Make sure when you are completed the sq. image covers the glass orb entirely. seven. Press Enter to finalize the scaling. Simply click CTRL + D to deselect the selection circle (the "marching ants"). 8. Choose the Elliptical Marquee Device (M) and draw a circle though urgent over the Change essential. The circle really should display "strolling ants" close to its circumference. nine. Middle the selected circle more than your sq. photo. 10. Press Ctrl + Change + I to inverse the choice.
eleven. Press Delete to delete the corners with the square. 12. Click on CTRL + D to deselect the choice circle (the "marching ants"). 13. You should definitely have picked the Transfer Resource (V) (the arrow with black suggestion). 14. Center your spherical photo more than your glass orb. 15. Click the downward arrow proper next to the "Mixing Modes" field in addition to the Levels box (which displays "Normal" by default). 16. Decide on "Overlay" and Bingo! Your image is captured inside the glass orb. Be at liberty to experiment with other Blending Modes and Opacity options. Check out for example "Variation" Mixing and 50% Opacity. Your imagination is your limit. Appreciate! -------------------------------------------------------------------