Download
1 / 1
10 likes | 26 Vues
Canon Selphy CP1300 Troubleshooting guide to fix Canon Selphy CP1300 technical problems, Wireless setup issues, drivers installation, lost connection<br>

E N D
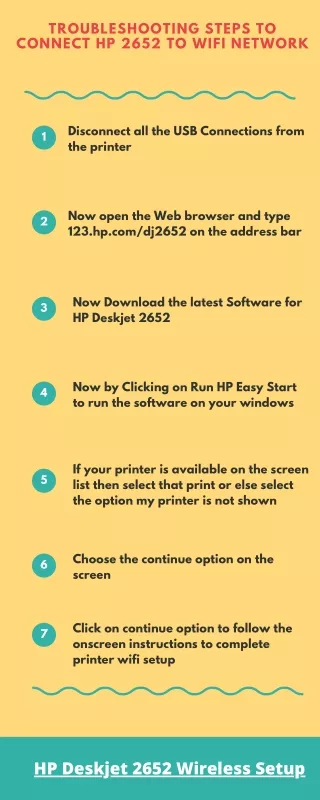
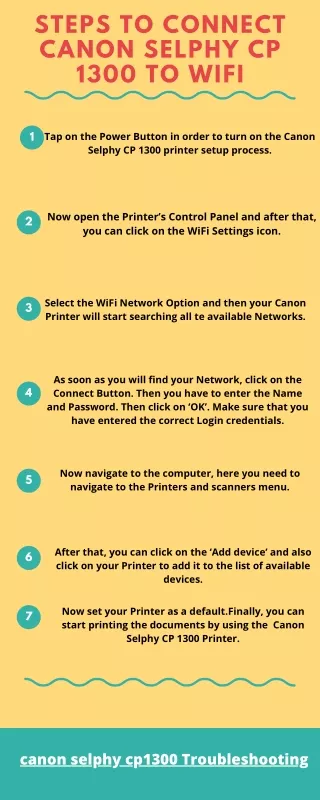
STEPS TO CONNECT CANON SELPHY CP 1300 TO WIFI Tap on the Power Button in order to turn on the Canon Selphy CP 1300 printer setup process. 1 Now open the Printer’s Control Panel and after that, you can click on the WiFi Settings icon. 2 Select the WiFi Network Option and then your Canon Printer will start searching all te available Networks. 3 As soon as you will find your Network, click on the Connect Button. Then you have to enter the Name and Password. Then click on ‘OK’. Make sure that you have entered the correct Login credentials. 4 Now navigate to the computer, here you need to navigate to the Printers and scanners menu. 5 After that, you can click on the ‘Add device’ and also click on your Printer to add it to the list of available devices. 6 Now set your Printer as a default.Finally, you can start printing the documents by using the Canon Selphy CP 1300 Printer. 7 canon selphy cp1300 Troubleshooting