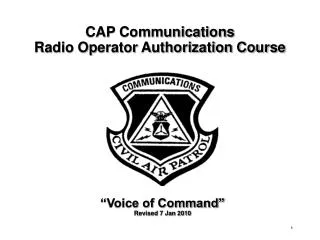
ALABAMA WING CAP Communications TRAINING
1.05k likes | 1.28k Vues
ALABAMA WING CAP Communications TRAINING. Section 2, Ground Communication Systems Information Unclassified- For Official Use Only. CAP GROUND RADIOS.

ALABAMA WING CAP Communications TRAINING
E N D
Presentation Transcript
ALABAMA WING CAP CommunicationsTRAINING Section 2, Ground Communication Systems Information Unclassified- For Official Use Only
CAP GROUND RADIOS This section should be conducted with the actual, operational radios available. If unavailable, this presentation is meant to provide a basic familiarization only.
CAP GROUND RADIOS This section will cover the following radios: • ICOM 4008M UHF FM Inter-Squad Radio (ISR) • E.F. Johnson 5100 series VHF FM Portable Radio • E.F. Johnson 5300 series VHF FM Mobile Radio • Tait 2020 series VHF FM Radio • Motorola Micom HF Radios • Motorola RDP (Rapid Deployment Package) HF Radio Many other radios may be in use. It is important that operators are familiar with the radio they are using.
Operation of Inter-Squad Radio (ISR) Range up to 2 miles CAN NOT be used to talk to VHF radios in the vehicles, bases, or aircraft. Operates on DOD shared UHF frequencies.
ISR Specifications • UHF-FM (DOD shared frequencies) (Although it resembles a FRS radio, it does not operate on FRS frequencies) • 14 Channels • 38 Group Codes • Ring Function • Automatic Transponder System
ISR Utilization Policy • ISR frequencies are used by other military and federal users on a shared basis. • While chances of conflicting with another agency are small, be aware that there may be other users of the frequencies. • ISRs are not intended to be used from aircraft. • The ISR is intended to be a short-range radio. If it is used in an aircraft, it’s range increases dramatically and may interfere with other users.
ISR Utilization Policy, cont. • Standard CAP radio procedure will be used. • Call signs will be used at all times and will be assigned by appropriate leaders. • ISRs will normally be used with tactical call signs (ex. Ground Team 2, Unit 1 or AL118, Unit 1) Uses include Ground Teams, Flightline, Mission Base Staff, etc.
ISR’s Range • The ISR is a short-range radio. It covers different areas in different terrain: • In wide areas free from obstruction, it has its highest range (up to 2 miles) • When there are large buildings or trees in the operating area, it covers a medium range. • In mountainous areas or areas with heavy foliage, it covers a minimum range.
Batteries • The ISR operates on three AA batteries. To install: • Open the latch at the bottom of the back of the radio • Lift the battery cover from the bottom and pull out. • NEVER leave batteries in the radio when the radio is not being used.
ISR Antenna • The ISR’s antenna rotates behind the radio for easy transportation. • Never lower the antenna outside the carrier
Turning the ISR on/off • To turn the ISR on or off, press and hold the POWER button on the front of the radio.
Volume Control • The volume knob is located on the right-hand side of the top of the radio and is indicated in red. • When setting the volume level: Press and hold the MODE button, also indicated in red for one second or until you hear static. This will open the squelch and allow you to set the volume to a comfortable level. Once volume is set, press MODE again for one second until the squelch is closed.
ISR Display • Basic Display Elements: • Radio Symbol (A) • Channel (B) • Group Code (C) • Key = Key Pad Locked • Clock = Auto Power Off • Battery = Low Battery
Radio Symbol • The Radio Symbol, shown in red, indicates that the radio power is on. • The downward arrow indicates the channel is busy or the squelch is open. • This radio is on Channel 14 and Group 38
Channel Number • The Channel Number, shown in red, indicates what channel the radio is currently operating on. The ISR has 14 channels.
Group Code • The Group Code, shown in red, indicates which group code the radio is currently operating on. There are 38 groups. • If the Group Code is disabled, only the channel is displayed.
What are Group Codes? • The ISR has 38 group codes. Group codes, or tones, are transmitted along with your signal and allow other radios on the same group code to receive your transmission. Radios with no selected code will also hear the transmissions. • In order to operate properly, all the radios in a net need to be operating on the same channel and group code.
Changing Channels • To change the channel on the ISR, press the UP or DOWN buttons (shown in red) until the desired channel appears on the screen.
Changing Group Codes • To change the group code on the ISR: • Press the MODE button to enter Group Mode. The Group Code will display. • Use the UP and DOWN buttons to choose the appropriate Group Code. • To turn Group Codes off, use the UP and DOWN buttons to select ---. • Press MODE again to exit Group Mode.
Key Lock Function • To activate the key lock function, hold the POWER button for 2 seconds when turning the radio on. • Only the power and PTT buttons will work in key lock mode. • To deactivate key lock function, turn the radio off, then hold the POWER button for 2 seconds when turning the radio on.
Resetting the ISR • If you ever enter a mode you cannot get out of, or if you encounter a problem, simply reset the radio. • To reset the radio, press DOWN and MODE while turning the POWER on. • The Reset will cause all settings to return to their defaults.
? Questions
Operation of theEF Johnson Handheld Radio Range 2 to 5 miles. VHF FM, used to communicate with other ground units, mobiles, bases, and aircraft.
Overview • Radio Specifications • Radio Features • Radio Operation
Radio Specifications • Very High Frequency - Frequency Modulation (VHF-FM) Radio • Designed for Mobile, Handheld use in the field or on the move • High / Low Power Modes • 256 programmable channels • (16 zones of 16 channels each) • 136 – 174 MHz Frequency Coverage
Radio Features CC 1
Batteries • Batteries should last approximately 13 hours. • When batteries begin to get low, the Low Battery Indicator appears at the top of the display.
Recharging Batteries • To recharge batteries: • Turn radio off. • Drop the radio into the charger. An amber light will appear while charging. A green light will appear when the radio is finished charging. • When finished, you may leave the radio in the charger. • When radio is not in use, charge it once a month.
Radio Operation • Power and Volume Control • Channel and Zone Selection • Keypad Lock • Push To Talk / Microphone • Feature Operation
Power and Volume Control • To turn the EF Johnson handheld on, turn the volume control clockwise. The screen will activate, and the radio will beep. Be careful not to turn the volume knob too far, or the volume will be set too high. • Turn the EF Johnson handheld off by turning the volume control counterclockwise until it clicks.
Radio Operation • Power and Volume Control • Channel and Zone Selection • Keypad Lock • Push To Talk / Microphone • Feature Operation
Channel Selection • To change the channel, turn the channel knob on top of the radio. The extreme counterclockwise position is Channel 1, and the extreme clockwise position is Channel 16. • Current channel name will appear on the display.
Zone Selection CC 1 ALWG NEW • Select the current Zone by pressing the UP or DOWN keys from the home screen. • The current zone number or name will appear on the display. • Press once to see ID • Press quickly to change. • Following a “beep” to indicate a change the display will show the current channel.
“ZONE 1” 1. CC 1 • 2. CC 2 • 3. AIR 1 • 4. AIR 2 • 5. GUARD 1{Standard in all aircraft} • 6. TAC 1 • 7. R65 CAT {Common Access Tone} • 8. R66 CAT • 9. R 67 {Tactical Repeater} • 10. R 68 {Tactical Repeater} 11. R 69 {Tactical Repeater} • 12. R 70 {Tactical Repeater} • 13. R 63 {Tactical Repeater} • 14. R 64 {Tactical Repeater}
2. “ALWG NEW” 1. CC 1 2. CC 2 3. AIR 1 4. AIR 2 5. GUARD 1{Standard in all aircraft} 6. TAC 1 7. R65 CAT {Common Access Tone} 8. R66 CAT 9. Oak Mountain 10. Cheaha 11. MTGY (Montgomery) 12. HUNTSVIL (Huntsville) 13. SHOALES (Muscle Shoales) 14. PHILLIPS (Phillips Mtn – Tuscaloosa 15. DAPHNE (Mobile) 16. VICTORIA (For later use)
3. “ALWG P25” Copy of Zone 2, except transmissions are digital. ALWG will not conduct routine operations using digital modulation until after the completion of the narrowband transition. A portion of the national policy is below. a. UTILIZATION: All Mission Communications nets or activities that do not involve a specific and identified complement of P25-equipped stations should continue to be conducted using analog modulation. While specific, controlled portions of these missions may be operated using digital modulation, care must be taken to ensure that no asset, unit or member is intentionally excluded from the ability to support these missions simply because they are not equipped with P25 radio equipment and assets.
4. “ALWG OLD” 1. COMMAND 1 2. COMMAND 2 This zone is 3. TAC 1 NO LONGER 4. AIR/GRND (Air / Ground) TO BE USED 5. BHAM (Birmingham) 6. CHEHA/MOB (Cheaha / Mobile) 7. MTGY/MSHOL (Montgomery/M.S.) 8. HUNTSVIL (Huntsville) 9. PRI ROAM 10. SEC ROAM 11. PRI MON (Monitors Primary Input) 12. SEC MON (Monitors Secondary Input) 13. OPEN (Not used) 14. AR1 (Airborne Repeater 1) 15. AR 2 (Airborne Repeater 2) 16. OPEN (Not Used)
ZONE 5. “WEATHER” (NWS WEATHER CHANNELS) ZONE 6. “ZONE 6 OLD” (Old Zone 1) ZONE 7. “LIAISON” (Currently USCG channels) ZONE 8. “R01-R16” (New Repeater Pair 1-16) ZONE 9. “R17-R32” (New Repeater Pair 17-32) ZONE 10.“R33-R48” (New Repeater Pair 33-48) ZONE 11.“R49-R64” (New Repeater Pair 49-64) ZONE 12.“R01P-R16P” (Repeaters 1-16 digital mode) ZONE 13.“R17P-R32P” (Repeaters 17-32 digital mode) ZONE 14.“R33P-R48P” (Repeaters 33-48 digital mode) ZONE 15.“R49P-R64P” (Repeaters 49-64 digital mode) ZONE 16. “P25 ZN1” (Zone 1 channels in digital mode)
“ABC” Selection • The ABC selector underneath the Channel Selection knob is used to select the encryption key. Unless specifically told otherwise for specific mission needs, this selector should be on “A” (Clear)
Radio Operation • Power and Volume Control • Channel and Zone Selection • Keypad Lock • Push To Talk / Microphone • Feature Operation
Keypad Lock • To lock the keypad, press the orange arrow-shaped key underneath the antenna. To unlock, press and hold. • This key is hard to press. The radio will beep when switching keypad lock on and off.
Radio Operation • Power and Volume Control • Channel and Zone Selection • Keypad Lock • Push To Talk / Microphone • Feature Operation
Microphone CC 1 • The microphone is located next to the F3 button in the center of the radio’s face. • When transmitting, hold the radio upright 3-4 inches from your mouth and speak in a normal voice.
Speaker and Microphone CC 1 • The speaker and the microphone are in different locations. • The speaker is located at the bottom of the radio’s face.
Radio Operation • Power and Volume Control • Channel and Zone Selection • Talk Around • Push To Talk / Microphone • Feature Operation
F1 Button CC 1 • Press the F1 Button to clear a selection in the menu and to exit the menu.
F2 Button CC 1 Press the F2 Button to activate the menu. Menu Options are: • Scan • Scan Select • Scan Edit • Key Select • Erase Keys • OTAR (Over The Air Re-key Request)
F2 Button Main Menu OTAR REKEY Scan Scan Selct Press the F2 Button to activate the menu. Press the F2 Button again to select the menu option. Press the F1 Button to exit the menu. Menu Options are: • Scan (Easier to use side button!) • Scan Select (Next Slide) • Scan Edit Use the following only with explicit direction. • Key Select • Erase Keys • OTAR (Over The Air Re-key Request)
F2 Button Main Menu OTAR REKEY Scan Scan Selct Press the F2 Button to activate the menu. Scan will be highlighted. Press F2 again and the scan on \ off option will appear. Use the up or down key to choose the option. Press the F2 button to select the option. Press F1 to back up to the menu. Press F1 again to close the menu.