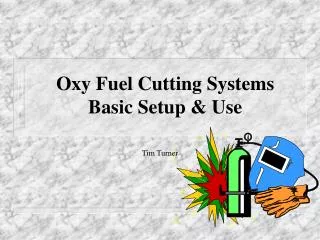
Oxy Fuel Cutting Systems Basic Setup & Use
Oxy Fuel Cutting Systems Basic Setup & Use. Tim Turner. Typical Torch System . Oxygen Cylinder Acetylene Cylinder Method of Securing the cylinders Caps Regulators Backflash arrestors Hoses Torch Body Torch Head Torch Tip Clothing and Eye/Face Protection. Oxygen Cylinders.

Oxy Fuel Cutting Systems Basic Setup & Use
E N D
Presentation Transcript
Oxy Fuel Cutting SystemsBasic Setup & Use Tim Turner
Typical Torch System • Oxygen Cylinder • Acetylene Cylinder • Method of Securing the cylinders • Caps • Regulators • Backflash arrestors • Hoses • Torch Body • Torch Head • Torch Tip • Clothing and Eye/Face Protection
Oxygen Cylinders • Oxygen is very pure - 99% • Pressure is about 2200 psi at 700 F • Hydrostatic tested to 3300 psi • Forged from a single piece of steel - no welding • Minimum of 1/4” thickness • Annealed periodically • Stored away from combustibles • 5’ high wall • 1/2 hour fire rating
T K LK S D,E,Y,U,LE Q ME MBE XAD MD R Oxygen cylinder sizes:
Acetylene Cylinders • Acetone - absorbs acetylene under pressure • Consumption rate = 1/7 content per hour • Fusible plug - 2120 F • Temperature has an extreme affect on pressure • Let stand upright at least 20 minutes before using • Protected valve or cylinder cap • Stored away from oxygen and combustibles • 5’ high wall • 1/2 hour fire rating
WS WCL WC WQ WK WTL
Acetylene Cylinders • C2H2 - Made from calcium carbide and water • Welded construction • Monolithic filler - Asbestos fibers, balsawood (85% porus) • Acetone - absorbs acetylene under pressure • Fusible plug - 2120 F • Consumption rate = 1/7 content per hour • Temperature has an extreme affect on pressure • Let stand 20 minutes before using • Protected valve or cylinder cap • Sold by cubic feet - determined by weight of the cylinders
Oxygen Cylinder Valve • Brass Construction • Double back seat - NEVER LEAVE HALF OPEN • Pop off valve - (fragile disk) • Right hand Thread
Acetylene Cylinder Valve • Brass Construction • Packed valve - OPEN 1/2 TO 3/4 TURN • Hand wheel or tank wrench - NEVER REMOVE WRENCH during use • RH (Male) or LH (Female) Thread
Manifold Systems • Increased Efficiency • more stations • no downtime
Parts: • Cylinders • Hoses - Brass or braided • Check valves or hand valves • Flashback Arrestors - OSHA • Regulators • Main valves
Procedure for changing tanks: • Continuous supply of gasses • Do not allow empties to be pressurized • Valves and/or checkvalves • Never unsecure cylinders without protective caps • Check for Leaks • MT - DATE
Regulators • Gauges - High and Low pressure • Bonnet - weakest point • Adjusting screw - Clockwise = On
Regulators • Single stage - less expensive • Dual stage - more accurate - lump on back - 200 psi • Nozzle Type - low volume • Stem type - High Volume • Gauges - High and Low pressure - bourbon tube • Bonnet - weakest point • Adjusting screw - Clockwise = On
Protector Cap • Protects valve from being knocked off • Must be in place when Regulators are off
Backflash Arrestor • Torch / Manifold • Regulator / torch
Hoses • Acetylene= Red • Notch around nut means LH thread • Oxygen = Green • RH Thread • New Hoses have talc inside - Blow out before connecting to torch
Needle valves • What each does • Preheat / Cutting hole pressures • Tightening
Torch Body • single stage / dual stage
Cutting Head • Preheat oxygen needle valve • Seat type / Graphite type - tightening • Body to head connection - tightening • Oxygen lever - regulator setting, #1 needle valve setting
Cutting Tips • 1 or 2 piece • sizes relate to # Drill Sizes • Hand / Wrench tight Rosebud
Acetylene safety Precautions • Never call acetylene “gas” • Extremely explosive with air or oxygen • Leave wrench on tank
Oxygen Safety Precautions • Never call oxygen “Air” • Never allow oxygen to come in contact with oil, grease, or other petroleum bases • Never use oxygen for compressed air • Never move cylinders without caps • Always secure cylinders
Setup Procedures for Oxy-Acetylene Systems • Do not move cylinders without valve protection • Secure cylinders • Inspect threads • “Crack” Oxygen Valve • Attach regulators and tighten • Blow talc from new hoses • Attach Flashback arrestors, check valves, hoses, check valves, torch body, torch head, and tip • Properly pressurize torch and check for leaks
Procedures for Lighting Oxy-Acetylene Systems • SCREW ADJUSTING SCREW OUT • Stand to the side of the adjusting screw • Open tanks one at a time (Oxygen wide, Acetylene 1/2 turn) • Adjust regulators • Bleed lines one at a time • Fine adjustments made while bleeding the hoses • Open the acetylene needle valve and light torch • Open high pressure oxygen needle valve wide • Adjust to a neutral flame
Shut Down Procedure for Oxy-Acetylene Systems • Turn off acetylene needle valve • Turn off preheat oxygen needle valve • Turn off tanks • Bleed lines one at a time • TURN ADJUSTING SCREWS OUT • Turn off all needle valves
Flame types Oxidizing Carborizing Neutral
Resume Cutting Heat the starting point Move the oxygen hole off the edge of the plate and start the oxygen stream Starting or restarting a cut
Offhand Cutting Techniques • Rolling your hands • “Pre-load” your wrist and forearm • Roll, don’t slide for a smoother cut • Sliding the torch through your fingers • Apply pressure to torch tubes with thumb and index finger • Keep other three fingers in fist • Don’t move the torch body hand during stops and starts.
Beveling Angles • Slide the torch through your fingers toward you. • Only move the hand nearest the flame when continuing the cut. • Keep your other three fingers in your fist. This will keep your hands cooler and allow you to make a better cut.
Safety • Backflash • Turn Oxygen off first • Watch where you cut • Don’t blow molten metal toward another person • Don’t melt the hoses • Don’t drop metal on hoses • Don’t let hoses lay on hot metal
Headgear Assembly • Forehead pad • Proper adjustment • How to assemble • How lenses go in • Cleaning different types of lenses • Autochange hoods • Shade numbers for various things • Cracked or broken hoods • Hood designs (pipeliner, short, sock, brazing shield, handheld).