Cascading Style Sheets
Cascading Style Sheets. Next Level. C ascading S tyle S heets (CSS) - control the look and feel of your HTML documents in an organized and efficient manner. With CSS you will be able to: Add new looks to your old HTML

Cascading Style Sheets
E N D
Presentation Transcript
Next Level • Cascading Style Sheets (CSS) - control the look and feel of your HTML documents in an organized and efficient manner. • With CSS you will be able to: • Add new looks to your old HTML • Completely restyle a web site with only a few changes to your CSS code • Use the "style" you create on any webpage you wish!
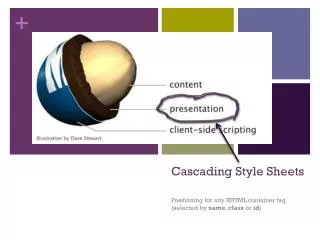
CSS Selector • CSS selectors are the heart and soul of CSS. • They define which HTML elements you are going to be manipulating with CSS code • In a typical CSS statements you have the following: • SELECTOR { PROPERTY: VALUE } • Where the property is the CSS element you wish to manipulate and "VALUE" represents the value of the specified property.
CSS Selector • If you wanted to change the way a paragraph tag behaved the CSS code would look like: • p { PROPERTY: VALUE } • NOTE: The styles must be define in the HEAD of the HTML page NOT in the body page.
Internal “Local” Styles: ex6a.html <html><head> <style type="text/css"> p {color: white; } body {background-color: black; } </style></head> <body> <p>White text on a black background!</p></body> </html>
CSS – General Format "HTML tag" { "CSS Property" : "Value" ; } <p> • We chose the HTML element we wanted to manipulate. - p{ : ; } • Then we chose the CSS attribute color. - p { color: ; } • Next we chose the font color to be white. - p { color: white; } <body> • We choose the HTML element Body - body { : ; } • Then we chose the CSS attribute. - body { background-color: ; } • Next we chose the background color to be black. - body { background-color: black; }
CSS – General Format and example <html> <head> <style type="text/css"> body { background-color: gray; } p { color: maroon; } </style> </head> <body> <h2>Internal CSS</h2> <p>This page uses internal CSS. Using the style tag we are able to modify the appearance of HTML elements.</p> </body> </html>
Some pre-defined colors Here are some of the colors and the predefined hexadecimal number Black 000000 Cyan 00FFFF Gray 808080 Teal 008080 Silver C0C0C0 Green 008000 White FFFFFF Olive 808000 Maroon 800000 Lime 00FF00 Red FF0000 Yellow FFFF00 Magenta FF00FF Purple 800080 Blue 0000FF Navy 000080
Generic text-level styles • You can predefine how you want a set of text to be displayed instead of the default given. • Use <span> tag: • Example: <span> text to be different </span> • In the style section, you define what you want for the span tag ie. • span { font-size:150%; font-family=Verdana; color:maroon; }
Internal CSS Exercise: ex6b.html • use internal style definitions, construct the following page at the bottom. • You need to modify or stylize the following: • <p> - text in maroon • <h2> - text in blue • <b> - text in black (hint your default will be maroon based on the “paragraph” setting” • <body> - gray
Types of Style - Classes Recall that as styles are defined as • element_name { property1: value; property2: value;} example: p {font-size: 150%; color: blue;} • What if you want to have different types of “paragraphs”? • You create “subclasses” and define them as follows: element.classname { property1: value; property2: value;} example: p.bigblue {font-size: 150%; color: blue;} p.smallred {font-size; 50%; color: red;} Placed Period here
Types of Style - Classes <style type="text/css"> span {font-weight: normal; font-size: normal;} span.boldred {font-weight: bolder; color: red;} span.italicblue {font-style: italic; color: blue;} b {font-size: normal} b.big {font-size: 150%;} b.small {font-size: 75%} b.bigbolder {font-size: 150%; font-weight: bolder;} </style>
<style type="text/css"> span {font-weight: normal; font-size: normal;} span.boldred {font-weight: bolder; color: red;} span.italicblue {font-style: italic; color: blue;} b {font-size: normal} b.big {font-size: 150%;} b.small {font-size: 75%} b.bigbolder {font-size: 150%; font-weight: bolder;} </style> <span> This will be normal </span> <span class="italicblue"> This line will be in italic and blue </span <br /> <b>this is normal bold </b> <br /> <b class=small>this is smaller bold </b> <br /> <b class=bigbolder>this is BIG BOLDER </b> Calling a “class”
External Cascading Style Sheet • When creating web pages, it is preferable to keep the style on a separate sheet • Placing CSS in a separate file allows the web designer to completely differentiate between content(HTML) and design(CSS). • It keeps your website design and content separate. • It's much easier to reuse your CSS code if you have it in a separate file. Instead of typing the same CSS code on every web page you have, simply have many pages refer to a single CSS file with the "link" tag. • You can make drastic changes to your web pages with just a few changes in a single CSS file.
body { background-color: gray; } p { color: blue; } h3 { color: red; } <html> <head> <link rel="stylesheet“ type="text/css" href= "myStyle.css" /> </head> <body> <h3> A Red Header </h3> <p>This paragraph has a blue font. The background color of this page is gray because we changed it with CSS! </p> </body> </html> myStyle.css ex6b.html
Fun and Goodies – Pseudo Classes • Probably the coolest thing about CSS is the ability to add effects to your anchor tags, otherwise known as hyperlinks • A link has four different states that it can be in that can be customized. • link - this is a link that has not been used, nor is a mouse pointer hovering over it • visited - this is a link that has been used before, but has no mouse on it • hover - this is a link currently has a mouse pointer hovering over it/on it • active - this is a link that is in the process of being clicked
How to define links? a:STATE'S NAME { attribute: value; } Style definition: a:link { color: blue; } a:visited { color: red; } a:hover { color: green; } HTML call: <a href="">This is a special CSS Link</a>
How to remove default underline? a:(STATE'S NAME) { attribute: value; } Style definition: a:link { color: blue; text-decoration: none;} a:visited { color: red; text-decoration: none;} a:hover { color: green; } More fancy a:link { text-decoration: none; color: gray; } a:visited { text-decoration: none; color: gray;} a:hover { text-decoration: none; color: maroon; font-weight: bolder; }
Exercise 7 – Modify exercise 5 • Modify your exercise 5. Copy the whole directory ex5 to ex7 directory • Include an external cascading style sheet in both home.html and projects.html • Modify the link so that the links have no underlines and when you “hover” the links, it changes color. See sample code.