Welcome to the E-Toolbox Instructional User Guide.
360 likes | 503 Vues
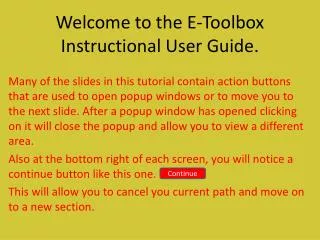
Welcome to the E-Toolbox Instructional User Guide. Many of the slides in this tutorial contain action buttons that are used to open popup windows or to move you to the next slide. After a popup window has opened clicking on it will close the popup and allow you to view a different area.

Welcome to the E-Toolbox Instructional User Guide.
E N D
Presentation Transcript
Welcome to the E-Toolbox Instructional User Guide. Many of the slides in this tutorial contain action buttons that are used to open popup windows or to move you to the next slide. After a popup window has opened clicking on it will close the popup and allow you to view a different area. Also at the bottom right of each screen, you will notice a continue button like this one. This will allow you to cancel you current path and move on to a new section. Continue
When you visit the eToolbox.net website, you will first be prompted to enter a user name and password to gain access to the site. If you do not currently have a user name and password, please click the hyperlink at the bottom of the log in window labeled “ Click here to Register for an account”. You will then be directed to the registration screen. Continue
This is the Website Registration Screen. Enter your required information in the boxes provided and click the “Register” button at the bottom left. After registration you will receive an acceptance email, notifying you that you now have access to the etoolbox.net website. Continue
Screen Navigation The Quick launch keys located here are simply shortcuts to the most used features of etoolbox.net and have the following functions. Home: The Home button is used to return you to the home screen. PO: The PO button is used to create new orders and manage existing orders. Cart: The Cart button is used to view items you currently have on order. Log Off: The Log Off button allows you to log out of your current session. Continue
The area of the website located here is know as the “Tabbed Menu”. These buttons have drop down menu’s that allow access to various portions of the website. The next few slides will further explain the sub-menu items related to these individual tabs. Continue
The Catalog Tab contains the following Sub-Menu items: New Items: Will redirect you to a screen listing the new items currently added to our warehouse. Pallet Buys: Will redirect you to a screen that list products that have special pricing if purchased by the pallet. Vendor Specials: Will redirect you to the screen listing products various vendors that are currently offering at a special price. Monthly Specials: Will redirect you to a listing of the current months product special pricing. Continue
The Orders Tab contains the following Sub-Menu items: Note: You will notice with this tabbed menu, an arrow to the right of the Open Orders and the Quick Entry. When you hold the mouse pointer over these menu items, a new list of menu items will appear allowing additional options within these selected menus. Open Orders >: Holding the mouse pointer over this menu item will reveal additional menu items: *Manage Orders, *Shopping Cart, *Warehouse and *Dropship’s. Quick Entry >: The Quick Entry will reveal the additional menu items: *Cipherlab Upload, *Quick Entry Form, *Paste Orders. Circular Orders: This area is still under construction at this time. Continue
Open Orders >Manage Orders: will take you to the Manage Orders screen. Here you can, Create a new order, Select an existing order to work with, Copy items from one order to another order, Finalize, Delete, or review Sent orders. Continue
Open Orders >Shopping Cart: will take you to a screen that allows you to view items within your order as well as Finalize the order. Here you can also Customize your retails , Edit your order header, Enter via the Quick Entry, or add to the order using the Copy/Paste method. Continue
Open Orders >Warehouse: allows you to view the status of a warehouse order in progress. As seen here, this order is currently on the floor being picked for shipment. Continue
Open Orders >Dropship’s: allows you to view the status of all open and completed dropship orders. The Order# is the dropshippers invoice # and you can easily reference the HHH PO# related to any order. Continue
Quick Entry >Cipherlab Upload: is an informational screen to inform you of the Cipherlab unit. This is a very useful tool to have in any store. It decreases valuable time spent in placing orders and reduces order errors. This unit can transmit your orders via telephone, Toolbox, and via the eToolbox.net website. Continue
Quick Entry >Quick Entry: is mainly used to quickly add items by entering Sku numbers and quantities only. Continue
Quick Entry >Copy and Paste: is very useful when you have used an Excel spreadsheet or a Word document to gather information about your order. This screen allows you to copy and paste the information directly into to the eToolbox.net site to transmit your order Note: To use the Copy/Paste method, the format should be Quantity , Sku; (10,16522088) for SKU mode or Quantity, UPC; (20, 072785030664) for UPC mode. Continue
Account Summary: is used to get an over-all view of your account standing. Continue
Statements: allows you to view PDF documents of your statement by date. Simply click on the view button for the date of the statement you wish to view. Continue
Invoice Lookup: is very useful to lookup a certain invoice # or for finding all invoices where a particular item was purchased. You can also find invoices related to a customer PO# or dropship PO# as well as all invoices within a specified date range. Continue
Invoice Lookup Date Range: Here is an example of viewing the invoice lookup by the Date Range option. Continue
The next section of the website we are going to visit is the Returns & Credits section. Here you will enter credit requests for shortages, field destroys and damages. You will also enter pickup request for shipping errors, customer returns, damages, defective, dealer write errors, and overages. Continue
Returns & Credits: This screen allows you to enter your returns and credit request. To enter a return or credit request… Enter the Sku or UPC in the box provided and click the Next button to the right of that entry box. Click the Next button to see an example of the return entry screen. Click here to see an example of the credit batches Continue
Reason: Here you will select the reason for your request. The Reason Code determines how the request is handled. The Reason Codes are as follows: 01 – Shipping Error: You received a product other than what was ordered. 02 – Customer Return: You are simply returning the product. Note: There is a 20% restocking fee for Customer Returns. 03 – Shortage: You did not received the product you purchased. Referring to products in cartons and tote boxes. 04 – Damage: The product you received was broken or damaged. 05 – Defective: The product does not work or has a visible defect. 07 – Field Destroy: The product is defective and meets the field destroy guidelines. 08 – Billing Error: This type of request should only be called into the credit dept. Ext.235 09 – Salesman Error: Your salesman has ordered the product incorrectly. Note: If you are a Dealer Write customer, you can not use this code. 10 – Shortage (Shipping): This type of shortage involves case qty’s and large products. 11 - Dealer Write: This type of reason code is for dealers who place their own orders. Note: There is a 5% restocking fee for Dealer Write returns. 12 – Tote Returns: This reason code is used for tote return request only. 13 - Overage: This reason code is used when you have received product you did not purchase or a qty greater than what was purchased. Exit This Window This screen is known as the Return/Credit request detail screen. This is where you enter the details about the item you are returning or requesting credit for. Clicking on the blue buttons will pop-up a window with details about the selection you have chosen. When finished with the pop-up window, click the “Exit This Window” to close it. Exit This Window Quantity To Return: Enter the qty to credit or return here. Note: Entering a qty that exceeds the purchased qty on the invoice referenced will deny the requested transaction Exit This Window Invoice Number: Here you must enter the invoice number that the request was originally purchased on. Note:All credit request, with the exception of Damages, Defectives, and Field Destroys, must be submitted within 30 days of the purchase date. Exit This Window Partial Return: This option is used to determine if the requested quantity is different than the purchased qty. Example – if you ordered a qty of 10 flash lights and only received 3, this is a partial shortage. You will also be prompted for the partial dollar amount, which is the price per item. Exit This Window Wrong Sku: When your request reason code is a 01 – Shipping Error, you will be ask to provide the item number of the item sent in error. Failure to do so will result in an incomplete return request. If the Item sent in error is unknown, please contact the credit dept. ext. 235 for assistance. Exit This Window Return Item: The options here are used for 01 – Shipping Errors and 13 - Overages. If you use either of these types of return request and choose Return “Yes”, a pickup list will be issued for the product. However, if you select “No”, an invoice will be generated and billed to your account. Exit This Window Notes: Here you can enter special notes about the Return/Credit request. An example of this would be to note the defect or damage with a product being returned. Exit This Window Purchase History: This window is used to show the purchase history for this product. Invoices that a Blue are older than 30 days. Exit This Window Continue
Online Payments: This will take you to an area where you can setup your account to make your online payments to House Hasson. You will be able to pay an entire invoice, part of an invoice, or your entire bill. Online Payments: This screen is the Pay By Balance Screen. Use the checkboxes under the item column to select your method of payment. Clicking the pay by invoice button will take you to the invoices screen. In this screen click the invoice you wish to pay under the pay column, then enter the amount in the payment column. Click here to view the Pay By Invoice Screen. Click here to visit the Online payments Page. Continue
Go Paperless: This option allows you to receive your Invoices, Credit Memos, and Statements via email. Click here to view the Go Paperless application Seen here is a list of the benefits of going paperless Continue
Quick Stock Check: This Screen is used to quickly check the warehouse stock of an item before making a purchase. Clicking here after entering a valid sku number will take you to the item inventory screen. As seen here, the current quantity on hand is 868. Click here to view the Quick Stock Check Screen Continue
Support: This tabbed menu contains useful links and information about the various services provided by House Hasson Hardware. Continue
Resources: This tabbed menu contains useful Resources for improving your business as well as information like News updates related to products, vendor contact information, our company directory, policies and obtaining MSDS reports. Continue
The Search box shown here is used to search various portion of the website. To search a specific area, click the list box as seen below and select the type of search. Then in the search box, type in what you are looking for. An example is to select the “Sku” in the list box and then enter “16522088” in the search box. This example would find a 40 gal. electric water heater. Continue
Here you can see the results of this search. Searching by Category We start by selecting the Lawn and Garden Category Next we select the sub-category Fencing and Gates Searching products using the category menu located on the left side of the screen, has a very useful drill down ability. By clicking on headings that show a (+) to the left of that heading will allow you to further narrow your search within a specific category. The example here shows a search of the Lawn and Garden Category. When you click on the Lawn and Garden category a number of sub-categories are now available. Clicking on any of these sub-categories will continue to narrow the search. Click here to see this example. Within the Fencing and Gates sub-category, we select the Electric Fence and Equipment. And finally, we select the Controller Fence Electric category. Continue
Vendor Search Below you will see 9 products stocked in our warehouse by Acme Sponge & Chamois Co. Clicking one of the alpha-Hyperlinks shown here will list vendor names starting with the selected letter. Here we have chosen the Acme Sponge & Chamois Co. As you can see to the right of this vendor, our warehouse stocks (13) sku’s of their product line. The drop down menu to the left labeled Vendor is used to list only the products supplied by a selected vendor that is stocked within our warehouse. Click here to see an example of a search by vendor. Here we have chosen the Acme Sponge & Chamois Co. as the vendor line to seach. Continue
Storm Readiness Here we have selected the Hand & Power Tools Category, to view. Within the Hand & Power Tools , we drill down to the Chainsaw Bar Chain Kit. The Storm Readiness tab is used to suggest items to stock in your store when ample warning of an approaching storm has been determined to strike within your area. Click here to view this option. Now we can see all of the items listed within this sub-category. Continue
Specials Selecting the New Items will allow you to view the newest items added to our warehouse. Here you can see the special pricing for the Pallet buy items. Here you can see the close-out price for this item. Here we have the Specials tab. In the next few slides, we will look at some area’s to get great buys to maximize your profits and to offer great deals to your customers. Click here to view this section Continue
Assortments Here you can see an example of the 110A 16ft assortment section. Lets look at the Steel Goods Assortment package for this example Clicking on the Diy Hoe, Cult, Fork (TruTmp.Seymr) W/O Gardefrnt will allow you to select the best fit for store. The Assortments tab is an effective buying option for you to purchase a pre-determined group of related items at one time. This eliminates the need to search our inventory for all of the items required for each assortment. Click here to view this option. Continue
The Options Tab This tab is used to setup the webpage in a layout of your choosing. Let’s look at the options The Display option gives you the ability to view the item with or without cost information. This is very useful if you are showing your customer a list of items and you do not want them to view your cost. The next few slides will show examples of each. The area of change will happen just above the qty box. Click here to begin. Continue
You will notice here that there are multiple sku’s listed for a single picture and description. This is done because these are like items, with only a difference in size and price. This is the 5 across grid view The output section of the options menu, displays how you wish to view the layout of you items. Here you can see the items in a “List” format. Clicking through will show the other options available to you. This is the 3 across grid view. Here you see the picture output. Continue
And this option simply displays the number of items you wish to view per page.