Setting Up Xrootd Space Access and Data Transfers Between CERN and SLAC
This guide provides detailed instructions on how to set up your environment for accessing Xrootd space at SLAC. You'll learn how to configure the ATLCURRENT file, interact with Xrootd space using ROOT URLs, and perform data transfers using the bbcp tool between CERN and SLAC. The document also describes how to access datasets and files through command-line tools, ensuring smooth interaction with the distributed data environment for the ATLAS experiment.

Setting Up Xrootd Space Access and Data Transfers Between CERN and SLAC
E N D
Presentation Transcript
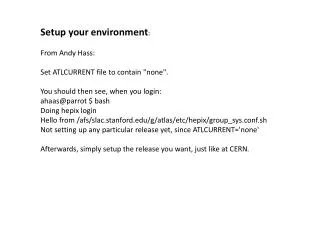
Setup your environment: From Andy Hass: Set ATLCURRENT file to contain "none".You should then see, when you login:ahaas@parrot $ bashDoing hepix loginHello from /afs/slac.stanford.edu/g/atlas/etc/hepix/group_sys.conf.shNot setting up any particular release yet, since ATLCURRENT='none'Afterwards, simply setup the release you want, just like at CERN.
How to access Xrootd space at WT2 • On all nodes, Xrootd space can be accessed via ROOT URL • root://atl-xrdr.slac.stanford.edu//atlas/xrootd/atlasdatadisk/… • root://atl-xrdr.slac.stanford.edu//atlas/xrootd/atlasmcdisk/… • root://atl-xrdr.slac.stanford.edu//atlas/xrootd/usr/… • To copy a file in and out of Xrootd, use ‘xrdcp’: • xrdcp /tmp/README root://atl-xrdr//atlas/xrootd/usr/y/yangw/README • xrdcproot://atl-xrdr//atlas/xrootd/usr/y/yangw/README /tmp/junk • Note: directories will be created automatically • Accessing root file in Xrootd space from ROOT : • $ root –b –l • root [0] TXNetFilef("root://atl-xrdr//atlas/xrootd/usr/y/yangw/root.root”)
How to access Xrootd space at WT2, cont’d • Interactive machines can access Xrootd space via XROOTDFS • atlint01.slac.stanford.edu : 8 core Intel Xeon 3Ghz, 8GB, RHEL4 32bit • mount xrootd space in local directory tree, just like NFS: • /xrootd/atlas/atlasdatadisk/… • /xrootd/atlas/atlasmcdisk/… • /xrootd/atlas/usr/… • Mapping between ROOT URL and XROOTDFS mount point: • root://atl-xrdr.slac.stanford.edu//atlas/xrootd /xrootd/atlas • Most Unix tools work on XROOTDFS. • Try ‘cd’, ‘ls’, ‘file’, ‘cp’, ‘cat’, ‘rm’, ‘bbcp’. Will NOT create directories automatically • dq2-client tools also run on XROOTDFS
DQ2 clients tools • Login to atlint01.slac.stanford.edu, do “voms-proxy-init –voms atlas” • cd /xrootd/atlas/usr/y/yangw (use yours !!!). If not exist, mkdir • which sites has dataset A ? • dq2-ls "data08_cosmag.00090272.physics_TGCwBeam.recon.AOD.o4_*" • dq2-ls -r data08_cosmag.00090272.physics_TGCwBeam.recon.AOD.o4_r559_tid027239 • what datasets is available at a site • dq2-ls -s SLACXRD_USERDISK • what files are in a dataset • dq2-ls -f data08_cosmag.00090272.physics_TGCwBeam.recon.AOD.o4_r559_tid027239 • where are physical locations of files in a dataset • dq2-ls -L SLACXRD_MCDISK -f -p \ • data08_cosmag.00090272.physics_TGCwBeam.recon.AOD.o4_r559_tid027239 • dq2-ls -L SLACXRD_MCDISK -f -p \ • mc08.205334.HerwigVBFH120tautaulh.recon.AOD.e387_s495_r617_tid042118 • how to get a dataset to SLAC • dq2-get mc08.205334.HerwigVBFH120tautaulh.recon.AOD.e387_s495_r617_tid042118 • how to register my own dataset
Transfer files between CERN and SLAC • (not using DDM, not using dq2-client tools) • Use bbcp. bbcp is not available at CERN, copy it from SLAC ( /usr/local/bin/bbcp ) • bbcp uses ssh: Add the content of your CERN ssh public key (~/.ssh/id_dsa.pub) to SLAC's authorized key file (~/.ssh/authorized_keys) • To transfer a single file from CERN to SLAC: • lxplus$ bbcp -s 64 –f –F -P 2 fileyangw@atlint01.slac.stanford.edu:/xrootd/atlas/usr/y/yangw • To transfer a whole directory: • lxplus$ bbcp -s 64 –f –F -P 2–rdiryangw@atlint01.slac.stanford.edu:/xrootd/atlas/usr/y/yangw • To transfer from SLAC to CERN: • lxplus$ bbcp -z -T /usr/local/bin/bbcp -s 64 –f -P 2 yangw@atlint01.slac.stanford.edu:/xrootd/atlas/usr/y/yangw/file /tmp