Three Phases & Work Flow of the Performance Management Process 1. Plan:
1.21k likes | 1.46k Vues
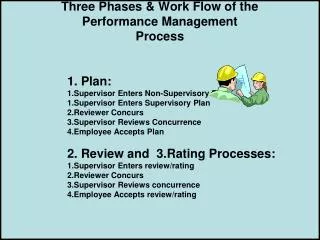
Three Phases & Work Flow of the Performance Management Process 1. Plan: 1.Supervisor Enters Non-Supervisory Plan or 1.Supervisor Enters Supervisory Plan 2.Reviewer Concurs 3.Supervisor Reviews Concurrence 4.Employee Accepts Plan

Three Phases & Work Flow of the Performance Management Process 1. Plan:
E N D
Presentation Transcript
Three Phases & Work Flow of the Performance Management Process 1. Plan: 1.Supervisor Enters Non-Supervisory Plan or 1.Supervisor Enters Supervisory Plan 2.Reviewer Concurs 3.Supervisor Reviews Concurrence 4.Employee Accepts Plan 2. Review and 3.Rating Processes: 1.Supervisor Enters review/rating 2.Reviewer Concurs 3.Supervisor Reviews concurrence 4.Employee Accepts review/rating
Work Flow of EmpowHR Performance Plan Process Phase 1, the Plan: 1.Supervisor Enters Plan 2.Reviewer Concurs 3.Supervisor Reviews Plan 4.Employee Accepts Plan
Contents of this EmpowHR Presentation 1.Supervisor Enters Non-Supervy Plan (Slides 3-43) 2.Supervisor Enters Supervisory Plan (44-79) 3.Reviewer Concurs (91-100) 4.Supervisor Reviews Plan (102-108) 5.Employee Accepts Plan (110-120) 6. Save Draft (33-34) 7. Print (36-41) 8. Copy from Previous Plan (81-90)
Supervisor Enters Non-Supervisory Plan Enter Userid & Password then Click SIGN IN button If you forget your password but Know your id, click here to get A new password. You must have Already set up a reminder question And answer for this to work.
Click Manager Self Service Note: EmpowHR will timeout and log you out after 22 minutes of no use
A list of your direct reports appears. The first example is a plan for a Non-supervisory employee. Click the NEW PLAN button for an employee
Enter the start date of the Performance/rating period with A four digit year. Click the ADD button
Enter Rating Scale = H • Verify the accuracy of the • other information. • 3. Click • ELEMENTS & STANDARDS • tab
Click the search icon to Select a performance Element from the table
The Pick Element Table is Displayed. OBF’s elements Begin with number 051. Supervisor’s elements are first Followed by non-supervisory Followed by job specific Elements.
Begin by clicking 056, the first of the non-supervisory elements. We’ll proceed to add each of the Four non-supervisory elements Then the elements specific to a GS-13 Accountant for a total Of seven elements. The system requires a minimum Of 4 elements and a max of 7
The 056 element template is dropped into the plan. Click the appropriate Critical Indicator Click + to add another element
A blank element box is Added. Click the search icon to select An element from the table. Note there are now two elements in the plan.
The 057 element template is dropped in to the plan. Click the appropriate Critical Indicator Click + to add another element
A blank element box is added Click the search icon to select An element from the table. Note there are now three elements in the plan.
The 058 element template is Dropped into the plan. Click the appropriate Critical Indicator Click + to add another element
A blank element box is added Click the search icon to select An element from the table. Note there are now four elements in the plan. Click the search icon to select Another element
The 059 element template is Dropped into the plan. Click the appropriate Critical Indicator Click + to add another element
A blank element box is Added. Note there are now five elements in the plan. Click the search icon to Select Another element
Select element 068 the Execution of Duties element For GS-13 Accountant
The 068 element template is Dropped into the plan. Click the appropriate Critical Indicator Click + to add another element
A blank element box is added Note there are now six elements in the plan. Click the search icon to select Another element
Select element 073 the Individual Contribution to Team element For GS-13 Accountant
The 073 element template is Dropped into the plan. Click the appropriate Critical Indicator There are no more Elements to add. Click the VIEW ALL link to See all elements on one Page and proof your work.
Use the scroll bar to scroll Up and down to see all Elements in the plan on One page.
You MUST click • SAVE • to save your work!! • Clicking SAVE • Saves your plan • Checks the FINALIZED • PLAN box on previous tab • And Enters today’s date • 3.sends an email to your • Supervisor indicating • that the plan is Ready for • Their concurrence • 4. Check accuracy of the • reports to info • 5. Formats the form for • Printing
Scroll to the top and click the PERFORMANCE PLAN Tab to print a hard copy.
SAVE DRAFT Alternatively, the SAVE DRAFT PLAN Button on the PERFORMANCE PLAN tab will save your Work if you are interrupted. This feature allows saving A draft without notifying The Reviewer the Plan is ready for their Concurrence. Also it does Not check reports to Information. If you get a Reports To error on SAVE, Use this button to save your Work.
SAVE DRAFT the SAVE DRAFT PLAN Button does not allow Printing the Draft Plan. Clicking SAVE DRAFT PLAN checks the Created Plan Box and adds the Date.
SAVE button is on both tabs. Click SAVE only once! Clicking it sends an email to the Reviewer. Clicking SAVE checks the FINALIZED PLAN button and The CREATED PLAN button If not previously checked. And Adds the date
SAVE also formats the AD-435 for printing. You must click the SAVE Button before attempting to print. Do not try to print the AD-435 form until after Clicking the SAVE button. It Will not be formatted correctly To PRINT: Click Create Printable Form Button to print the AD-435
Click VIEW DOCUMENT button
Click OPEN to view The form
Click the Print Icon to print • To Exit, click the X in the • Upper right corner
Click the link below to return To the list of employees and Enter another plan OR Click SIGN OUT to log off
To enter another plan, click The NEW PLAN button For the next employee Or SIGN OUT
Supervisor Enters Supervisory Plan Enter Userid & Password then Click SIGN IN button If you forget your password but Know your id, click here to get A new password. You must have Already set up a reminder question And answer for this to work.
A list of your direct reports appears. Click the NEW PLAN button for an employee
Enter the beginning date of the Rating period. Click ADD
Enter H for Rating Scale Verify the accuracy of the info Click ELEMENTS & STANDARDS Tab when done