Tips for Basement Finishing
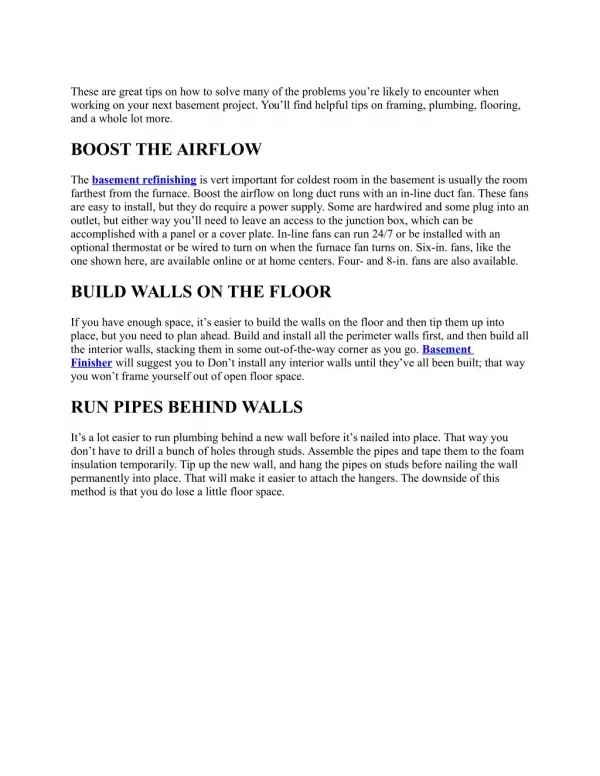
The basement refinishing is vert important for coldest room in the basement is usually the room farthest from the furnace. Boost the airflow on long duct runs with an in-line duct fan. These fans are easy to install, but they do require a power supply. Some are hardwired and some plug into an outlet, but either way you’ll need to leave an access to the junction box, which can be accomplished with a panel or a cover plate. In-line fans can run 24/7 or be installed with an optional thermostat or be wired to turn on when the furnace fan turns on. Six-in. fans, like the one shown here, are available online or at home centers. Four- and 8-in. fans are also available.<br><br>

Tips for Basement Finishing
E N D
Presentation Transcript
These are great tips on how to solve many of the problems you’re likely to encounter when working on your next basement project. You’ll find helpful tips on framing, plumbing, flooring, and a whole lot more. BOOST THE AIRFLOW The basement refinishing is vert important for coldest room in the basement is usually the room farthest from the furnace. Boost the airflow on long duct runs with an in-line duct fan. These fans are easy to install, but they do require a power supply. Some are hardwired and some plug into an outlet, but either way you’ll need to leave an access to the junction box, which can be accomplished with a panel or a cover plate. In-line fans can run 24/7 or be installed with an optional thermostat or be wired to turn on when the furnace fan turns on. Six-in. fans, like the one shown here, are available online or at home centers. Four- and 8-in. fans are also available. BUILD WALLS ON THE FLOOR If you have enough space, it’s easier to build the walls on the floor and then tip them up into place, but you need to plan ahead. Build and install all the perimeter walls first, and then build all the interior walls, stacking them in some out-of-the-way corner as you go. Basement Finisher will suggest you to Don’t install any interior walls until they’ve all been built; that way you won’t frame yourself out of open floor space. RUN PIPES BEHIND WALLS It’s a lot easier to run plumbing behind a new wall before it’s nailed into place. That way you don’t have to drill a bunch of holes through studs. Assemble the pipes and tape them to the foam insulation temporarily. Tip up the new wall, and hang the pipes on studs before nailing the wall permanently into place. That will make it easier to attach the hangers. The downside of this method is that you do lose a little floor space.
PLANE DOWN SAGGING JOISTS Hold a straightedge across joists to make sure they form a flat surface for the ceiling. If any joist sags 1/4 in. more than the one next to it, you’ll end up with a noticeable bump in your basement ceiling. Snap a line from the bottom edge of one end of the joist to the other and use a power plane to shave the board straight. According to the basement finishers, before you start, make sure there are no nails or screws embedded in the wood. Make several passes, each shorter than the next, until you cut down to the line. Power planers are loud, so wear hearing protection along with a dust mask and safety glasses. STRAIGHTEN BOWED STUDS Use a 4-ft. level or some other straightedge to check for bowed studs. Even if you personally checked every stud in every wall when you built it, new lumber can twist and bow as it dries. If a stud is bowed in, fill the gap with drywall shims made from paperboard (think cereal box) like the ones shown here. (Bundles of shims are available at home centers.) Start with longer strips and add layers of shorter strips until the gap is filled. If the stud is bowed out and you can get to the back side of it, use a reciprocating saw to slice into the side that’s bowed in. Cut far enough so the back side opens up when you press on the front side. Insert a shim in the kerf to hold the stud where you want it. Drive a nail through the separated area to keep the shim in place and add a little strength to the stud.
TEST THE AIRFLOW It’s a lot easier to troubleshoot the problem of poor airflow before the drywall is up. On remodel projects use an anemometer to check the airflow at each register first. This ABM-100 Airflow Anemometer is made by AAB and connects to the headset jack on your smartphone. You can find this instrument online. After downloading the free app, all you do is answer a few simple questions about your ducts and hold it in front of the register box. The numbers, which tell volume and velocity, will depend on the size of the room and the size of the ducts. DON’T INSULATE OVER A HEATED FLOOR In-floor heating systems are great for heating a basement, but installing thick, heavy carpet and heat-resistant padding over them is a sure way to reduce their efficiency. High R-values are a good thing for walls and attics, but when you’re covering in-floor heating, lower is better. Most carpeting is made of similar materials, so the type isn’t as important as the thickness— thinner is better. Carpet padding, however, is made up of different materials with different insulating properties. Waffle rubber padding is a good choice, with an R-value of 1 for a 3/8-in. pad. Urethane is a poor choice, with an R-value of 1.62 for a 3/8-in.-thick pad. GLUE DOWN THE CARPET Ready to install carpet? You can buy a tack strip made specifically for concrete, but it’s always hit-or-miss whether the nails in the strip will penetrate. For a guaranteed solid connection, pull out the nails and glue down the strip with epoxy. It’s rare for both the floor and the strips to be perfectly straight, so cut the strips into halves or thirds (pruning shears work well). It’s easier to get smaller pieces to lie flat. Wipe the floor clean before you start. Construction adhesive will also work, but you’ll need to wait a couple days before installing the carpet. RAISE A BEAM If it’s in the budget, removing that head-bonkingly-low beam in your customers basement is a doable project. You’ll need an engineer to tell you whether you can reuse the existing beam or need a bigger one. A lumberyard will be able to refer you to an engineer. Build temporary walls to support the joists before you remove the existing beam. Cut out a space in the joists for the new beam. Slide in the new beam and support each end. Finish by attaching the floor joists to the beam with hangers. USE SCREWS ON HARD LUMBER Old lumber gets hard and brittle, so nailing into it can be extremely frustrating, even for the pros. A pneumatic nail gun will penetrate old wood, but it also tends to split it. If you need to connect
new walls to old existing walls or attach soffits to old floor joists, make sure you have some self- tapping construction screws on hand before you start. Screws work better on old wood and create a super-strong connection. However, you might still have to pre-drill screw holes when you’re working with really brittle wood. INSTALL SKINNY LIGHTS Many mean green foundation repair have low ceilings, which is why recessed lights work so well. But sometimes ducts, pipes or beams get in the way, leaving no room for the cans that house the lights. That’s where LEDs come in. You can buy low-profile LED recessed lights that look like typical recessed lights but fit into standard round electrical boxes. These lights are available online or at home centers. FILL THE LOW SPOTS No matter what type of flooring you choose, the floor underneath must be smooth and flat. You don’t want to feel bumps under the carpet or hollow spots under plank flooring. And an uneven surface is a common cause of cracked tiles, especially large tiles. Holes deeper than 1 in. and large cracks need to be patched, but uneven sections and low spots can be filled with self- leveling underlayment. Vacuum and then mop the floor first; let it dry, and then roll out the recommended primer. Unless you have less than 10 sq. ft. to fill, get a helper so you have one person to mix the underlayment and the other to work it around with a squeegee. Don’t do the mixing right next to the area you’re working on; the dust could interfere with adhesion. QUIET NOISY PIPES If you’ve never spent much time in your unfinished basement (why would you?), you may have really noisy drainpipes but not even know it. Before you bury them behind drywall, have a helper run water, drain bathtubs, empty a washing machine and flush toilets while you hang out and listen for loud swooshing noises. If you do have a noisy pipe, wrap it with carpet padding. Use a quality duct tape or zip ties to hold it in place. If the home center near you doesn’t sell carpet padding by the foot, stop by your local carpet store, which may be able to give you some free scraps. FORM A FLAT CEILING The bottom edges of floor joists are not always on the same plane, especially in older houses. You could spend two days trying to plane them all into alignment, or you could sister new lumber onto the existing joists. Make sure the flooring system is structurally sound and doesn’t need additional bracing before establishing the new basement finishers height (learn more about structural repairs).
Install a straight 2×4 on the worst joist, and use that as a reference to snap lines on walls. Nail on new, straight boards to the sides of the joists even with the lines on the wall. To work in large rooms, pull a string tight and use it as a guide. It’s easier to avoid ducts, plumbing pipes and electrical wires if you nail up 2x4s. Use larger-dimension lumber if the joist spaces are relatively uncluttered and you want a stiffer floor on the first level. PUMP WASTE WATER AWAY Running supply lines to a basement wet bar is easy, but sometimes there’s not an easy way to install a drainpipe. The solution: Get a gray-water pump and direct sink water wherever you want. These pumps are easy to install and small enough to fit inside a cabinet. They will work for dishwashers and laundry sinks as well. But they’re not made for solids, so always keep a strainer in the basin. The one shown here is a Saniswift residental gray water pump made by Saniflo.