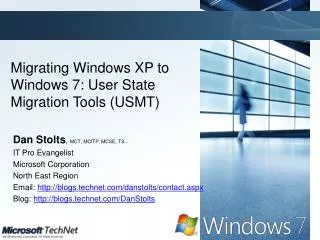
Migrate Your Windows XP Machines to Windows 7 Using Free Microsoft Deployment Tools
640 likes | 1.05k Vues
Required Slide. SESSION CODE: WCL311. Migrate Your Windows XP Machines to Windows 7 Using Free Microsoft Deployment Tools. Rhonda J. Layfield Sr. Technical Consultant RJL, INC. Rhonda Layfield. IT industry since 1982 US Navy for 7 years Contribute articles to Windows IT Pro mag

Migrate Your Windows XP Machines to Windows 7 Using Free Microsoft Deployment Tools
E N D
Presentation Transcript
Required Slide SESSION CODE: WCL311 Migrate Your Windows XP Machines to Windows 7 Using Free Microsoft Deployment Tools Rhonda J. Layfield Sr. Technical Consultant RJL, INC.
Rhonda Layfield • IT industry since 1982 • US Navy for 7 years • Contribute articles to Windows IT Pro mag • Setup and Deployment MVP • Desktop Deployment Product Specialist (DDPS) • Co-Author Windows Server 2003 R2 and Windows Server 2008 books • NEW Microsoft Deployment Book
What I’ll Cover • 4 scenarios • MDT Installation and required software • Create a Deployment Share • Import Windows 7, applications, drivers and packages • Create a task sequence • Migrate Applications • Refresh • Replace/Bare Metal • Automate the Deployment Wizard
Four Scenarios • Bare Metal • New machines • Refresh • Keeping the old hardware • Refreshing the OS on the existing machine • Replace • Replacing existing hardware with new • Maintaining user’s settings and data • Upgrade • Unless your upgrading from Vista there is no direct upgrade path
XP Migration “Refresh” Scenario 1 Gather Application Information 2 Configure MDT – OS & Application Information 3 Begin MDT Deployment Wizard 4 Get list of Configured Applications XP SP2/SP3 Windows 7 6 USMT Gathers User and Application Settings (local store) MDT 2010 Deployment Server 5 7 Boots to WinPE - Win 7 is Installed List & Registry Scan = New list 8 Applications are Installed 9 USMT Applies User and Application Settings (local store)
MDT Installation Requirements • You can install MDT on: • Vista SP1 • Windows 7 • Server 2003 SP2 • Server 2008 • Server 2008 R2 • Windows Automated Installation Kit (WAIK) 2.0 • Required software is included in the WAIK • NET Framework 2.0 • MSXML 6.0 • MMC 3.0 if Server 2003
Refresh Scenario Step-By-Steps • Create a Deployment Share • Import Windows 7 • Add applications, drivers and packages • Create a task sequence • Find existing applications from XP • Configure applications on the deployment server • Update Deployment Share • Launch LiteTouch.vbs from the XP machine • MDT scans for configured applications • The registry is scanned for existing applications
Refresh Scenario Step-By-Steps • The deployment wizard runs • USMT gathers existing application settings • The machine boots to the MDT WinPE • Windows 7 is installed • Applications are installed • USMT applies application settings
Creating a Deployment Share • The Deployment Share is the shared folder on the Deployment Server where target machines connect to perform the deployment • You must create it • Old MDT created it for you • But it put it on the C: drive • Now you decide where to create it MDT Deployment Server Deployment Share
Importing an Operating System XP SP3 Vista SP1 or later Windows 7 Windows Server 2003 R2 Windows Server 2008 & R2 Supported OSs
Adding Drivers Third party drivers
Adding Packages OS patches Language Packs
Create a Task Sequence • A list of tasks to be run for your deployment • The order in which the tasks will be run • Run task sequences in two different ways • Standard Client TS • LiteTouchPE_x86.iso • Within XP
Task Sequences • Standard Client TS • Deploys a desktop operating system, applications, drivers and patches • Standard Client Replace TS • Backs up the target machine before deploying an image including gathering users state information
Migrating Applications ANNOUNCING
MDT and Applications • MDT does not perform any magic on your applications • If they don’t run on Windows 7 • They won’t run on Windows 7 deployed by MDT 2010 • So, you’ll need to be sure you have tested your applications first! • Use Application Compatibility Toolkit (ACT) • To get a list of applications that will or will not run on Windows 7 • To troubleshoot the applications • To fix the applications – mitigate using SHIMS • Or • Microsoft Assessment and Planning (MAP) • To get a list of applications that will or will not run on Windows 7
Find Existing Applications on XP • Log on as a standard user for read only mode • HKLM\Software\Microsoft\Windows\CurrentVersion\Uninstall • Uninstall key name
Find Existing Applications • .Exe’s are easy – the application name is obvious • .Msi’s are displayed as GUID’s – look for the DisplayName .MSI ..EXE
Copying the Key Name • This is what you’ll get HKEY_LOCAL_MACHINE\SOFTWARE\Microsoft\Windows\CurrentVersion\Uninstall\{FC7BACF0-1FFA-4605-B3B4-A66AB382752D} • This is the piece you want: HKEY_LOCAL_MACHINE\SOFTWARE\Microsoft\Windows\CurrentVersion\Uninstall\{FC7BACF0-1FFA-4605-B3B4-A66AB382752D} • If your doing a lot of applications at one time: • XMLNotepad = {FC7BACF0-1FFA-4605-B3B4-A66AB382752D} • NetMon 3.3 = {365C5A10-6561-454F-B975-56EA878D0A06} • Office 2007 = {90120000-002A-0000-1000-0000000FF1CE}
Configure Applications on The Deployment Server • DW • Application Properties • On the Details tab • Input the Uninstall registry key name
Create The Script That Searches For Applications • Create LTIAppDetect.vbs script • Copy and paste the contents from Michael Neihaus’s blog http://blogs.technet.com/mniehaus/default.aspx?p=2 • or download LTIAppDetect.vbs from http://www.deploymentdr.com/Download.html • Then • Copy LTIAppDetect.vbs into your deployment share’s Scripts folder
Configure MDT to Look For Applications • Edit the Rules of your deployment share • The Rules determine which pages are displayed by the deployment wizard • DW right click deployment share Properties Rules tab • [Settings] • Priority=Default • Properties=MyCustomProperty • [Default] • OSInstall=Y • SkipAppsOnUpgrade=YES • SkipCapture=YES • SkipAdminPassword=NO • SkipProductKey=YES • [Settings] • Priority=Default • Properties=MyCustomProperty • [Default] • UserExit=LTIAppDetect.vbs • OSInstall=Y • SkipAppsOnUpgrade=YES • SkipCapture=YES • SkipAdminPassword=NO • SkipProductKey=YES
Begin Migration by Launching LiteTouch.vbs • From the XP workstation map a drive to your deployment server: • Start / Run / • Deployment server = DeploySrv • Deployment share = DeploymentShare$ • Scripts folder • Then run LiteTouch.vbs
Applications Appear Pre-Selected • But someone could de-select it • If you don’t anyone to be able to de-select an application • You’ll need to make it “Mandatory”
Making Applications Mandatory • Edit LTIAppDetect.vbs • Edit LTIAppDetect.vbs script • Set oApplications = oEnvironment.ListItem("Applications") • To: • Set oApplications = oEnvironment.ListItem("MandatoryApplications")
USMT Gathers Existing Application Settings • scanstate.exe C:\MININT\StateStore /v:5 /o /c /hardlink /nocompress /efs:hardlink /i:C:\MININT\USMT\MigApp.xml /i:C:\MININT\USMT\MigDocs.xml /l:C:\MININT\SMSOSD\OSDLOGS\USMTcapture.log /progress:C:\MININT\SMSOSD\OSDLOGS\USMTcapture.prg
Types of Files to Migrate - All Fixed Drives are Searched • .vsd • .wk* • .wpd • .wps • .wq1 • .wri • .xl* • .xla • .xlb • .xls* • .qel • .qph • .qsd • .rqy • .rtf • .scd • .sh3 • .slk • .txt • .vl* • .accdb • .ch3 • .csv • .dif • .doc* • .dot* • .dqy • .iqy • .mcw • .mdb* • .mpp • .one* • .oqy • .or6 • .pot* • .ppa • .pps* • .ppt* • .pre • .pst • .pub • .qdf
Settings That are Migrated • Accessibility settings • Address book • Command-prompt settings • *Desktop wallpaper • EFS files • Favorites • Folder options • Fonts • Users, Groups and Group memberships • *Windows Internet Explorer® settings * Settings not available for offline migration
More Settings That are Migrated • Microsoft Open Database Connectivity (ODBC) settings • Mouse and keyboard settings • Network drive mapping • *Network printer mapping • *Offline files • *Phone and modem options • RAS connection and phone book (.pbk) files • *Regional settings • Remote Access
The Last of The Settings That are Migrated • *Taskbar settings • Windows Mail • Microsoft Outlook Express Mail (.dbx) files are migrated from Windows XP • *Windows Media Player • Windows Rights Management
Microsoft Office is Special • Cannot migrate from/to a different version of an application • Except for Microsoft Office • USMT can migrate from an earlier version to a later • Microsoft Project settings are not migrated from Office 2003 to Office 2007
OS Settings NOT Migrated • Mapped network drives • Local printers • Hardware-related settings • Drivers • Passwords • Application binary files • Synchronization files • DLL files • Executable files • Permissions for shared folders • Languages must match • Customized icons for shortcuts • Taskbar settings (Migrating from XP)
Migrating from XP • Internet Connection Firewall check box and settings are migrated • Advanced-configuration settings are not migrated because of increased security risks • Security Logging • ICMP exceptions • Internet Connection Sharing setting is not migrated • Could make the network less secure if migrated to the destination computer • The Network Connections user interface does not refresh properly until you log off or press F5
Windows 7 is Installed • Windows 7 should be added to MDT’s Deployment Workbench
USMT Applies Application Settings • loadstate.exe /v:5 /c /lac /hardlink /nocompress /i:C:\MININT\USMT\MigApp.xml /i:C:\MININT\USMT\Migdocs.xml /l:C:\MININT\SMSOSD\OSDLOGS\USMTrestore.log C:\MININT\StateStore /progress:C:\MININT\SMSOSD\OSDLOGS\USMTrestore.prg
Network Location Page - BUG • Work Around • Set a Group Policy for Network Location • Computer Configuration / Windows Settings / Security Settings / Network List Manager Policies / All Networks • Change Network Location to “User cannot change location” • Hotfix coming - KB 2028749
Issues You Might Run Into • Multiple versions of an application • You could add an application to the DW • Configure the Uninstall Registry key for version 1 • Add the same application to the DW again • Configure the Uninstall Registry key for version 2 • BUT • USMT gathered application data for version 1 and might not be able to apply the settings to version 2
XP Migration “Replace” Scenario 1 Gather Application Information 2 Configure MDT w/ Application Information 3 Begin MDT Deployment Wizard 4 List of Configured Apps “Pre-selected” XP SP2/SP3 Windows 7 5 USMT Gathers User and Application Settings MDT 2010 Deployment Server 6 Boots to WinPE - Win 7 is Installed 7 Applications are Installed 8 USMT Applies User and Application Settings
Bare Metal and Replace Scenario – With Applications • When applications are added to the MDT a random GUID is created • Find your application’s GUID • Open Windows Explorer • navigate to your deployment share\Control folder • Open Applications.xml • Expand the application’s node (each application has it’s own application node) • Cick on guid to see the MDT generated GUID in the details pane • If your using MDT 2010 Update 1 the application guid has been added to the properties of the application’s Details tab • From within the DW double click your application and go to the Details tab
Configuring MDT with Mandatory Applications • Right click your deployment share and choose Properties • Go to the Rules tab • [Settings] • Priority=Default • Properties=MyCustomProperty • [Default] • OSInstall=Y • SkipAppsOnUpgrade=YES • SkipCapture=YES • SkipAdminPassword=NO • SkipProductKey=YES • MandatoryApplications1={0992c971-a6b2-48d3-b34e-c96309bd4030}