Castor Bot
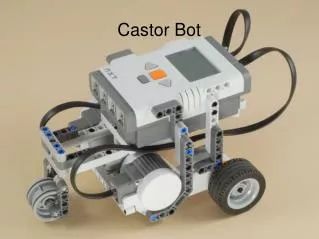
Castor Bot. Now, we will begin creating a robot. Log onto your computer On your screen, click on the website labeled “castor bot” Your building instructions will be found there Raise your hand if you need any help. Now, that everyone has created a robot. Please open your NXT program

Castor Bot
E N D
Presentation Transcript
Now, we will begin creating a robot • Log onto your computer • On your screen, click on the website labeled “castor bot” • Your building instructions will be found there • Raise your hand if you need any help
Now, that everyone has created a robot... • Please open your NXT program • Click “new program”
Creating a new program… • You can create a new program or open a program you previously created. • Once you have a name for your program, select go!
Your work area • The Left bar is for putting blocks on your program • There are many different blocks, but we will go over the most basic ones first. • In the middle is our area where we do our programming. • We drag items onto the tracks.
Using the Motion block • Has many parts. • The active ports. • Power • Direction: can be set to forward, reverse or stop. • Duration: controlled by: • Rotation • Degrees • Time • Steering: can adjust how hard a turn • Brake or coast modes.
Ports What are ports? • Cables connecting brain to components A, B, C • Used for controlling motors 1,2,3,4 • Used for connect to the sensors • We will learn more about these later
Changing ports and power • Depending on how many active motors you have connected, we check/uncheck Ports A, B, and/or C. • Power effects the speed of the motors.
Controlling Direction What is it to control direction? Dragging the arrow left/right changes the direction that the robot will move. This feature is only active when two motors are selected. It controls forward, backward, or stop. How will changing the power effect the steering?
Duration of activity Duration effects how long the block is active. Types of Duration Degrees Unlimited Time Rotation Let’s investigate!!
Lego MindStorm An Introduction to programming
Blocks Blocks are used to give instructions to your robot. There are many types of blocks You can use the blocks that come with the NXT software. You can create your own blocks.
Common Blocks The common blocks:
Common Blocks Move Tells your robot to move. Record Play The record play block allows your robot to record itself (movements and sound) and replay its actions later in the program.
Common Blocks cont. Sound Allows your robot to play a sound file. Display Displays an image on the NXT brick screen.
Flow Blocks The Flow Blocks
Flow Blocks The Loop Block Use the loop block if you want your robot to continue doing the same things again and again, such as moving forward and backward until a touch sensor is pressed.
Flow Blocks The Switch Block The switch block enables the robot to make its own decisions, such as going left when it hears a loud sound and turning right when it hears a soft sound.
Flow Blocks The Wait Blocks The wait block makes your robot wait for sensor input, such as a sound or a time interval. Sound Distance Light Time Touch
Action Blocks The Action Blocks
Action Blocks Display The display block enables you to control the display on the NXT brick. You can type, show icons or even draw through your program!
Action Blocks Lamp The lamp block tells your robot when to turn the lamp on/off. You can program your robot to turn on its lights when the touch sensor is triggered, or when it becomes dark.
Action Blocks Message Send The message send block tells your robot to send information to another robot or to your computer.
Action Blocks Motor The motor block tells your robot to turn on a motor. This is different from the move block. Your robot may have multiple motors attached.