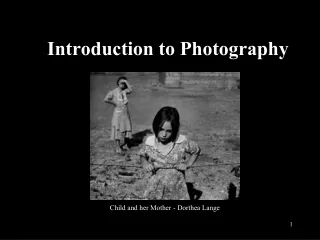
Introduction to Digital Photography
Introduction to Digital Photography. Getting the Shot!. What we will cover today. The importance of light The relationship between aperture, shutter speed, and ISO Automatic scene modes and what they mean Using your flash – fill flash and balanced lighting Photo tips for good composition.

Introduction to Digital Photography
E N D
Presentation Transcript
Introduction to Digital Photography Getting the Shot!
What we will cover today • The importance of light • The relationship between aperture, shutter speed, and ISO • Automatic scene modes and what they mean • Using your flash – fill flash and balanced lighting • Photo tips for good composition
Remembering to notice light • A picture taken with correct light exposure means less work after and generally has a better outcome. • Light has qualities of both brightness and color “temperature” • Automatic settings will solve most daily lighting problems. • SCENE modes will add to your photo quality. • Learning to change aperture, shutter speed, and ISO manual settings will give you an even greater range of lighting situations you handle well.
Basic camera operations • Adjustable aperture • Adjustable shutter • ISO The total light that reaches your processor chip is determined by the balance between these three factors.
Proper Exposure All digital cameras can function on automatic quite well. Most cameras also let you decide the settings manually if you like. You can also correct photos later (to a point) using editing software, but first you need to develop an eye for what the optimum exposure looks like. Underexposed Correct Overexposed Photos from Sony website
You can see the aperture inside the lens The aperture opening allows light to enter. The size is measured in f-stops. Each “stop” allows in twice the light of the stop before it. Range= 2.8-22
Lens Aperture Closed Open
You can manually adjust the aperture to control “depth of field,” i.e, the amount of three dimensional distance that is in focus. • A larger aperture (a smaller f-stop number) gives less depth of field. To keep it simple just remember smaller number = smaller depth of field & vice versa. • When shooting a landscape, use f-stop 11 or more for Infinity focus. Shallow depth of field F-stop = 3.5 Greater depth of field F-stop = 5.6
The shutter speed determines how long light has to enter. Shutter Open Shutter Closed
Aperture and shutter settings together determine how much light reaches the sensor. ISO (called ASA in film) controls chip (or film) sensitivity to the light that reaches it. Range is 100 - 3200 Film cameras and digital cameras behave very similarly. Diagrams from the Sony website
Aperture priority exposure (on the dial, Av =aperture value) • This allows you to force the camera to adjust to a low F-stop (a larger opening which results in a shallower “depth of field”). The shutter adjusts for this extra the light by closing faster to make up for it. Remember our mantra: LOW F-Stop number = LESS depth of field. • Example: A normal shot is at F-stop 5.6. Shooting at 3.2 will tend to give a shallow depth of field, that is, blurring behind the subject and your shutter will speed up to compensate. • Selecting the “Portrait” SCENE mode provides this effect (it blurs the background but keeps the face in focus.) • You can also create this effect afterward using a blur filter in Adobe Photoshop Elements or another digital photo editor.
Adjustable shutter speed • A fast shutter speed can freeze fast action. • A slow shutter speed used on a fast moving subject creates a motion blur - often to very good effect! Slow shutter speed Fast shutter speed
Shutter speed priority exposure (on the dial, Tv=time value) • The Tv setting allows you to force a fast or a slow shutter speed while allowing the camera to adjust the aperture opening to maintain a correct exposure. • This is most commonly useful during sports events when you must have a fast shutter speed of 1000/sec or more to freeze the subject. Higher speed also helps to reduce handshake blur in low light and turns into the sun into a star at sunset. • The automated “SPORTS” SCENE mode will do this automatically.
Automatic camera settings Most digital cameras, even professional SLR’s have even more automatic modes you can quickly change to work with different light or or shooting situations. To get a close up of a typical dial, let’s go to: Kodak.com and, click to About Digital Cameras - Digital Camera controls - Picture Taking modes
More Common Camera Features • Macro lens setting • Adjustable image quality • Adjustable “film” speed or ISO
Macro Lens = Close up mode-look for an icon of a flower. A macro lens keeps you in focus with the camera VERY close to the subject! (Remember to turn it off when you back away.) Many digital cameras have this setting. Professional level cameras usually offer a separate lens with a short focal length.
Adjustable image Size • A digital camera lets you use fewer dots per inch than it is capable of producing • Sometimes you may want a smaller image just for a webpage or a small snapshot. • Sometimes you just want to squeeze more photos onto a memory card. • Look for this setting in your camera’s MENU. In my Canon, its called “Quality” and lets me choose several settings from “RAW to Large-high quality” to “Small, low-quality.”
RAW? • Sorry, RAW is a picture format with a special attraction for professionals: it captures ALL light information and allows you to effectively change the exposure settings later by at least two stops. • RAW pictures capture more vibrant detail - and they also use FAR more memory. • RAW format is becoming more popular as more people learn how to use its advantages. • It may - or may not - require a camera specific plugin to read. Each year the technology is advancing by leaps and bounds.
Adjustable “Film” Speed (ISO) • ISO is the third leg of the formula your camera uses to compute the right exposure. In film it relates to film speed, i.e. film’s “sensitivity to light.” • Higher ISO allows you to take a picture in a darker room. For example, normal ISO is 100. Try ISO 400-1000 in a museum with low light. • Higher ISO allows you to use a faster shutter speed and so prevent handshake blurring. • Be careful! Higher ISO may also produce more random “noise” or pixelization artifacts, i.e., a grainy picture just as high ASA film used to do in film cameras.
Using a flash • On A setting on your dial (fully automatic) the flash will fire if your camera determines the light is too low. • On P (program mode or partly automatic) the flash will fire if you open it manually. • You should be able to find a place to turn off your flash. Look for a tiny lightning bolt on the dial or in the menu. • SLR’s and some prosumer cameras can also attach to external flashes - which you can aim at the ceiling for more balanced lighting in dark rooms.
Why flash?? As you may or may not have noticed, many pictures look worse when the flash is used. Colors can wash out, perspiration may shine, and a shadow may be cast behind on a wall, making your subject look like he or she is in a police line up! There ARE some ways to use built in flash effectively however. Put the main light source BEHIND your subject and use the flash to light the eyes - this is called FILL FLASH. And don’t use it too close or far away. About 6 feet is optimum to prevent over exposure.
Tips for taking your best shot! Let’s go to Kodak online! Tips and project center www.kodak.com