Download
1 / 7
240 likes | 856 Vues
Line and Rotational Symmetry. Unit of Study: Transformations and Symmetry Global Concept Guide: 2 of 3. Content Development.

E N D
Line and Rotational Symmetry Unit of Study: Transformations and Symmetry Global Concept Guide: 2 of 3
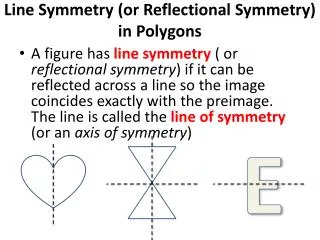
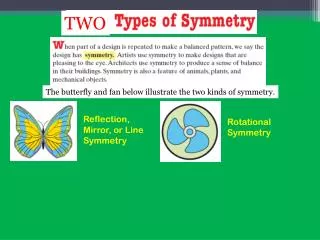
Content Development “When introducing line of symmetry, provide examples of geometric shapes with and without lines of symmetry. Shapes can be classified by the existence of lines of symmetry in sorting activities. This can be done informally by folding paper, tracing, creating designs with tiles or investigating reflections in mirrors.” – 4th Grade Flip Book “If a shape can be folded on a line so that the two halves match, then it is said to have line symmetry (or mirror symmetry). Notice that the fold line is actually a line of reflection…that is the connection between line symmetry and transformations.” van de Walle Due to the fact that students identified congruent shapes and lines of symmetry in 3rd grade, there is not an entire day devoted to differentiated instruction in this GCG. Use daily informal assessments to make instructional decisions, and utilize reteach and enrich activities and online tutorials as appropriate.
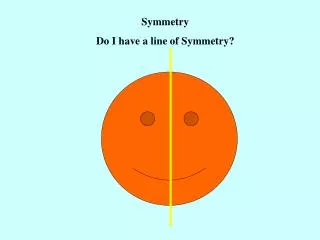
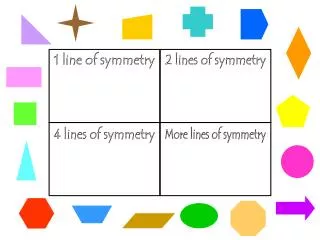
Day 1 • Essential Question: How can you prove a shape has line symmetry? • Show students examples and non-examples (or all of these/none of these) of pictures with line symmetry on a concept card. Students should be able to use the concept card, along with their prior knowledge, to come up with a definition for line symmetry. Come to a class consensus on the definition for line symmetry. • Prepare a variety of different die cut shapes and letters (including figures with 0, 1 and multiple lines of symmetry). Through a cooperative structure such as mix-freeze-pair-share, have students justify to a classmate the number of lines of symmetry their shape has by folding the shapes. Give students the opportunity to explore several shapes. • Create a class anchor chart like the one to the right, and allow students to tape their die-cut shape where they think it belongs. Give students the opportunity to agree or disagree with the placement of the shapes and justify their point of view. • Facilitate a discussion on how to accurately describe a line of symmetry as horizontal, vertical or diagonal. Revisit figures on anchor chart and describe the lines of symmetry. • Use pattern blocks or die-cuts of regular polygons to focus on lines of symmetry in regular polygons. Students should be able to make the generalization that the number of lines of symmetry of a regular polygon is the same as the number of sides. • By the end of day one, students should be able to prove whether or not a figure has line symmetry. Go Math SE p. 496 #18 could be used as a “Ticket Out the Door”.
Day 2 • Essential Question: How can you create designs with line symmetry? • Ask students, “How could the reflection of a figure be used to create a symmetrical design?” • Have students use pattern blocks to create a design on one side of a fold (horizontal, vertical and diagonal folds) of a piece of paper. Once the design is created, ask them to trace around the individual blocks on the design. Partners exchange papers and create a reflected design on the other side of the fold to demonstrate symmetry. Model how to use mirrors to check for symmetry, and give students the students the opportunity to use mirrors to check for the symmetry of their completed designs. • Have students create symmetrical designs on geoboards and prove the symmetry by transferring their figure to geoboard paper and folding or using mirrors. • By the end of day 2, students should be able to create and justify designs with line symmetry.
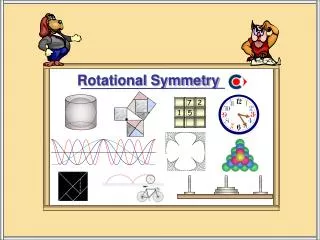
Present students with examples and non-examples of shapes with rotational symmetry. This is a PowerPoint slide with animation, with each click, it will go through showing a 360 degree rotation of all of the examples first, then non-examples. After students come up with a definition of rotational symmetry based on the concept card, the next slide is the same, but with circles to help students use their understanding of angles and rotations to identify the smallest degree of a turn or fraction of a turn that results in the figure matching up with the original. The last click will bring up the definition of rotational symmetry. Day 3 • How can you identify whether or not a shape has rotational symmetry? • Students can investigate whether other shapes have rotational symmetry through the use congruent die-cuts. Glue one die-cut onto a paper backing. Attach the other congruent die-cut on the top using a brad at the center of the figure. Students can then make predictions about whether the shape will have rotational symmetry, and then actually rotate the shape around the brad to view its position at turns of different degrees. Students should also be able to identify the smallest degree and fraction of a turn that results in the figure “matching”. • By the end of day 3, students should be able to identify whether or not a figure has rotational symmetry, and identify the smallest degree or fraction of a turn that demonstrates rotational symmetry.
Enrich/Reteach/Intervention • Reteach: • Have students create their own concept card with examples and non examples of figures they cut out of a magazine. Have students first visualize and predict the number of lines of symmetry and then fold the figures to check for symmetry. • Students can predict whether figures have rotational symmetry, trace the figure on transparency paper, and check their prediction by rotating the transparency. • Online Florida Intervention Skill: 52- tutorial on line symmetry • Online Florida Intervention Skill: 53 – tutorial on rotations and rotational symmetry • Core: • Have students find all lines of symmetry in the letters of their name (letters could be cut out from a magazine to maintain consistency across levels) and identify those letters that have rotational symmetry. • Students can create figures on geoboards and predict what it will look like when rotated 90 degrees, record the prediction on geoboard paper and check it by turning the geoboard. • Students read A Mirror Image from the Go Math Grab and Go kit, or another picture book about symmetry in nature, and identify line and rotational symmetry found in nature. • Mega Math: Shapes Ahoy: Ship Shapes Lesson M and Lesson N ( symmetry); Ice Station Exploration: Polar Planes Lesson J (line symmetry), Lesson K (symmetry), Lesson L (rotational symmetry) • Enrich: • Have students find pictures in a magazine with one line of symmetry. Students cut the pictures in half and glue half on drawing paper. Students should complete the picture to make it symmetrical. • Students can find figures in the magazine that appear to have rotational symmetry and then prove it. • Illuminations: Archimede’s Puzzlecan be used as an application of line and rotational symmetry